
Dell Chromebook 13-7310 Cooling Fan Replacement
はじめに
手順 1 に進むThe cooling fan is an integral part of the laptop; if it is running loudly or poorly, it could mean that the device is at risk of overheating. Fortunately, this problem is easy to fix, and the fan itself can be replaced following this guide.
必要な工具と部品
パーツ

ツール


もっと見る
-
-
-
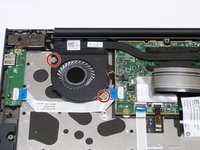
Using the #1 Philips screwdriver, remove the two, 2mm screws securing the fan assembly.
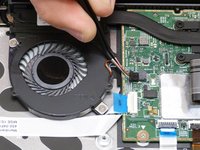
-


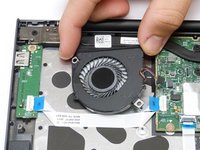
Congratulations! You have successfully removed the cooling fan of your Dell Chromebook 13-7310. To reassemble your device, follow these instructions in reverse order.
Congratulations! You have successfully removed the cooling fan of your Dell Chromebook 13-7310. To reassemble your device, follow these instructions in reverse order.
チーム

Western Carolina University, Team S1-G3, Virtue Fall 2017 Western Carolina University, Team S1-G3, Virtue Fall 2017人のメンバー
WCU-VIRTUE-F17S1G3
4 メンバー
5のガイドは作成済み