メインコンテンツにスキップ
Canon PowerShot SX520 HS Lens Replacement

Canon PowerShot SX520 HS Lens Replacement

Lisa Choe

Lisa Choe とその他 5 人の作成者

最終更新日: November 17, 2017

15 - 20 分
難しい
空欄の手順

If you crack the lens of your camera or if it is not functioning properly, this guide may be for you. This guide will help you remove and replace the lens.

必要な工具と部品

ツール

  1. Canon PowerShot SX520 HS Lens Replacement, Battery: 手順 1、 1の画像 1
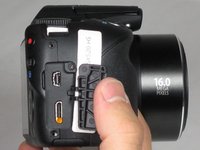
    • Using your fingers, slide the battery compartment door to the right until it unlocks.

  2. Canon PowerShot SX520 HS Lens Replacement: 手順 2、 1の画像 1
    • Rotate the door along hinges to open.

    • Take out the battery with your fingers.

  3. Canon PowerShot SX520 HS Lens Replacement, Back Face: 手順 3、 3の画像 1 Canon PowerShot SX520 HS Lens Replacement, Back Face: 手順 3、 3の画像 2 Canon PowerShot SX520 HS Lens Replacement, Back Face: 手順 3、 3の画像 3
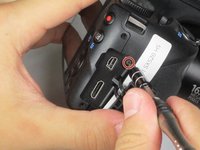
    • Remove 2-3.4 mm screws that secure the back panel using a Phillips #000 screwdriver.

    • Remove 4-4 mm screws on the left and right sides of the camera using a Phillips #000 screwdriver.

  4. Canon PowerShot SX520 HS Lens Replacement: 手順 4、 1の画像 1
    • Remove 2-4 mm screws that secure the bottom of the camera using a Phillips #000 screwdriver.

  5. Canon PowerShot SX520 HS Lens Replacement: 手順 5、 2の画像 1 Canon PowerShot SX520 HS Lens Replacement: 手順 5、 2の画像 2
    • Pull back the rubber facing to access the A/V and HDMI output compartment.

    • Remove 1-3.4mm screw inside the compartment using a Phillips #000 screwdriver.

  6. Canon PowerShot SX520 HS Lens Replacement: 手順 6、 1の画像 1
    • Once all screws are removed, pull the back facing off with your fingers.

  7. Canon PowerShot SX520 HS Lens Replacement, LCD Screen: 手順 7、 1の画像 1
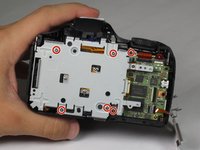
    • Remove 3-4.4 mm screws that secure the small metal plate using a Phillips #000 screwdriver.

  8. Canon PowerShot SX520 HS Lens Replacement: 手順 8、 1の画像 1
    • Carefully pop out the LCD screen with your fingers.

  9. Canon PowerShot SX520 HS Lens Replacement, Metal Plate: 手順 9、 3の画像 1 Canon PowerShot SX520 HS Lens Replacement, Metal Plate: 手順 9、 3の画像 2 Canon PowerShot SX520 HS Lens Replacement, Metal Plate: 手順 9、 3の画像 3
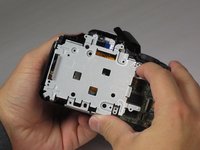
    • Remove 6-4.4 mm screws that secure the metal cover using a Phillips #000 screwdriver.

    • Remove 2-2.5 mm screws that secure the back panel using a Phillips #000 screwdriver.

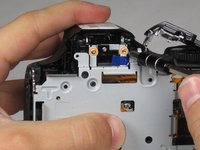
    • After all 8 screws are removed, pull the metal plate out with your fingers.

  10. Canon PowerShot SX520 HS Lens Replacement, Lens: 手順 10、 1の画像 1
    • Unlcip the large cable by pulling up on the metal part with your finger.

    • Slide out the 2 smaller cables with your fingers.

  11. Canon PowerShot SX520 HS Lens Replacement: 手順 11、 1の画像 1
    • Lift up the lens by grabbing the sides with your fingers.

終わりに

To reassemble your device, follow these instructions in reverse order.

6 の人々がこのガイドを完成させました。

作成者

5人の作成者と共同で作成されました。

Lisa Choe

メンバー登録日: 09/22/15

460 ポイント

3のガイドは作成済み

チーム

Baylor, Team 4-4, Williams Fall 2015 Baylor, Team 4-4, Williams Fall 2015人のメンバー

BU-WILLIAMS-F15S4G4

4 メンバー

6のガイドは作成済み

コメント 1 件

guide is unfinished; dropping to the point of lens group extraction without going on further. I found it, useless.

SimoneGallina - 返信

コメントを追加

統計データ:

過去 24時間: 1

過去 7 日: 2

過去 30 日: 24

今までの合計 3,292