メインコンテンツにスキップ

Canon PowerShot SD1000 Shutter Button Replacement

必要な工具と部品

  1. Canon PowerShot SD1000 Shutter Button Replacement, Back Panel: 手順 1、 2の画像 1 Canon PowerShot SD1000 Shutter Button Replacement, Back Panel: 手順 1、 2の画像 2
    • Remove the two 2.9 mm screws from the side panel closest to the camera lens.

  2. Canon PowerShot SD1000 Shutter Button Replacement: 手順 2、 1の画像 1
    • Remove the two 2.9 mm screws from the camera bottom panel.

  3. Canon PowerShot SD1000 Shutter Button Replacement: 手順 3、 1の画像 1
    • Remove the two 2.9 mm screws from the side panel farthest from the lens.

  4. Canon PowerShot SD1000 Shutter Button Replacement: 手順 4、 1の画像 1
    • Pull the back panel away from the camera body, starting at the end with the function buttons.

  5. Canon PowerShot SD1000 Shutter Button Replacement: 手順 5、 1の画像 1
    • Remove the small cover panel and the attached wrist strap mount.

  6. Canon PowerShot SD1000 Shutter Button Replacement, Front Case: 手順 6、 1の画像 1
    • Remove the front cover by gently pulling it away from the camera body.

  7. Canon PowerShot SD1000 Shutter Button Replacement: 手順 7、 1の画像 1
    • Place the front cover, back cover, and wrist strap mount in a safe place until you are ready for reassembly.

  8. Canon PowerShot SD1000 Shutter Button Replacement, Shutter Button: 手順 8、 2の画像 1 Canon PowerShot SD1000 Shutter Button Replacement, Shutter Button: 手順 8、 2の画像 2
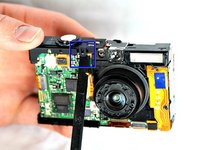
    • Using the spudger, take off the shutter button by prying the small tab on the front side of the camera.

終わりに

To reassemble your device, follow these instructions in reverse order.

作成者

6人の作成者と共同で作成されました。

Phillip Phung

メンバー登録日: 01/19/12

624 ポイント

9のガイドは作成済み

チーム

Cal Poly, Team 8-18, Maness Winter 2012 Cal Poly, Team 8-18, Maness Winter 2012人のメンバー

CPSU-MANESS-W12S8G18

4 メンバー

12のガイドは作成済み

0 件のコメント

コメントを追加

統計データ:

過去 24時間: 0

過去 7 日: 1

過去 30 日: 5

今までの合計 1,131