メインコンテンツにスキップ

Canon PowerShot S100 GPS Board Replacement

必要な工具と部品

  1. Canon PowerShot S100 GPS Board Replacement, Outer Case: 手順 1、 3の画像 1 Canon PowerShot S100 GPS Board Replacement, Outer Case: 手順 1、 3の画像 2 Canon PowerShot S100 GPS Board Replacement, Outer Case: 手順 1、 3の画像 3
    • Remove the 2 screws (3.2mm, Phillips #00) found on the bottom side of the camera.

    • Remove the 2 screws (3.2mm, Phillips #00) found on the side of the camera.

    • Remove the 2 screws (3.2mm, Phillips #00) found on the side of the camera where the terminals are.

    • Open the flap revealing the cable inputs and remove the final screw (3.8mm, Phillips #00) found inside.

  2. Canon PowerShot S100 GPS Board Replacement: 手順 2、 1の画像 1
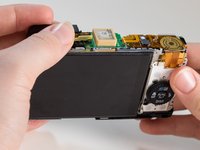
    • Turn the camera so that the LCD screen is facing you.

    • Remove the back panel by pulling it off of the camera.

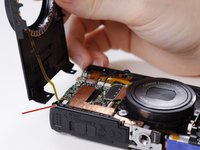
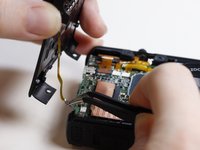
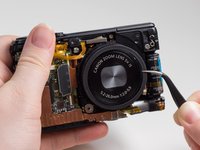
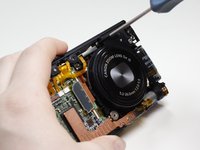
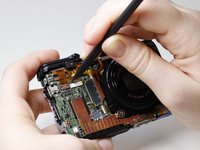
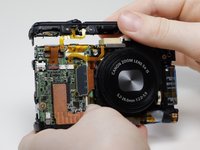
  3. Canon PowerShot S100 GPS Board Replacement: 手順 3、 3の画像 1 Canon PowerShot S100 GPS Board Replacement: 手順 3、 3の画像 2 Canon PowerShot S100 GPS Board Replacement: 手順 3、 3の画像 3
    • Turn the camera so that the lens is facing you.

    • Do not pull the front panel off without removing the ribbon cable first.

    • Slowly lift the front panel from the camera.

    • The ribbon cable is connecting the front panel to the camera. Using the tweezers, gently pull the ribbon cable out of its socket.

    • A spudger may also be used to remove the ribbon cable.

    • Remove the rubber guard that rests on top of the lens.

  4. Canon PowerShot S100 GPS Board Replacement, Top Panel: 手順 4、 1の画像 1
    • Turn the camera over on its side so that the terminals are facing you.

    • Remove the screw (3.9mm, Phillips #00) that is connecting the top panel to the metal frame.

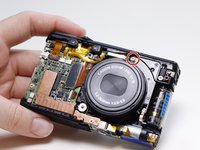
  5. Canon PowerShot S100 GPS Board Replacement: 手順 5、 2の画像 1 Canon PowerShot S100 GPS Board Replacement: 手順 5、 2の画像 2
    • Turn the camera so that the lens is facing you.

    • Remove the screw (2.9mm, Phillips #00) that is directly above the camera lens.

  6. Canon PowerShot S100 GPS Board Replacement: 手順 6、 2の画像 1 Canon PowerShot S100 GPS Board Replacement: 手順 6、 2の画像 2
    • Using the spudger, remove the center ribbon cable that is connecting the top panel to the motherboard.

    • Gently lift the top panel off the camera.

    • Tweezers may also be used to remove the ribbon cable.

  7. Canon PowerShot S100 GPS Board Replacement, GPS Board: 手順 7、 1の画像 1
    • Turn the camera over so that the camera lens is facing you.

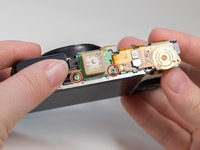
    • Using the spudger, detach the ribbon cable that is connecting the GPS tracker to the motherboard.

    • Tweezers may also be used to remove the ribbon cable.

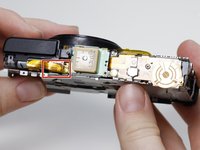
  8. Canon PowerShot S100 GPS Board Replacement: 手順 8、 2の画像 1 Canon PowerShot S100 GPS Board Replacement: 手順 8、 2の画像 2
    • Turn the camera over so that the top edge is facing you, and the lens is away from you.

    • Gently lift the folded ribbon cable piece off of the camera body.

    • The folded ribbon cable piece is glued onto the camera, so removing it will require minimal force.

  9. Canon PowerShot S100 GPS Board Replacement: 手順 9、 2の画像 1 Canon PowerShot S100 GPS Board Replacement: 手順 9、 2の画像 2
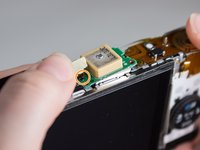
    • Lift to expose the Phillips #00 screw located beneath it.

    • Unscrew the 2 screws (4.1mm, 1.8mm, both Phillips #00) connecting the GPS tracker to the camera.

    • Remove the GPS tracker by gently lifting it off of the pin that holds it to the top of the camera.

終わりに

To reassemble your device, follow these instructions in reverse order.

2 の人々がこのガイドを完成させました。

作成者

3人の作成者と共同で作成されました。

Ricky

メンバー登録日: 02/23/15

958 ポイント

5のガイドは作成済み

チーム

USF Tampa, Team 1-4, Leahy Winter 2015 USF Tampa, Team 1-4, Leahy Winter 2015人のメンバー

USFT-LEAHY-W15S1G4

4 メンバー

5のガイドは作成済み

0 件のコメント

コメントを追加

統計データ:

過去 24時間: 0

過去 7 日: 0

過去 30 日: 3

今までの合計 1,101