メインコンテンツにスキップ

Canon PowerShot A2500 Buttons Replacement

必要な工具と部品

  1. Canon PowerShot A2500 Buttons Replacement, Body Casing and Faceplate: 手順 1、 2の画像 1 Canon PowerShot A2500 Buttons Replacement, Body Casing and Faceplate: 手順 1、 2の画像 2
    • Remove the knot holding the wrist lanyard onto the camera

  2. Canon PowerShot A2500 Buttons Replacement: 手順 2、 1の画像 1
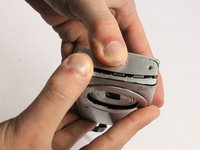
    • Open the latch at the bottom corner of the device to reveal the battery and SD card housing.

    • There is an orange latch holding the battery in place which must be pushed back in order to free the battery.

    • Once the battery is removed push the SD card and this will activate a spring ejecting the card from the camera.

  3. Canon PowerShot A2500 Buttons Replacement: 手順 3、 3の画像 1 Canon PowerShot A2500 Buttons Replacement: 手順 3、 3の画像 2 Canon PowerShot A2500 Buttons Replacement: 手順 3、 3の画像 3
    • Remove the 6 Phillips #00 exterior screws from the camera. Two are located on the bottom and two are located on either side as shown. Notice that one of the screws is under the AV Out Digital flap on the side. All exterior screws should be 2.4mm in length

  4. Canon PowerShot A2500 Buttons Replacement: 手順 4、 3の画像 1 Canon PowerShot A2500 Buttons Replacement: 手順 4、 3の画像 2 Canon PowerShot A2500 Buttons Replacement: 手順 4、 3の画像 3
    • Pry apart the camera casing using the plastic opening tool tool provided. Once the casing has begun to separate pull the two sides apart with your hands.

    • Be careful not to bend the plastic casing to much, as it will crack.

  5. Canon PowerShot A2500 Buttons Replacement, Buttons: 手順 5、 1の画像 1
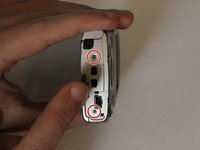
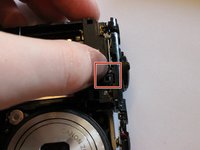
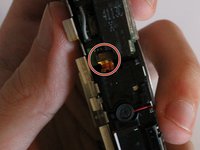
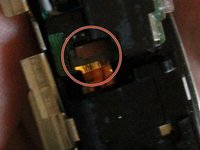
    • Remove the single philips #00 screw on the button pad which are 2.2mm long. This screw is circled in red in the guide image.

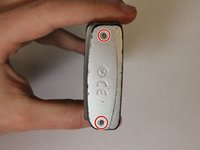
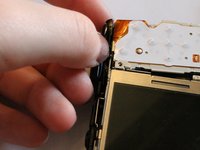
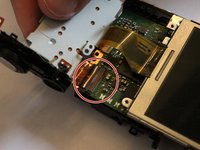
    • Next, remove the two 2.4mm long screws located in between the LCD screen and the touch pad. These screws will require a Phillips #00 screwdriver.

  6. Canon PowerShot A2500 Buttons Replacement: 手順 6、 2の画像 1 Canon PowerShot A2500 Buttons Replacement: 手順 6、 2の画像 2
    • Pull the two clips off located near the power button

    • The clips are easily broken, use care while disconnecting these clips.

  7. Canon PowerShot A2500 Buttons Replacement: 手順 7、 3の画像 1 Canon PowerShot A2500 Buttons Replacement: 手順 7、 3の画像 2 Canon PowerShot A2500 Buttons Replacement: 手順 7、 3の画像 3
    • Remove the circuit ribbon connecting the flash to the camera in order to proceed to the next instruction.

    • Carefully pull out the circuit ribbon from the camera which should be the last piece holding the button pad onto the camera.

終わりに

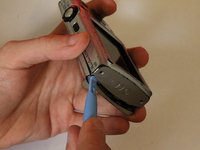
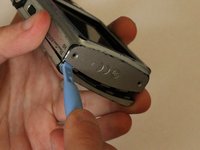
To reassemble your device, follow these instructions in reverse order.

2 の人々がこのガイドを完成させました。

作成者

4人の作成者と共同で作成されました。

Jeff

メンバー登録日: 03/12/15

221 ポイント

1ガイドが承認済み

チーム

UMass Dartmouth, Team 3-4, Duarte Spring 2015 UMass Dartmouth, Team 3-4, Duarte Spring 2015人のメンバー

UMASSD-DUARTE-S15S3G4

4 メンバー

12のガイドは作成済み

0 件のコメント

コメントを追加

統計データ:

過去 24時間: 2

過去 7 日: 5

過去 30 日: 13

今までの合計 868