メインコンテンツにスキップ

BLU Life XL Motherboard Replacement

必要な工具と部品

  1. BLU Life XL Motherboard Replacement, Volume Control Buttons: 手順 1、 3の画像 1 BLU Life XL Motherboard Replacement, Volume Control Buttons: 手順 1、 3の画像 2 BLU Life XL Motherboard Replacement, Volume Control Buttons: 手順 1、 3の画像 3
    • Turn the device off by holding down the power button for up to 5 seconds and then tapping the "Power off" button on the screen.

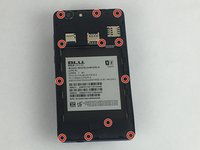
    • Remove the rear cover using your hands at the lip on the device back cover. No tools required.

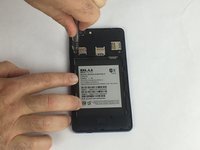
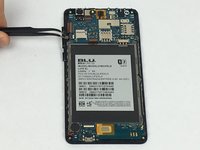
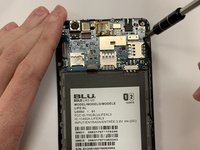
    • Remove the battery by lifting the lower edge of the battery up first.

  2. BLU Life XL Motherboard Replacement: 手順 2、 2の画像 1 BLU Life XL Motherboard Replacement: 手順 2、 2の画像 2
    • Remove the 12x3mm screws from the rear plate using the Phillips#000 screwdriver.

  3. BLU Life XL Motherboard Replacement: 手順 3、 2の画像 1 BLU Life XL Motherboard Replacement: 手順 3、 2の画像 2
    • Firmly press the prying tool into the gap between the front glass and rear plate. This gap is located on all sides of the phone.

    • Run the prying tool around the entire phone separating the rear plate from the frame.

  4. BLU Life XL Motherboard Replacement: 手順 4、 3の画像 1 BLU Life XL Motherboard Replacement: 手順 4、 3の画像 2 BLU Life XL Motherboard Replacement: 手順 4、 3の画像 3
    • Gently remove the tape covering the volume control buttons. The tape is located near the top left of the cavity for the battery.

    • Replace the component and reapply the tape over the buttons.

  5. BLU Life XL Motherboard Replacement, Motherboard: 手順 5、 2の画像 1 BLU Life XL Motherboard Replacement, Motherboard: 手順 5、 2の画像 2
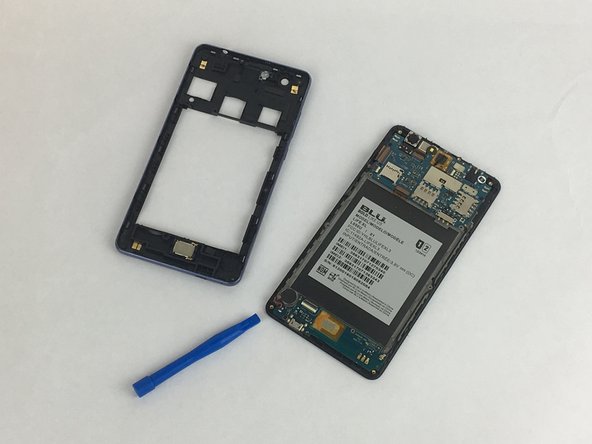
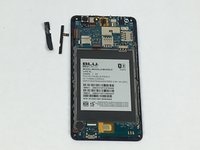
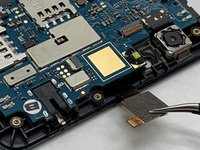
    • Remove the two 12x3mm screws using the Phillips #000 screwdriver.

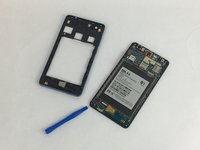
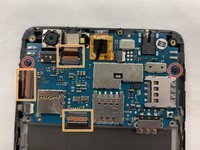
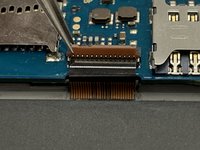
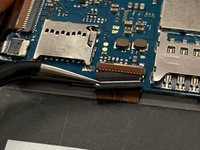
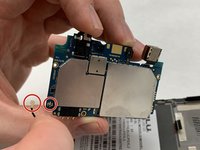
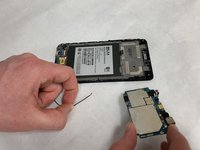
    • Remove the ribbon cables.

  6. BLU Life XL Motherboard Replacement: 手順 6、 3の画像 1 BLU Life XL Motherboard Replacement: 手順 6、 3の画像 2 BLU Life XL Motherboard Replacement: 手順 6、 3の画像 3
    • The ribbon cables are attached by zero insertion force (ZIF) connectors. To disconnect the cable, flip up the small locking flap and pull the cable out.

  7. BLU Life XL Motherboard Replacement: 手順 7、 3の画像 1 BLU Life XL Motherboard Replacement: 手順 7、 3の画像 2 BLU Life XL Motherboard Replacement: 手順 7、 3の画像 3
    • Remove the white ZIF connector then remove the cable connecting the digitizer to the motherboard by gently pulling.

    • An adhesive pad attaches this component to the motherboard. To remove it, use a pair of tweezers to gently pry it upwards.

  8. BLU Life XL Motherboard Replacement: 手順 8、 3の画像 1 BLU Life XL Motherboard Replacement: 手順 8、 3の画像 2 BLU Life XL Motherboard Replacement: 手順 8、 3の画像 3
    • The motherboard should now be free from its mount in the phone, but it is still connected to the PBC data cable. To remove the cable from the motherboard, gently pry upward.

    • The motherboard is now free and can be replaced.

終わりに

To reassemble your device, follow these instructions in reverse order.

ある他の人がこのガイドを完成しました。

作成者

2人の作成者と共同で作成されました。

Matthew Hook

メンバー登録日: 03/25/19

439 ポイント

4のガイドは作成済み

チーム

IUPUI, Team S1-G6, Hovde Fall 2019 IUPUI, Team S1-G6, Hovde Fall 2019人のメンバー

IUPUI-HOVDE-F19S1G6

4 メンバー

6のガイドは作成済み

コメント 1 件

how i identified the components in this motherboard

victor ismael piñero hernandez - 返信

コメントを追加

統計データ:

過去 24時間: 0

過去 7 日: 2

過去 30 日: 7

今までの合計 470