はじめに
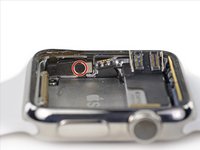
残念ながら、Apple Watchを開口するとガスケットともなっている感圧センサーが故障してしまう場合があります。このセンサーは2層で構成されており、それぞれがのりづけされています。
各層は御開帳してしまったときに分離し、再組立て時に密閉性が損なわれることがあります。
万が一そうなってしまったら、センサーの修理・交換を再組立て前に行う必要があります。
感圧センサーのガスケットが正常に機能し、接着剤を交換するだけでよい場合は、この修理ガイドの代わりに、こちらのApple Watchの接着剤の交換ガイドに従ってください。
必要な工具と部品
-
-
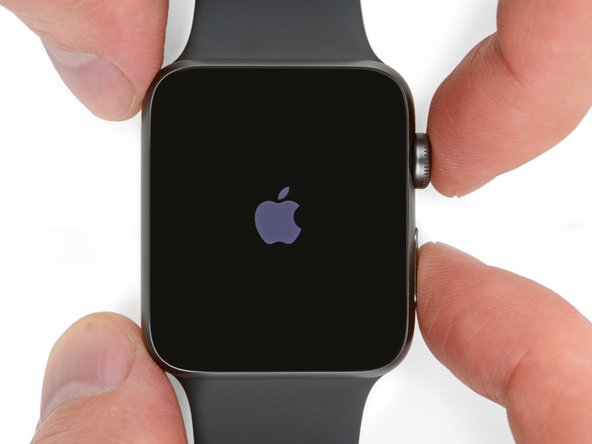
iOpenerを準備(またはヘアドライヤーかヒートガン)し、触れるには少し熱すぎるくらいの温度まで加熱します。
-
iOpenerを1分以上ウォッチにあてて、スクリーンを温めます。ケースに装着している接着剤が完全に柔らかくなるまで待ちます。
-
-
-
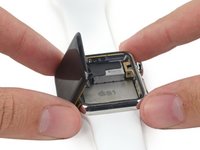
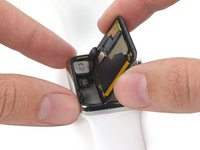
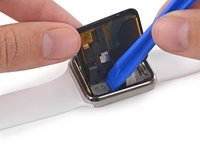
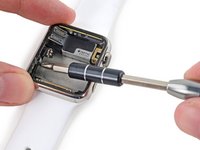
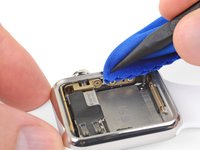
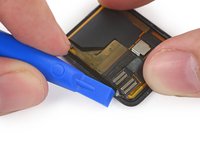
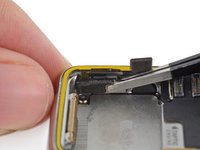
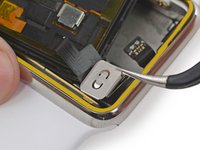
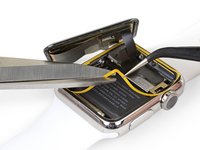
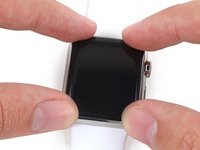
デバイス正面下部の端のガラスとケースの隙間に刃のカーブ部分をしっかりと真下に押し下げます。
-
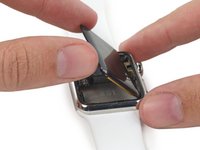
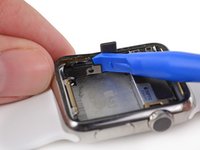
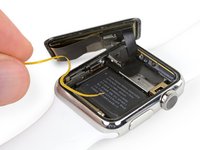
ガラスが押し上がったら、丁寧にナイフを下向きに位置を変えていき、ガラスをもっと押し上げるようにして隙間を広げていきます。
-
-
-
-
ハサミを使って、バッテリーの幅に合うように開口ピックを切ってください。鋭利な角を残さないように丸みを持たせてください。
-
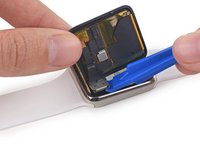
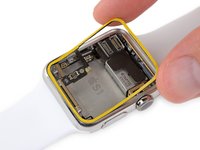
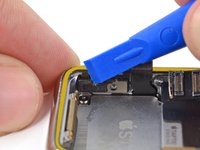
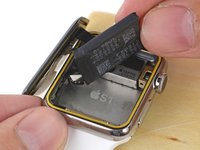
バッテリー右側とケースの間に切り込んだピックを挿入します。
-
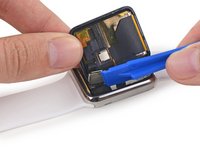
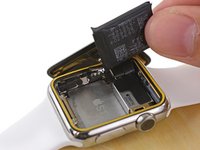
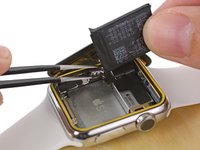
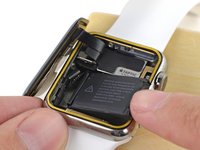
一定の力でゆっくりとバッテリーを持ち上げます。システムボードにバッテリーを固定している接着剤を剥がします。
-
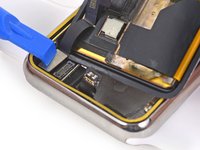
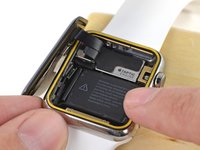
42mmモデルでは、バッテリー下に搭載されたシステムボードを、アクシデントでこじ開けてしまうことがあります。開口ピックを、バッテリーの下に差し込んだ際には、システムボードから離しながら持ち上げます。
-
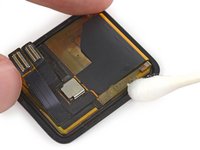
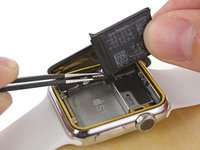
接着剤を弱めるため、必要に応じて、高濃度のイソプロピルアルコール(90%以上)をバッテリーの周辺と底に塗布してください。
-
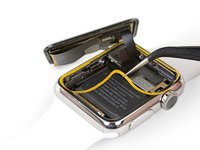
バッテリーが接続されたままの状態で、取り外すことは絶対にしないでください。
-
-
この手順で使用する道具:iFixit Precision 4 mm Screwdriver Bit$2.99
-
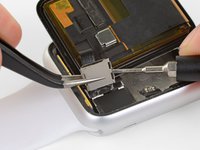
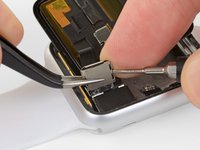
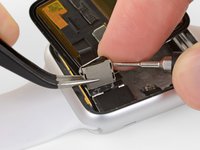
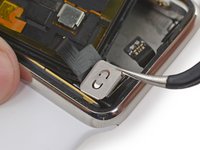
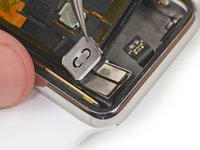
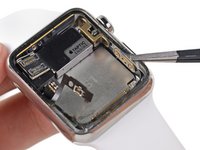
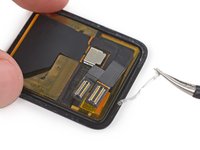
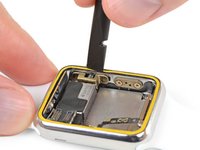
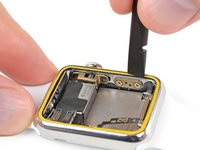
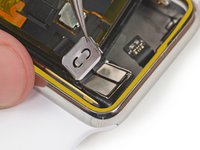
Y000ドライバーを使って、Force Touchセンサーのコネクタケーブルを固定しているトライポイントネジを1本外します。
-
-
この手順で使用する道具:Tesa 61395 Tape$5.99
-
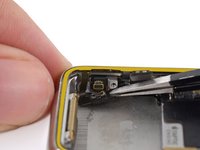
必要に応じて、バッテリーを固定している接着剤を再利用することもできます。あるいは、Tesa 63195やE6000のような液体接着剤などの両面テープを使用することも可能です。
-
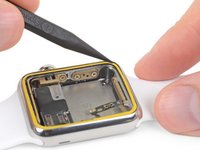
バッテリーをスロットの中に装着して、しっかりと所定の位置に押さえ込みます。
-
バッテリーをシステムボード側に向けて押さえ、接着剤で固定します。
-


電子機器のごみはR2 or e-Stewards certified recyclerにもっていきましょう。
修理がうまくいかない際は、basic troubleshootingを試すか、Answers forumで質問をお願いします。
電子機器のごみはR2 or e-Stewards certified recyclerにもっていきましょう。
修理がうまくいかない際は、basic troubleshootingを試すか、Answers forumで質問をお願いします。
134 の人々がこのガイドを完成させました。
以下の翻訳者の皆さんにお礼を申し上げます:
100%

これらの翻訳者の方々は世界を修理する私たちのサポートをしてくれています。 あなたも貢献してみませんか?
翻訳を始める ›

チーム

Tobias Isakeit - Repairability Engineer Tobias Isakeit - Repairability Engineer人のメンバー
Business
1 メンバー
1,131のガイドは作成済み
37 件のコメント
does the touch function need the force touch sensor? i am lost. i have replaced the sensor (which worked even if separated) put the thing together, have attached the force touch sensor and i just tried to test the watch. it turns on, but i have no touch. there was touch prior to the force touch replacing. does the touch work if the protective film is still on it?
palokiller - 返信
Hi palokiller, the force touch sensor is responsible for the force touch function (pressing on the display). The touch itself is handled by the display assembly, meaning the three cables at the back of the display. Check those cables and make sure they are seated deep enough and the ZIF flap is closed properly. The touch (and also the force touch) should work with a protective film still on.
Hey,
I’m kind of facing the same problem of having not touch after assembly. Do you have find your problem, because I have no clue what I have done wrong.
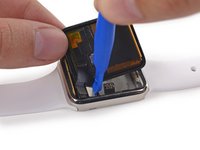
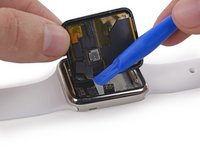
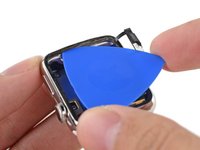
Step 20 of this guide can and should be completely skipped. This is by far the most difficult part of the process. It requires excessive force on parts of a fragile cable that is prone to ripping. While it is easier to clean the edge of the display assembly with it removed, it is still possible to clean it while attached.
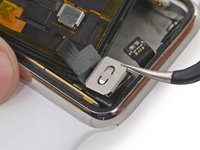
I thought the same. But then I discovered, there is a with applying the latch. If you watch carefully at the pictures, you’ll notice they lifted the connector assembly up. In this uplift position the latch can be mounted, but it’s almost impossible to mount it at the rested position.
Hope this helps someone.