この修理ガイドは変更されています。最新の未承認バージョンに切り替えます。


-
-
-
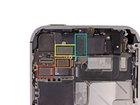
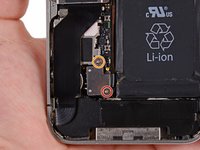
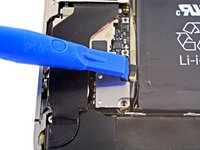
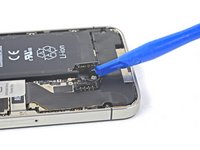
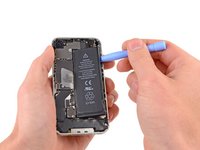
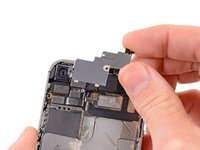
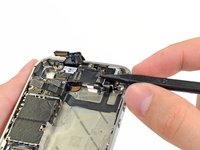
ロジックボードに留められたドックコネクターのケーブルカバーから次のネジを外します。
-
1.5 mm プラスネジー1本
-
1.2 mmプラスネジー1本
-
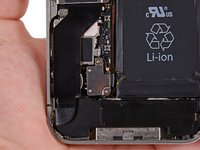
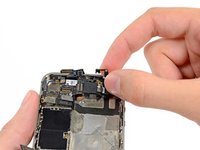
メタル製のドックコネクターケーブルのカバーを外します。
-
-
-
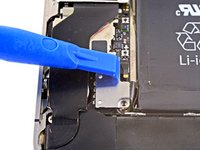
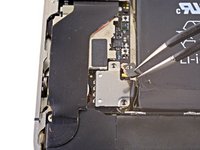
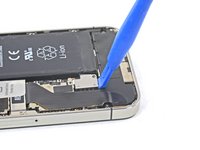
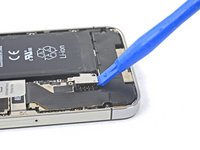
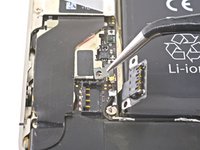
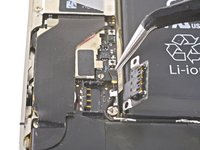
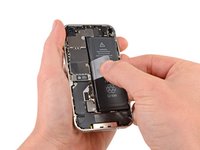
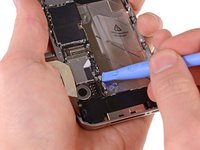
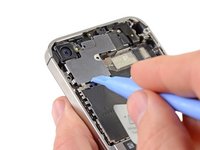
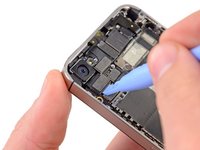
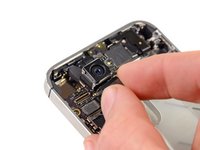
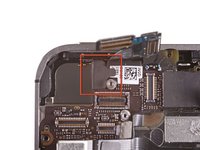
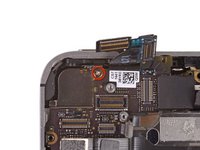
次の順番でロジップボード上部付近に装着された5つのケーブルを取り外します。
-
ヘッドホンジャック/ボリュームボタンケーブル
-
正面カメラケーブル
-
デジタイザーケーブル
-
ディスプレイデータケーブル
-
パワーボタンケーブル(2番目の画像に表示されているように、ヘッドホンジャック/ボリュームボタンケーブルの下に位置します)
-


デバイスを元に戻すにはこれらのインストラクションを逆の順番に従って作業を進めてください。
デバイスを元に戻すにはこれらのインストラクションを逆の順番に従って作業を進めてください。
256 の人々がこのガイドを完成させました。
以下の翻訳者の皆さんにお礼を申し上げます:
100%

これらの翻訳者の方々は世界を修理する私たちのサポートをしてくれています。 あなたも貢献してみませんか?
翻訳を始める ›

12 件のコメント
recently I tried to fix my wifi antenna and ended up disturbing something that made my touch unresponsive. Okay just to make sure that my Display unit was not damaged I plugged in another display set and still the touch was not working!
what could have possibly gone wrong?
What can I say but BRILLIANT!!!!
You have saved me a bomb - very easy and much appreciated!
I had 2 broken iPhones and thanks to this guide I have a working one and a load of pieces :-)
Thank you very much for these instructions, which are aircraft maintenance quality. I had 2 phone: one with broken front glass and bad battery but with 32G. Other one good conditions but only 16G, which left over after getting 5s. So I changed logic board assembly from 32G to other frame and left all the rest inside. Voila, there it is fixed 32G 4s phone ready to use after recharging battery.
Instructions are so good that it takes me about 1 1/2 hour to disassembly and reassembly 2 phones and I had´t done that ever before. I just read instructions first and then followed step by step and checked out comments.