メインコンテンツにスキップ

Google Pixel 8aのスクリーン交換

英語
日本語

手順 20を翻訳中

手順20
Google Pixel 8a Screen Replacement: 手順 0、 2の画像 1 Google Pixel 8a Screen Replacement: 手順 0、 2の画像 2
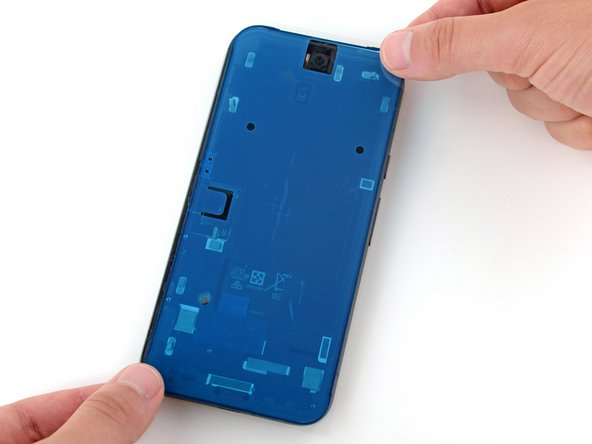
  • If your screen already comes with adhesive pre-installed, remove its liner and skip down six steps to continue reassembly.

  • Before removing any liners from the screen adhesive, hold it over the frame to make sure it's oriented correctly. Use the camera cutout on the top edge to line it up correctly.

  • The blue liner should be facing up, with the larger, clear liner on the bottom.

もし交換用スクリーンにあらかじめ接着剤が取り付けられている場合は、接着剤の剥離紙を剥がしてから6つ先の手順に進んで組み立てを続けて下さい。

スクリーン用接着剤から剥離紙を剥がす前に、接着剤をフレームの上に重ねて向きが正しいか確認して下さい。上端にあるカメラ用の穴を使って穴が正しく上に来る向きに合わせて下さい。

青色の剥離紙が上を向き、より大きな透明の剥離紙が下向きになるはずです。

クリエイティブコモンズのオープンソース著作権のもと、あなたの投稿は著作権の対象となります