はじめに
iPhone 5の壊れたスピーカーを交換して音を蘇らせましょう。
必要な工具と部品
-
-
使用するツールに関係なく、ディスプレイ全体を引き上げなければなりません。
-
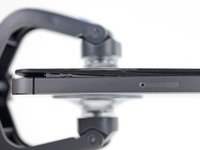
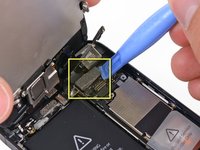
最初の画像の通り、ガラスがプラスチックから外れたら、プラスチック製の開口ツールをフレームとメタルボディの間に差し込み、ケースからメタルクリップを押し上げます。
-
-
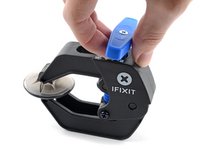
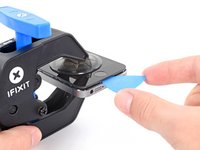
この手順で使用する道具:Clampy - Anti-Clamp$24.95
-
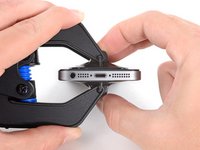
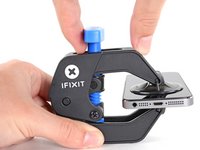
青いハンドルをヒンジ側に引いて、リバースクランプのアームのロックを解除します。
-
iPhoneの左/右側の端に向けてアームをスライドします。
-
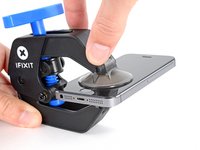
吸盤カップをiPhoneの下端付近に装着します。上部に一つ、下部に1つずつ取り付けます。
-
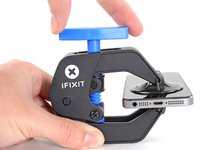
吸盤カップ両側をしっかりと締め合わせると、標的の場所にしっかりと装着させることができます。
-
-
-
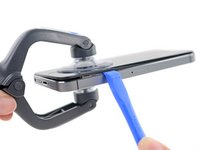
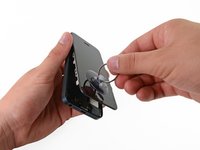
iPhone を片手でしっかりと抑えながら、吸盤カップを本体背面ケースからフロントパネルを丁寧に引き離していきます。
-
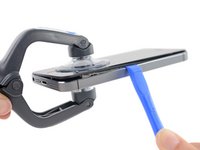
プラスチックの開口ツールを使うと吸盤カップを上に引き上げながらゆっくりとスクリーンを本体から離すことができます。
-
-
-
-
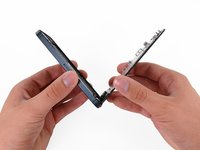
クリップがフロントパネルの下と両サイドから外れたら、アセンブリの下を引っ張り背面ケースから外します。
-
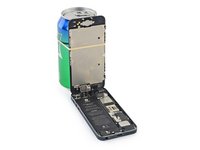
ディスプレイを90度まで開きます。開いて固定したまま作業するため、後ろに衝立を用意して立てかけてください。
-
ディスプレイが作業中閉じないように、ゴムを使って衝立に固定してください。これはディスプレイケーブルが過度な力で引っ張られないようにするためです。
-
-
-
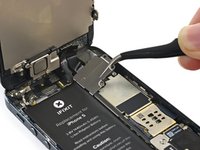
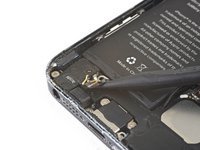
ロジックボードに留められているメタル製バッテリーコネクターブラケットから次のネジを2本外します。
-
1.8 mmプラスネジー1本
-
1.6 mmプラスネジー1本
-
-
-
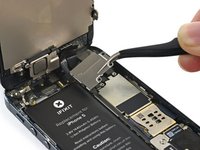
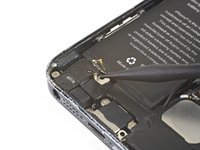
フロントパネルのケーブルブラケットが本体ボードにあることを確認してから次のネジを外します。
-
1.2mmのプラスネジー2本
-
1.6mmのプラスネジー1本
-
-
-
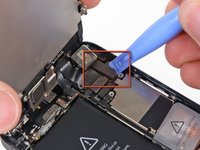
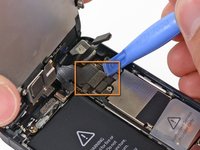
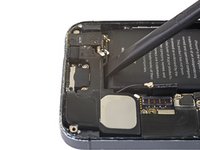
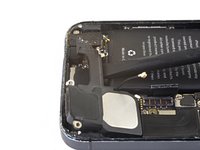
プラスチックの開口ツールもしくは爪先を使って、次の3つのフロントパネルアセンブリケーブルを外します。
-
正面カメラとセンサーケーブル
-
LCDケーブル
-
デジタイザーケーブル
-


オリジナルのパーツと交換用パーツをよく見比べてください。交換用パーツに付いていない残りのコンポーネントや接着シールなどは、インストールする前に新パーツに移植する必要があります。
このデバイスを再組み立てするには、インストラクションを逆の順番に従って作業を進めてください。
e-wasteを処理する場合は、認可済みリサイクルセンターR2を通じて廃棄してください。
修理がうまく進みませんか?iPhone 5のアンサーコミュニティに尋ねてみましょう。
オリジナルのパーツと交換用パーツをよく見比べてください。交換用パーツに付いていない残りのコンポーネントや接着シールなどは、インストールする前に新パーツに移植する必要があります。
このデバイスを再組み立てするには、インストラクションを逆の順番に従って作業を進めてください。
e-wasteを処理する場合は、認可済みリサイクルセンターR2を通じて廃棄してください。
修理がうまく進みませんか?iPhone 5のアンサーコミュニティに尋ねてみましょう。
101 の人々がこのガイドを完成させました。
以下の翻訳者の皆さんにお礼を申し上げます:
100%

Midori Doiさんは世界中で修理する私たちを助けてくれています! あなたも貢献してみませんか?
翻訳を始める ›


7 件のコメント
Step 2 Can I suggest that prior to any dismantling of the main component section that,when the front display has been set aside you take a photo of section containing battery etc.Print the photo you have just taken,then when you remove a screw place it on the corresponding position of the pictured screw.
do not follow this guide! you will destroy your phone: no need to remove logic board for speaker replacement!!! skip to step 28!!!
beware ifixit can not fixit!
No need to remove battery or logic board. After disconnecting battery and removing screen, Do steps 26 and 27. Then remove the two stand-offs on the lower part of the logic board (shown in orange in step 30) and the screw on the far right of the logic board (bottom screw shown in red in step 30). Using a spudger, pop off the cellular data antenna (shown in step 21). Remove the screw on the bottom right securing the speaker in the frame and grounding the home button (this is the blue screw in step 34). You can carefully peel the lightning connector ground off the speaker (large flat ribbon on the bottom right. Then carefully peel the home button ground contact ribbon off the speaker on the left side. You can then gently slide the speaker out from under the logic board and replace it. Put tings back in reverse order. You can use a little piece of battery sticker to re-glue the home button ground contacts back to the left side of the speaker. No need to remove the data port or any other component.