はじめに
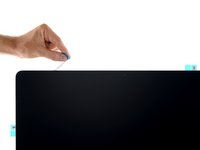
ディスプレイを外すには、スクリーン周辺の接着剤を切り離す必要があります。接着剤が切断した後、ディスプレイを再装着する際に再利用ができません。そのため、新しい接着ストリップに交換しなければなりません。
このガイドのうち幾つかの画像は2015年モデルのiMacで使用されたものを使っていますが、ほとんど変わりがありません。作業自体には支障ありません。
必要な工具と部品
-
この手順で使用する道具:iMac Intel 27" Cardboard Service Wedge$4.99
-
ヒンジは自由に動くため、iMacのバランスが取れにくく、作業が難しいです。iMacのサービスウェッジを配置すると、修理作業が安定した環境で行うことができます。
-
-
-
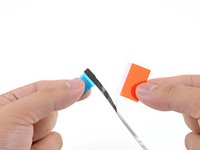
現在使用中のディスプレイを再利用する場合、ディスプレイ背面から古い接着剤を全て除去してください。
-
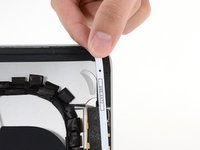
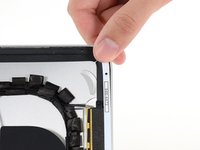
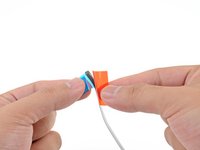
古い接着ストリップをピンセットもしくは指先で剥がします。ディスプレイ下側からデバイス上部側に、上向きに剥がします。
-
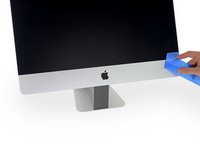
古い接着剤を全て除去したら、濃度90%以上のイソプロピルアルコールと糸くずの出ないマジックワイプなどの布で表面を慎重に拭き取ります。前後ではなく、一方向に向かってワイプします。
The aluminum frame have a plastic zone. Could the isopropyl alcohol damage the plastic surface?
Hello! Isopropyl alcohol should not damage the plastic surface.
It’s not clear if you’re supposed to remove the black strips under the adhesives from the screen. Sometimes they come off when removing the main adhesives, but they seem to be two separate layers.
Only the adhesive should be removed—the black strips underneath them should stay in place.
“Only the adhesive should be removed—the black strips underneath them should stay in place.”
By fault I’ve removed the black strips, now there is a gap between the glass and the aluminum frame in the bottom.
the display is perfectly pasted, it’s only a matter of appearance…
If I open the computer again, what kind of adhesive tape (caption tape?) could I use to eliminate the gap between the glass and the frame?
Or it’s better to let it go…
Thanks for your support
Hi Massimiliano ,
You should be fine. The bottom edge doesn’t have black strips. It should be bare metal. However, there shouldn’t be any gaps between the glass and the frame. Make sure that the adhesive is fully adhered on the bottom edge.
Hi Arthur,
my English is not perfect…
I would mean that I removed all the black strips under the adhesives on the screen; so I believe that the glass has become too thin compared to the bottom aluminium frame.
I thought to open the Mac again and put some black strips to increase the thickness of the glass screen but I don’t know what kind of tape I should use (Kapton or other?).
And then I will put a new set of ifixit adhesives strips.
Maybe it’s a waste of time… it’ s only an aesthetic matter
Thanks again
Thanks for the clarification. Since there is always a chance to crack the screen glass when cutting the adhesive, I’d suggest not to open up the iMac again. However, if you do open it, I suggest using Tesa tape.
Thanks Arthur,
I will follow your suggestion… I will not open again my computer…
Now it works very well and fast.
So, the bit about the adhesive strips really needs to be clarified. Nowhere in the instructions is there talk about multiple layers of adhesive, one that should be removed and one that should remain. And looking at the pictures further on, clearly the wider sections where the adhesive go are completely clean of any black strips. However, on the screen side, I’ve noted that indeed there are two layers, at least on the top. And removing both layers leads to the adhesive *not* really taking hold and the screens falling out. Really wish this had been clearer. I’ve helped dozens of people upgrade their iMac but after the first time that I had to replace a screen due to it falling and breaking, I’ve been using clear strong adhesive tape externally on the corners to ensure that the screen stays in place. Ugly, but better than the risk.
Are you sure there are 2 layers of tape? My replacement tape comes with the sections that sticks over the 2x antenna sections on the right side of the screen (looking at the screen). The old tape has antenna section left over because only the thinner edge part was cut so that section separated.
Furthermore, the replacement tape on the antenna section is only sticky on 1 side (facing the chassis) and no sticky surface to the screen (other than the thin 5-6mm width edge like the rest of the none antenna section.
As for falling off, I'm guessing there are 1. cheap tapes that looks the part but don't stick as well 2. surfaces not cleaned and primed 3) 2 top corner breathing channel (hot air rise and go out there) got sealed off as Step 6 below + pulling and stretching the tape sealed off that channel. Happened to me the first time, had to cut back to expose the air channel. On subsequent efforts, didn't pull to stretch the tape. Went gradually a couple of inches at a time so the tape don't stretch.
Howard -
I too started removing the second layer of adhesive strips before reading these comments. PLEASE update the article to reflect that the other black strips should stay!
A few key notes
2 top corners have air gaps to let the hot air out. When applying the new tapes, its easy to stretch the tape and seal this hole using the method outlined below. Best to go slowly small section at a time to avoid stretching the tape. 2 people is helpful.
Before peeling the tape facing the LCD, its good to mount the LCD with masking tape (avoid covering mic holes) to test everything. I like to use Photo Booth and record a video to ensure camera and mics are all working properly.
2 people also helpful on the final reseal. I like to stand the iMac up vertically so can power on and do final check after LCD connection before reseal. The screen is pivots on the bottom edge and iMac chassis is wobbly on its stand so 2 people is helpful. For final check, I like to make sure screen powers on and display shows before final reseal.
-
-
-
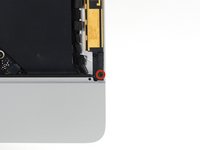
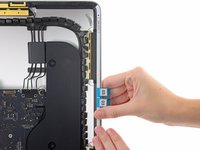
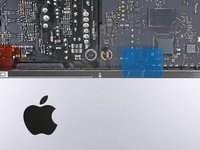
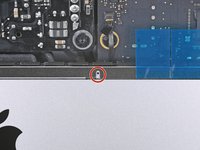
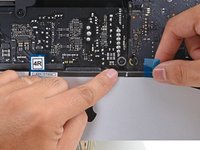
背面エンクロージャーの右側縦にあたるストリップ番号03から作業を始めます。
-
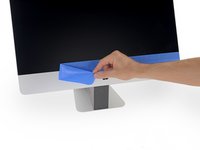
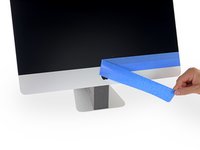
青いタブをつかみ、ストリップ裏側の短い裏張りを剥がして、エンクロージャーに装着する接着面を露出させます。
-
-
-
-
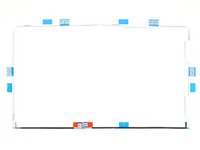
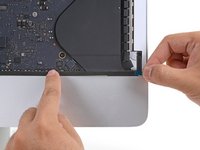
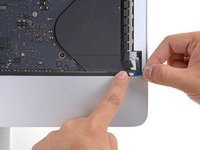
前と同じ方法、でさらに3つの接着ストリップを装着します。作業は、iMacの周囲を反時計回りに行います。
-
上部右にストリップ番号02
-
上部左にストリップ番号01
-
左側縦にストリップ番号05
-
-
-
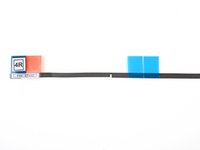
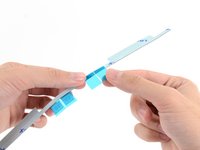
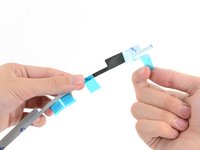
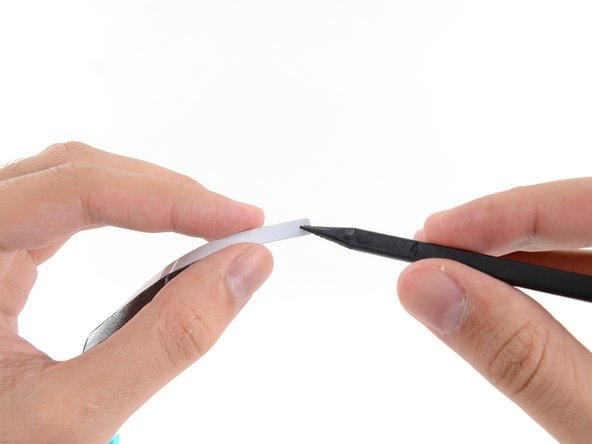
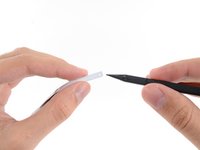
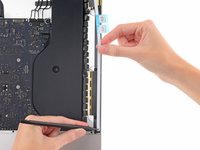
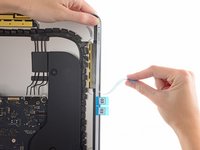
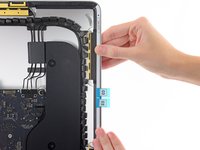
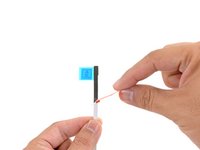
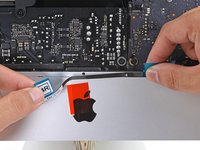
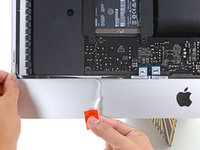
ストリップ番号4Rの赤いプルタブをつかみ、ストリップから約5 cmの白い裏張りを剥がします。
These steps instruct you to install the lower strips to the iMac frame first, as that is what Apple instructs their techs to do. If you have an iMac without a microphone hole, you can choose to install the lower strips onto the display first. Peel the blue tab instead of the red to expose the adhesive. Carefully place the adhesive along the bottom edge of the display. The L-bend on the adhesive should match the display contours.
Arthur Shi - 返信
i have no microphone hole - which is good . . . because the 4R and 4L stips must be labelled incorrectly as the L’s are on the wrong side. Also the strips don’t completely cover the bottom. And there are no holes in these strips making placement less secure. Someone certainly goofed. (Reckon I’ll use snipped off L’s to cover the open space.
Ah, the L strips don’t overlap - so they’re long enuf, but they are still reversed.
Die Löcher in den Klebestreifen passen nicht (mehr) zu den Löchern im Rahmen. Ich habe mich an den breiten Stellen orientiert und die Klebestreifen daran ausgerichtet. Das ging besser.
The holes in the adhesive strips no longer match the holes in the frame. I oriented myself towards the wide areas and aligned the adhesive strips with them. That worked better.
-
-
-
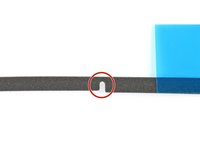
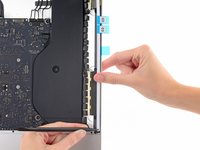
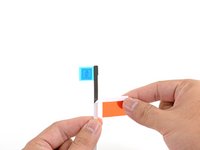
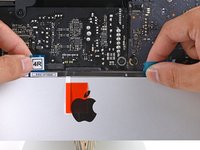
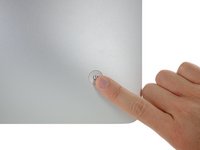
マイクロフォンホール上にマイクロフォンの突起を位置合わせして、下側端に沿って接着ストリップを揃えます。
-
iMacにマイクロフォン用のホールがない場合、ストリップの右側端を揃えて、右側の垂直側の接着剤の真隣にL字コーナーがくるように配置してください。 L字型は、右側の垂直に留める接着ストリップと重ならないようにしてください。
-
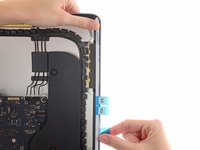
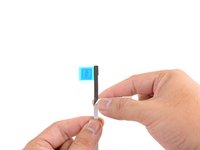
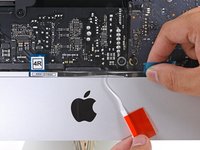
ストリップを位置合わせしたら、左の接着面が露出した端を慎重にiMacに揃えて固定します。
The strips that I received from OWC do not have a notch cut out for the microphone. The instructions advise you, for 2017 and later 21.5” iMacs, to cut about 2 inches off from the left side of the strip so you do not cover the microphone hole.
As far as the remaining 2 inches I cut off, I snipped off a little more on the right side to leave a small gap for the microphone and placed that small remaining part in the center where it should have been if there was no microphone, just to complete the adhesive.
I have done quite a few of these now. It is easier to apply the bottom strips to the Display, rather than the housing. With the Red tabs folded at 90 degrees to the adhesive. You can then remove these tabs with the display kind in place, secured by painters tape on the out side before closing it up.
Don't make the mistake i just did - if you want to cut a notch, cut the BOTTOM 2/3rds section of the strip, not the top! :P
Also, here's a some pics of the mic location in the 2017 retina version from iFIXit: Muffled Microphone - iMac 21.5" (mid 2017) - Following Adhesive Strips.
-
-
-
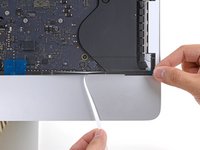
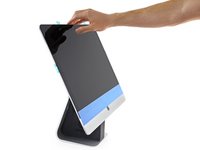
iMac上にディスプレイを慎重に重ねて、位置合わせをします。
In my experience, it is easier to lay the Mac flat on its back, especially if you do not have a wedge, because the display will tilt up and down and you do not want that happening. With the Mac on its back, I removed all the front adhesive strips and then angled the display (not a big angle) against the chin making sure it was even on both sides. Then reconnect the video cables and gently bring the display down into the proper position. Step 23 below seems too much of a hassle to try and get the bottom adhesive strips out while the display is resting on them, and taping the bottom of the display in Step 19 also seems to be a hassle.
-
-
-
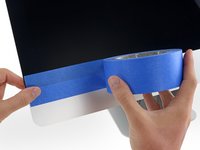
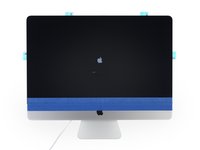
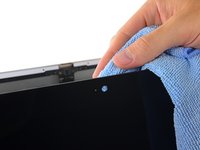
マスキングテープなどを一時的に使用して、iMacのエンクロージャーとディスプレイの下部端を固定します。
Noooo!! I followed this step and promptly cracked my screen!!!! You need to be extremely careful NOT to wrap the tape around the back of the computer. These images make it look like it's wrapped around, but if you do that, you won't be able to lift the screen at all to attach the display cables. Why?!!!!!
Oh no! I'm so sorry to hear this! Thank you for sharing your experience—I'm going to add a warning into the step.
-
-
-
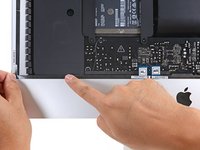
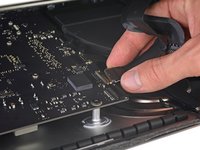
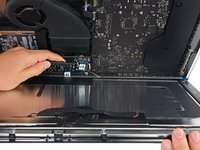
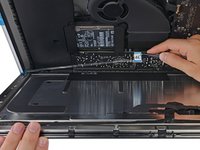
ディスプレイの電源コネクタをロジックボードのソケットに挿入します。
I am powering the unit back up to test all is working. Screen is black but fan is running loud. I’ve decoupled the power and confirmed both the display cables are connected. Note - I replaced both the HDD with a SSD as well as upgraded the RAM from 8GB to 16GB.
-
-
-
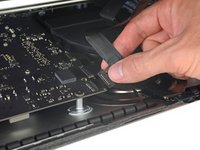
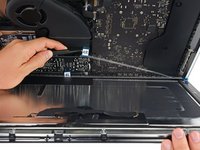
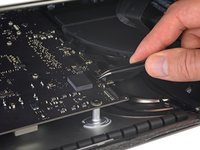
ピンセットもしくは片手で、ディスプレイデータケーブルのコネクタをロジックボードのソケットに挿入します。
-
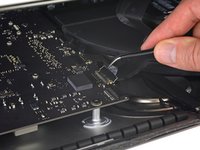
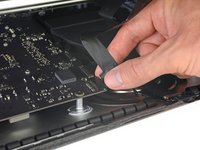
ディスプレイデータケーブルのメタル製固定ブラケットをロジックボード側に向けて下向きに装着します。
While the previous step refers to “cables,” plural, this step suggests that only the display cable needs to be reinstalled in order to test working order. In my experience (iMac 21-1/2" Retina 4K Display, late 2015), I found that I had to also reconnect the camera/microphone cable in order for the screen to work. [6/7/21]
-
-
-
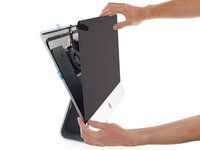
ディスプレイをiMacの背面エンクロージャに戻します。
-
デバイスを密閉する前に、iMacの電源を入れて、修理が成功しているか点検してください。 取り外したり、接続を外した全ハードウェアの機能を必ず確認してください。
At this point I tested everything to make sure it worked, including the microphone. It was a bit muffled so I poked it with a pin to try and clear it. This was incredibly stupid because (a) the muffling was due to the backing which I was about to remove from the strip (b) poking with a pin broke the microphone.
I’m not going to buy a new microphone (£72 apparently) and a new set of strips, so I’ll get an external USB microphone instead.
But to anyone else, if the microphone sound is muffled, don’t worry!
-
-
-
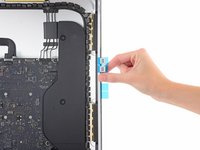
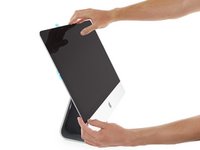
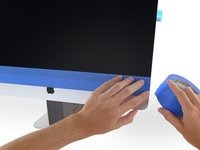
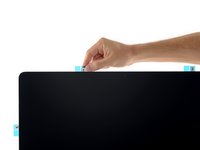
iMacの機能が正しく動いていることが確認できたら、ディスプレイケーブルの接続を外して、ディスプレイを慎重に前向きに傾けます。
-
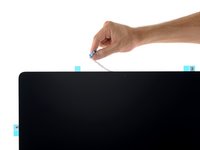
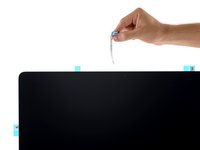
ピンセットで2つの下部ストリップの裏地を剥がします。ブルーのタブをディスプレイの下部端からまっすぐ上向きに引っ張ります。
-
-
-
しっかりと固定するには、iMacの背面を慎重に平らに傾けて(スクリーンを真上に向けて)、ディスプレイの四隅全てをしっかりと押します。
-
ディスプレイをリアエンクロージャーに固定しているマスキングテープを剥がします。
Yo lo pongo sobre una manta con la pantalla apoyada sobre la manta.Pongo trapos o papel de cocina doblado alrededor de la pantalla y lo sujeto con pinzas de tender ropa.Lo dejo así 24 horas y queda perfecto. Saludos y gracias por el tutorial.
-


デバイスを再組み立てする際は、これらのインスラクションを逆の順番に従って作業を進めてください。
デバイスを再組み立てする際は、これらのインスラクションを逆の順番に従って作業を進めてください。
18 の人々がこのガイドを完成させました。
以下の翻訳者の皆さんにお礼を申し上げます:
100%

これらの翻訳者の方々は世界を修理する私たちのサポートをしてくれています。 あなたも貢献してみませんか?
翻訳を始める ›

2 件のコメント
Thanks so much for this thorough guide. I had never dared do something like opening a computer and changing the hard drive. Not on an iMac, anyway. I was successful in changing my HDD with a SSD.
I made one out of a square cardboard box, and working well so far
Will Moindrot - 返信