はじめに
Use this guide to replace the daughterboard in your TicWatch Pro 3 GPS.
You’ll need replacement adhesive when reassembling the device. Your device will function normally, but will lose its IP (Ingress Protection) rating.
必要な工具と部品
-
-
Before starting repairs, take your watch off the charger and power it down.
-
Remove the watch band.
-
-
-
Use a Torx T3 screwdriver to remove the four 4.1 mm-long screws securing the back cover.
-
-
-
Apply a heated iOpener to the rear side of the watch for 5 minutes to loosen the adhesive underneath.
-
-
-
Insert the flat end of a spudger into the microphone opening at the top edge of the back cover.
-
Pry upwards to loosen the back cover assembly. This may require some force.
-
Swing the back cover assembly open by 45 degrees to gain access to the sensor assembly cable.
-
-
-
-
Use a spudger to disconnect the sensor assembly cable by prying the connector straight up from its socket.
-
-
-
Use a spudger to disconnect the interconnect cable by prying the connector straight up from its socket.
-
-
-
Use a spudger to disconnect the microphone cable by prying the connector straight up from its socket.
-
-
-
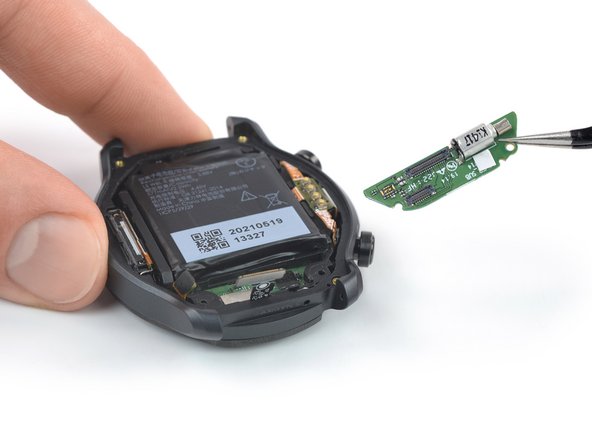
Use a Phillips screwdriver to remove the two 4.1 mm-long screws securing the daughterboard.
-
-
-
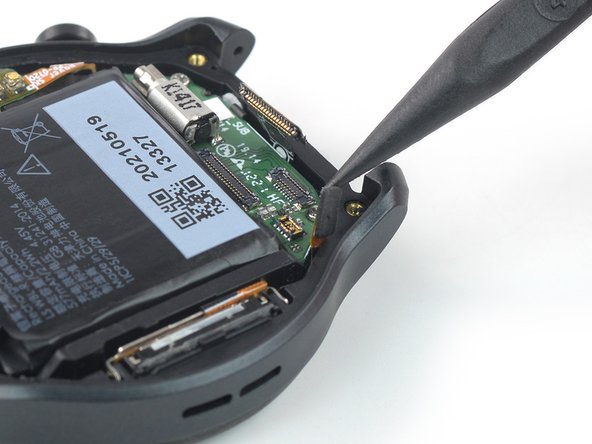
Insert the point of a spudger between the watch housing and the edge of the daughterboard.
-
Pry upwards to loosen the daughterboard.
-
-


Compare your new replacement part to the original part—you may need to transfer remaining components or remove adhesive backings from the new part before you install it.
To reassemble your device, follow these instructions in reverse order.
During reassembly, apply new adhesive where it's necessary after cleaning the relevant areas with isopropyl alcohol (>90%).
Take your e-waste to an R2 or e-Stewards certified recycler.
Repair didn’t go as planned? Try some basic troubleshooting, or ask our TicWatch Pro 3 answers community for help.
ある他の人がこのガイドを完成しました。


3 件のコメント
Thanks for this amazing guide!
I will use for change the battery of my ticwatch 3 pro gps but I have a big problem.
I need also to change the back cover of the watch and I didn't find a shop or a website that have this replacemnt.
Do you have any informations about it?
Thanks and have a nice day.
Where can I buy a daughterboard?
For those of you with button problems you can see the tactile switches attached... Mobvoi does not sell this part or any part.