はじめに
Samsung Galaxy S8の壊れた画面を交換するにはこのガイドをご利用ください。
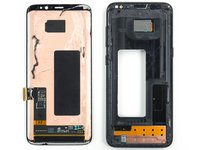
ご注意:このガイドはオリジナルのフレーム、マザーボード、バッテリーを所定の場所に残したままディスプレイのみを交換する方法です。 しかし、ある交換用のスクリーンパーツにはフレーム(別名:カシス/筐体)が一緒についているものがあります。この場合、作業方法が異なってきますのでご注意ください。—内部コンポーネントを新しいフレームに移して、新しいバッテリーを搭載します。このガイドを参照して作業を始める前に、正しいパーツを入手しているか確認してください。
このガイドにはリアガラスカバーを外す作業が含まれますので、デバイス本体の裏側カバーに再装着する交換用の圧着剤が必要です。もし交換用のスクリーンに圧着剤が含まれない場合は、テープを代わりに使用することもできます。
フレームにダメージが入っていたり凹んでいる場合は、交換することができません。交換すると新しい交換用スクリーンが正しく装着されず、不均等なプレッシャーによりダメージを与えてしまいます。
フレームからディスプレイを外す作業では通常、ディスプレイを破壊します。そのためディスプレイを交換しない場合はこのガイドを参照しないでください。
必要な工具と部品
ビデオの概要
-
-
鍋を十分な量のお湯で満たして、iOpener を完全に沈めます。
-
お湯を沸かして熱くなったら火を止めます。
-
iOpenerを熱湯の中に約2−3分間沈めます。iOpener全体が完全に浸かっているか確認してください。
-
トングなどを浸かって、温まったiOpenerをお湯から取り出します。
-
タオルでiOpener全体を拭き取ります。
-
iOpenerの準備は整いました。iOpenerを再度温める必要がある場合は、お湯を沸騰させて、火を止めてからiOpenerを2-3分間浸してください。
-
-
-
-
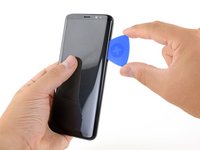
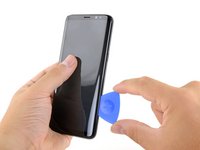
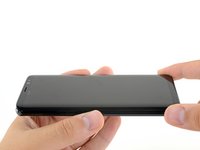
スクリーンを触って温まっていれば、電話本体の温まったエッジ付近に吸盤カップを装着します。カーブしているエッジ上には装着しないでください。
-
スクリーンがひび割れている場合、吸盤カップは装着できません。より強力なテープを使って持ち上げたり、吸盤カップに強力ボンドをつけて引き上げると上手くいきます。
-
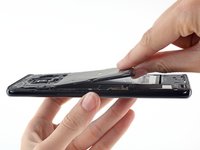
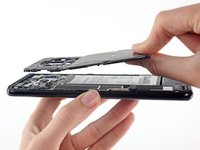
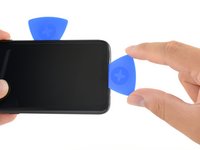
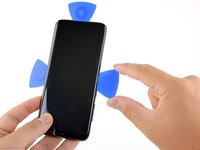
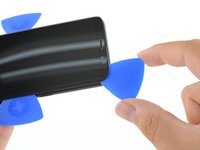
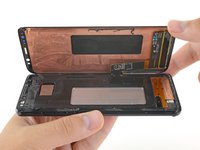
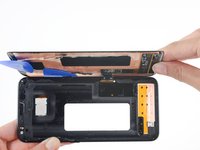
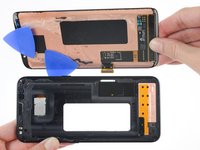
吸盤カップを持ち上げて、開口ピックをディスプレイアセンブリの下に挿入します。
-


圧着剤の再装着後は、これらのインストラクションを逆の順番に従って、デバイスを再組み立てしてください。
この修理を完成後、このガイドに従って、修理がうまくいったかどうかテストしてください。
237 の人々がこのガイドを完成させました。
以下の翻訳者の皆さんにお礼を申し上げます:
100%

これらの翻訳者の方々は世界を修理する私たちのサポートをしてくれています。 あなたも貢献してみませんか?
翻訳を始める ›

36件のガイドコメント
Did my first repair two days ago. If you've done any other samsung repairs such as S7 or S7E, this will be cake for you to do. If you have big fingers like I do, the most challenging thing will be the fingerprint scanner flex on the back glass, connecting and reconnecting.
I go about this repair a bit differently if I want to salvage the lcd. I remove the battery motherboard and sensors , and start through the opening in the frame under the battery. I drip isopropyl alcohol along the perimeter of the battery opening applying heat and work a playing card in between the LCD and the frame, loosening adhesive as I go.
I like the way you think.
Thank you. My utterly novice self ordered only the glass, thinking it would be moderately easy for a layman. I didn't realize the LCD was nearly permanently stuck to it, and don't have $190 to replace it. I'll try your way. Thanks!
Great guide, very accurate. Be very careful along the right side of the device, as it is very, very easy to shear the connector flex in half. To avoid any chance of damage, I remove the board and front camera/sensor flex. It's an easy job, and saves a massive headache if any parts are damaged. Overall quite a familiar phone to work on, if you've ever done any S6's and upwards.
Harry Rowse - 返信 共有