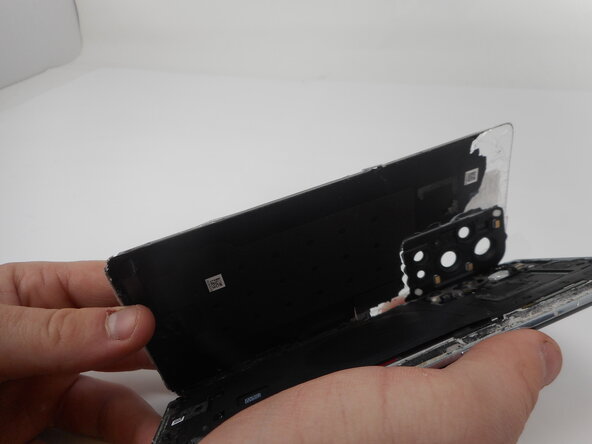
メインコンテンツにスキップ

OnePlus 9 Pro Battery Replacement

必要な工具と部品

  1. OnePlus 9 Pro Battery Replacement, Rear Glass: 手順 1、 1の画像 1
    • For your safety, discharge your battery below 25% before disassembling your phone. This reduces the risk of a dangerous thermal event if the battery is accidentally damaged during the repair. If your battery is swollen, take appropriate precautions.

    • Unplug any chargers/peripheries and power off your phone.

  2. OnePlus 9 Pro Battery Replacement: 手順 2、 1の画像 1
  3. OnePlus 9 Pro Battery Replacement: 手順 3、 2の画像 1 OnePlus 9 Pro Battery Replacement: 手順 3、 2の画像 2
    • Use a hair dryer to lightly heat the perimeter of the rear glass.

    • Additionally, heat the top-right corner, as there is adhesive further inside of phone in that one spot.

    • Do not hold the hair dryer in one spot on the phone for too long to prevent damage to internal parts of the phone.

  4. OnePlus 9 Pro Battery Replacement: 手順 4、 1の画像 1
    • Apply a suction handle as close to the bottom edge as possible.

    • Pull up on the suction handle with strong, steady force to create a gap between the glass and the frame.

    • If you have trouble creating a gap, apply more heat to further soften the adhesive.

    • Insert an opening pick into the gap.

  5. OnePlus 9 Pro Battery Replacement: 手順 5、 1の画像 1
    • Slide the opening pick around the perimeter of the rear glass to slice the adhesive.

    • Insert additional opening picks as you slice the adhesive to prevent the adhesive from resealing.

    • If the adhesive becomes hard to cut, it has most likely cooled down. Use your hair dryer to reheat it.

  6. OnePlus 9 Pro Battery Replacement: 手順 6、 2の画像 1 OnePlus 9 Pro Battery Replacement: 手順 6、 2の画像 2
    • Carefully lift the rear glass up and off of the phone.

    • During reassembly secure the rear glass with pre-cut adhesive or double-sided adhesive tape. After installing the rear glass, apply strong, steady pressure to your phone for several minutes to help the adhesive form a good bond—a stack of heavy books works well.

  7. OnePlus 9 Pro Battery Replacement, Battery: 手順 7、 3の画像 1 OnePlus 9 Pro Battery Replacement, Battery: 手順 7、 3の画像 2 OnePlus 9 Pro Battery Replacement, Battery: 手順 7、 3の画像 3
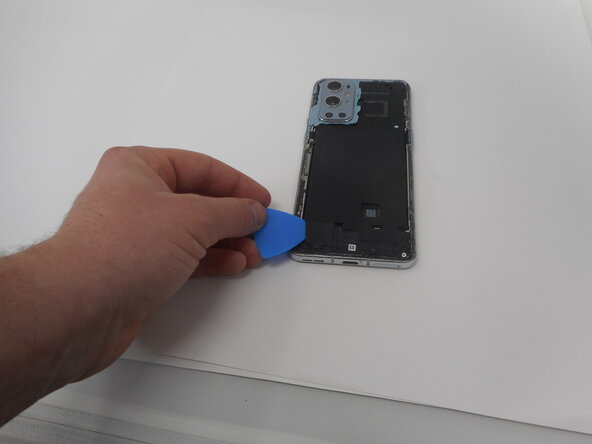
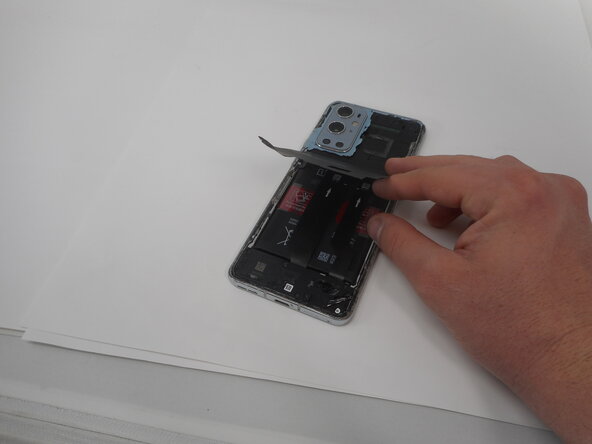
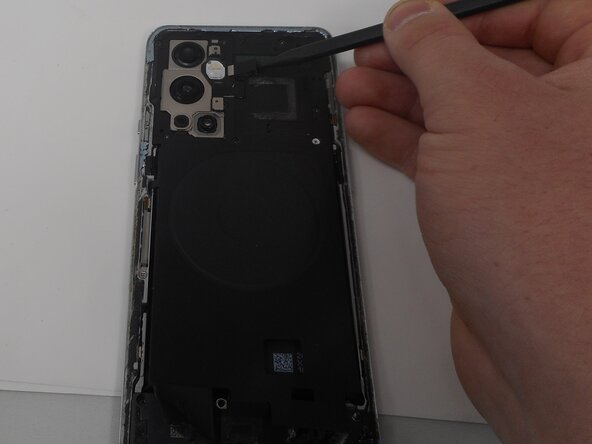
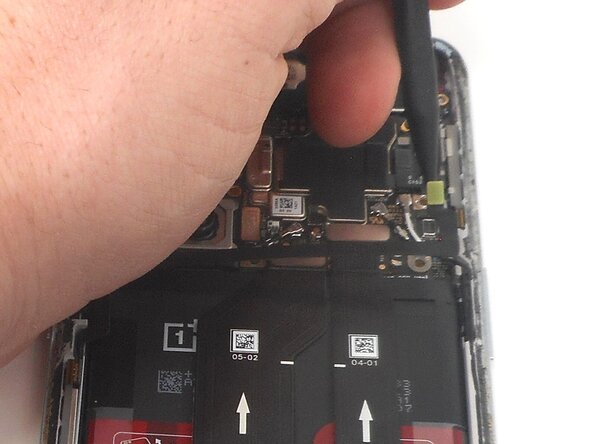
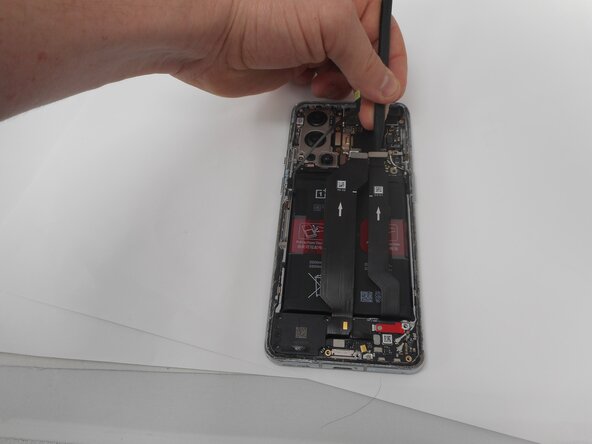
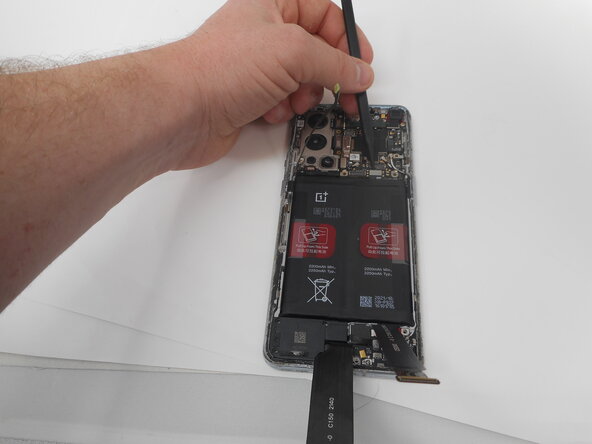
    • Use an opening pick or tweezers to carefully peel back the adhesive on the bottom of the wireless charging module.

  8. OnePlus 9 Pro Battery Replacement: 手順 8、 3の画像 1 OnePlus 9 Pro Battery Replacement: 手順 8、 3の画像 2 OnePlus 9 Pro Battery Replacement: 手順 8、 3の画像 3
    • Pry on the bottom of the flash module off using a pick and use tweezers to get under the module without ripping it.

    • Be careful unplugging the module as the cable is very delicate.

  9. OnePlus 9 Pro Battery Replacement: 手順 9、 1の画像 1
    • Use a Phillips #000 screwdriver to remove the eleven 4.8 mm-long screws securing the motherboard cover.

  10. OnePlus 9 Pro Battery Replacement: 手順 10、 3の画像 1 OnePlus 9 Pro Battery Replacement: 手順 10、 3の画像 2 OnePlus 9 Pro Battery Replacement: 手順 10、 3の画像 3
    • Pry around the phone with picks to remove the motherboard cover.

  11. OnePlus 9 Pro Battery Replacement: 手順 11、 1の画像 1
    • Lift off the motherboard cover.

  12. OnePlus 9 Pro Battery Replacement: 手順 12、 2の画像 1 OnePlus 9 Pro Battery Replacement: 手順 12、 2の画像 2
    • Pry up and disconnect the press connector ribbon cable in the top right with a spudger.

    • Make sure not to damage them in the process.

  13. OnePlus 9 Pro Battery Replacement: 手順 13、 3の画像 1 OnePlus 9 Pro Battery Replacement: 手順 13、 3の画像 2 OnePlus 9 Pro Battery Replacement: 手順 13、 3の画像 3
    • Use a spudger to disconnect the two interconnect cables from the motherboard by prying the connector straight up from its socket.

  14. OnePlus 9 Pro Battery Replacement: 手順 14、 2の画像 1 OnePlus 9 Pro Battery Replacement: 手順 14、 2の画像 2
    • Take care not to bend or puncture battery during the removal procedure—a bent battery may leak dangerous chemicals or cause a fire.

    • Remove the battery from the phone by slowly pulling up on the red tabs.

    • If you're having trouble lifting the battery out of its recess, apply a heated iOpener to the screen side for two minutes to loosen the battery adhesive.

    • A hair dryer, heat gun, or hot plate may also be used, but be careful not to overheat the device.

終わりに

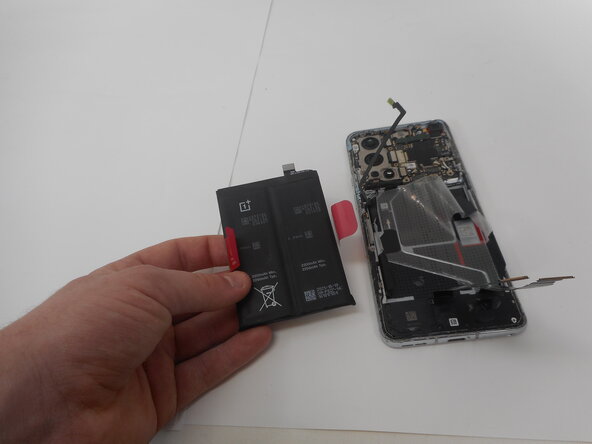
To reassemble your device, follow the above steps in reverse order.

For optimal performance, after completing this guide, calibrate your newly installed battery.

Take your e-waste to an R2 or e-Stewards certified recycler.

Repair didn’t go as planned? Try some basic troubleshooting or ask our Answers community for help.

4 の人々がこのガイドを完成させました。

作成者

2人の作成者と共同で作成されました。

Brayan Santana

メンバー登録日: 02/19/25

641 ポイント

3のガイドは作成済み

チーム

University of Memphis, Team 1-1, Sneed Spring 2025 University of Memphis, Team 1-1, Sneed Spring 2025人のメンバー

UM-SNEED-S25S1G1

4 メンバー

9のガイドは作成済み

0件のガイドコメント

コメントを追加

統計データ:

過去 24時間: 25

過去 7 日: 177

過去 30 日: 721

今までの合計 3,769