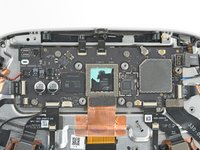
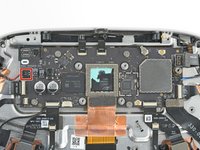
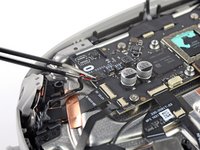
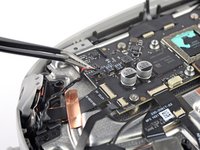
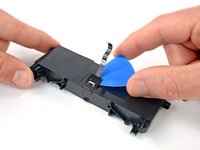
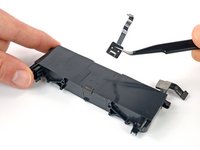
メインコンテンツにスキップ
リペアコミュニティに参加 - アカウントの作成

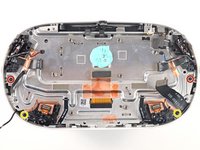
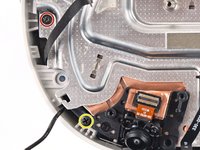
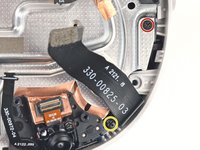
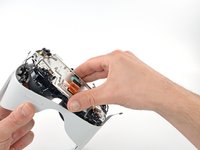
Meta Quest 2 Headset Battery Replacement

必要な工具と部品

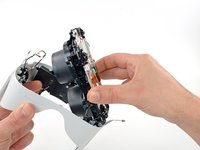
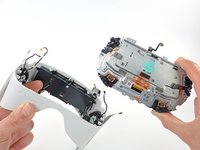
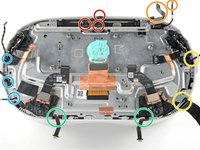
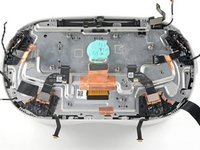
  1. Meta Quest 2 Headset Battery Replacement, Power off your Meta Quest 2: 手順 1、 1の画像 1
    • Hold the power button for three seconds to fully turn off your headset.

    • You'll hear a power down chime, and the LED next to the power button will turn off.

    FixBotに聞いてみる
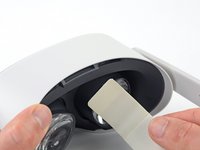
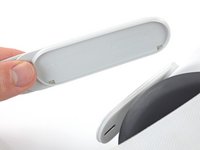
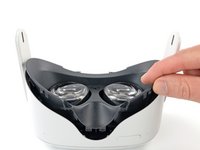
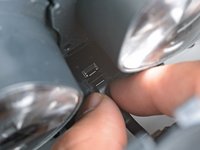
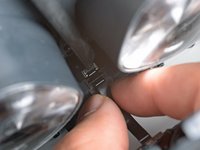
  2. Meta Quest 2 Headset Battery Replacement, Remove the facial interface: 手順 2、 2の画像 1 Meta Quest 2 Headset Battery Replacement, Remove the facial interface: 手順 2、 2の画像 2
    • Grasp and pull on the nose section of the facial interface to unclip it from the headset.

    FixBotに聞いてみる
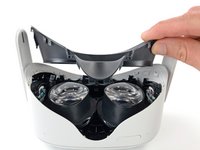
  3. Meta Quest 2 Headset Battery Replacement: 手順 3、 2の画像 1 Meta Quest 2 Headset Battery Replacement: 手順 3、 2の画像 2
    • Grasp and pull on the top section of the facial interface to unclip it from the headset.

    FixBotに聞いてみる
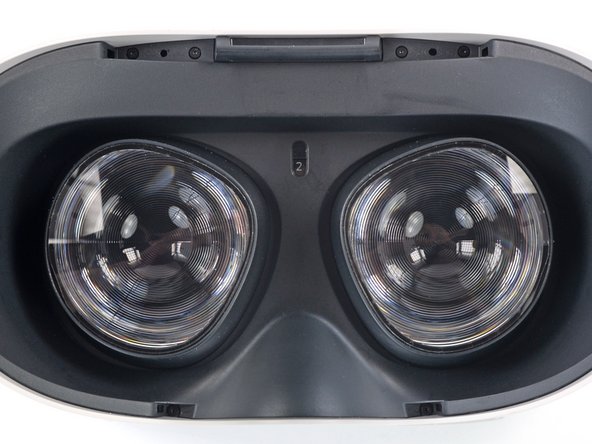
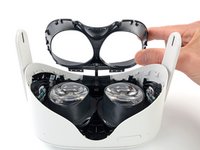
  4. Meta Quest 2 Headset Battery Replacement: 手順 4、 1の画像 1
    • Remove the facial interface.

    • During reassembly, align the facial interface to the headset and use your fingers to press along the perimeter to clip it back in.

    FixBotに聞いてみる
  5. Meta Quest 2 Headset Battery Replacement, Unclip the side straps: 手順 5、 3の画像 1 Meta Quest 2 Headset Battery Replacement, Unclip the side straps: 手順 5、 3の画像 2 Meta Quest 2 Headset Battery Replacement, Unclip the side straps: 手順 5、 3の画像 3
    • Use your fingers to grasp the right strap near the headset.

    • Peel the right strap away from the headset arm to unclip it.

    FixBotに聞いてみる
  6. Meta Quest 2 Headset Battery Replacement: 手順 6、 2の画像 1 Meta Quest 2 Headset Battery Replacement: 手順 6、 2の画像 2
    • Repeat the procedure to peel the left strap away from the arm to unclip it.

    FixBotに聞いてみる
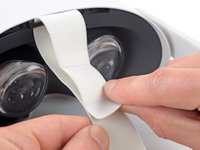
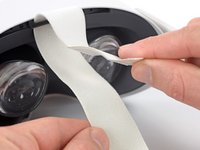
  7. Meta Quest 2 Headset Battery Replacement, Remove the top strap: 手順 7、 2の画像 1 Meta Quest 2 Headset Battery Replacement, Remove the top strap: 手順 7、 2の画像 2
    • Separate the hook and loop strip on the top strap.

    FixBotに聞いてみる
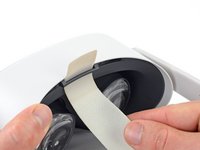
  8. Meta Quest 2 Headset Battery Replacement, Remove the head strap: 手順 8、 2の画像 1 Meta Quest 2 Headset Battery Replacement, Remove the head strap: 手順 8、 2の画像 2
    • Unthread the top strap from its bracket.

    • Remove the head strap.

    FixBotに聞いてみる
  9. Meta Quest 2 Headset Battery Replacement, Remove the eyepiece trim screws: 手順 9、 2の画像 1 Meta Quest 2 Headset Battery Replacement, Remove the eyepiece trim screws: 手順 9、 2の画像 2
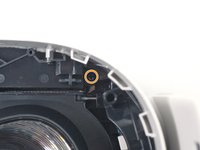
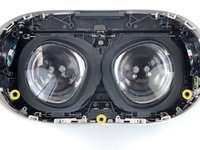
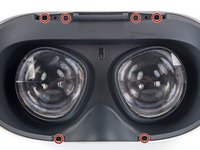
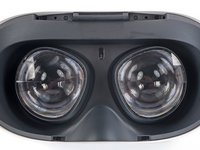
    • Use a Torx T2 driver to remove the six 3.5 mm‑long screws securing the eyepiece trim.

    FixBotに聞いてみる
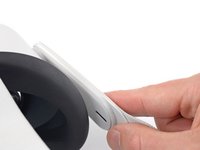
  10. Meta Quest 2 Headset Battery Replacement, Release the eyepiece trim clips: 手順 10、 2の画像 1 Meta Quest 2 Headset Battery Replacement, Release the eyepiece trim clips: 手順 10、 2の画像 2
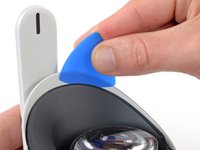
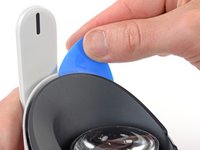
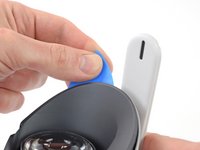
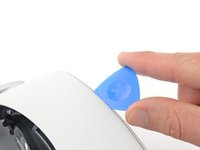
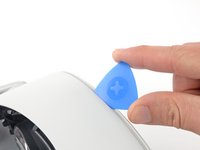
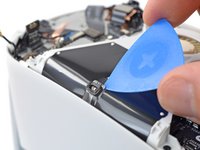
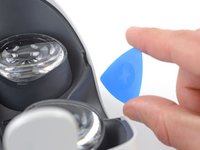
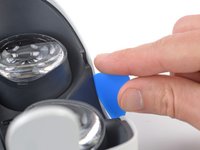
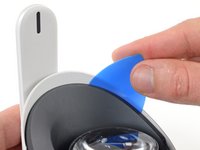
    • Insert an opening pick into the seam between the eyepiece trim and white outer shell, near the nose cutout.

    FixBotに聞いてみる
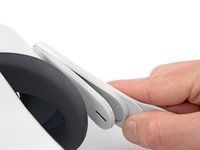
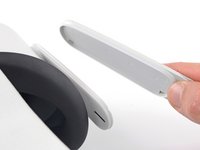
  11. Meta Quest 2 Headset Battery Replacement: 手順 11、 3の画像 1 Meta Quest 2 Headset Battery Replacement: 手順 11、 3の画像 2 Meta Quest 2 Headset Battery Replacement: 手順 11、 3の画像 3
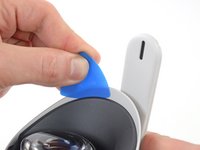
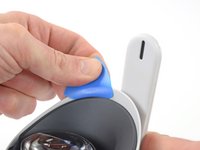
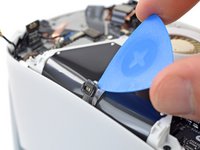
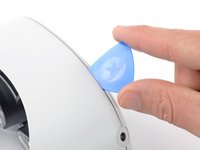
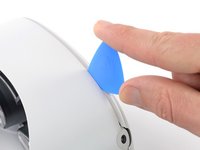
    • Slide the opening pick to the right along the seam to release the clips securing the eyepiece trim.

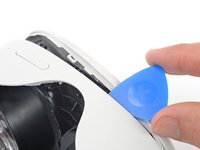
    • Pry with the opening pick to release the clips securing the right side of the eyepiece trim.

    • Leave the opening pick in the seam to prevent the clips from reengaging.

    FixBotに聞いてみる
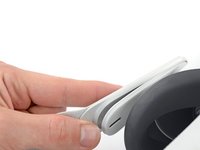
  12. Meta Quest 2 Headset Battery Replacement: 手順 12、 3の画像 1 Meta Quest 2 Headset Battery Replacement: 手順 12、 3の画像 2 Meta Quest 2 Headset Battery Replacement: 手順 12、 3の画像 3
    • Repeat the prying procedure along the left edge to release the clips securing the eyepiece trim.

    • During reassembly, press your fingers along the perimeter of the eyepiece trim to clip it back in place.

    FixBotに聞いてみる
  13. Meta Quest 2 Headset Battery Replacement, Reposition the eyepiece trim: 手順 13、 3の画像 1 Meta Quest 2 Headset Battery Replacement, Reposition the eyepiece trim: 手順 13、 3の画像 2 Meta Quest 2 Headset Battery Replacement, Reposition the eyepiece trim: 手順 13、 3の画像 3
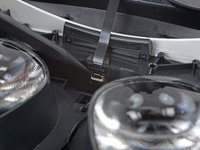
    • Don’t try to fully remove the eyepiece trim in this step. It’s still connected to the headset by a short cable.

    • Lift the eyepiece trim slightly and tilt it towards the top edge of the headset.

    • Set the trim down on your work surface, making sure not to strain the cable.

    FixBotに聞いてみる
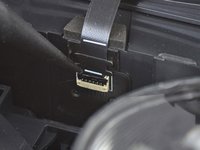
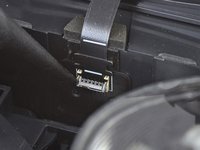
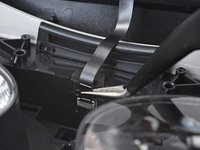
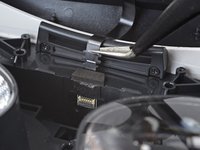
  14. Meta Quest 2 Headset Battery Replacement, Disconnect the face sensor: 手順 14、 3の画像 1 Meta Quest 2 Headset Battery Replacement, Disconnect the face sensor: 手順 14、 3の画像 2 Meta Quest 2 Headset Battery Replacement, Disconnect the face sensor: 手順 14、 3の画像 3
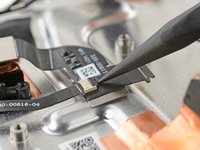
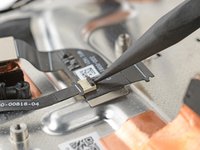
    • Use the point of a spudger to flip open the black lock tab on the ZIF connector securing the face sensor cable.

    FixBotに聞いてみる
  15. Meta Quest 2 Headset Battery Replacement: 手順 15、 2の画像 1 Meta Quest 2 Headset Battery Replacement: 手順 15、 2の画像 2
    この手順で使用する道具:
    Tweezers
    $4.99
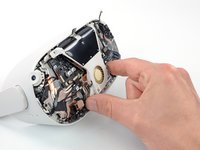
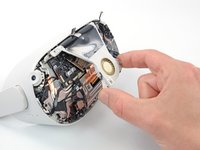
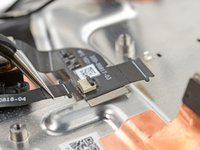
    • Use tweezers to pull the face sensor cable out of the ZIF connector.

    FixBotに聞いてみる
  16. Meta Quest 2 Headset Battery Replacement, Remove the eyepiece trim: 手順 16、 1の画像 1
    • Remove the eyepiece trim.

    FixBotに聞いてみる
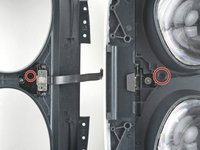
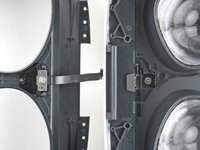
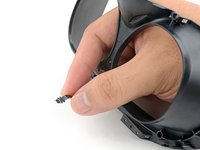
  17. Meta Quest 2 Headset Battery Replacement, Reassembly note: 手順 17、 2の画像 1 Meta Quest 2 Headset Battery Replacement, Reassembly note: 手順 17、 2の画像 2
    • During reassembly:

    • Make sure the lens spacing matches the spacing indicator. This allows the indicator peg to sit correctly in its notch.

    • If the lens spacing doesn't match the indicator, manually adjust the lens with your fingers.

    FixBotに聞いてみる
  18. Meta Quest 2 Headset Battery Replacement, Reassembly note: 手順 18、 3の画像 1 Meta Quest 2 Headset Battery Replacement, Reassembly note: 手順 18、 3の画像 2 Meta Quest 2 Headset Battery Replacement, Reassembly note: 手順 18、 3の画像 3
    • During reassembly, the face sensor cable can be tricky to connect. Follow these tips to connect the cable:

    • Thread your fingers through the eyepiece trim’s eyeholes and grasp the edges of the sensor cable.

    • Slide the sensor cable into the socket until the first set of tabs rests in the socket. This should flip the lock tab down partially.

    • Use a spudger to press the lock tab down towards the cable to lock it in place.

    FixBotに聞いてみる
  19. Meta Quest 2 Headset Battery Replacement, Remove the front cover screws: 手順 19、 3の画像 1 Meta Quest 2 Headset Battery Replacement, Remove the front cover screws: 手順 19、 3の画像 2 Meta Quest 2 Headset Battery Replacement, Remove the front cover screws: 手順 19、 3の画像 3
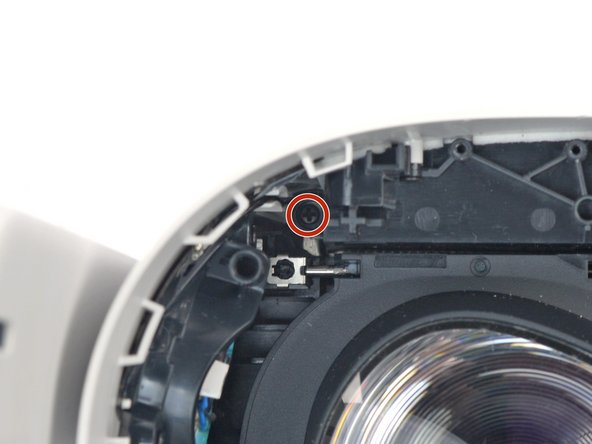
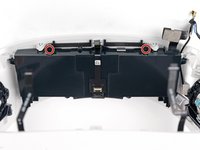
    • Use a Phillips screwdriver to remove the five 7.7 mm‑long screws securing the front cover to the headset:

    • One recessed in the top-left corner

    • One recessed in the top-right corner

    • Three along the lower edge

    FixBotに聞いてみる
  20. Meta Quest 2 Headset Battery Replacement, Release the front cover clips: 手順 20、 2の画像 1 Meta Quest 2 Headset Battery Replacement, Release the front cover clips: 手順 20、 2の画像 2
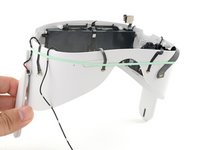
    • The front cover is still held in place by clips along the bottom and side edges.

    • Insert an opening pick into the seam between the bottom edge of the front cover and the headset.

    • Pry with the opening pick to release the front cover clips.

    FixBotに聞いてみる
  21. Meta Quest 2 Headset Battery Replacement: 手順 21、 3の画像 1 Meta Quest 2 Headset Battery Replacement: 手順 21、 3の画像 2 Meta Quest 2 Headset Battery Replacement: 手順 21、 3の画像 3
    • Slide the opening clip along the seam and pry to release all the clips securing the front cover.

    FixBotに聞いてみる
  22. Meta Quest 2 Headset Battery Replacement, Remove the front cover: 手順 22、 1の画像 1
    • Remove the front cover.

    FixBotに聞いてみる
  23. Meta Quest 2 Headset Battery Replacement, Disconnect the top right antenna: 手順 23、 3の画像 1 Meta Quest 2 Headset Battery Replacement, Disconnect the top right antenna: 手順 23、 3の画像 2 Meta Quest 2 Headset Battery Replacement, Disconnect the top right antenna: 手順 23、 3の画像 3
    この手順で使用する道具:
    Tweezers
    $4.99
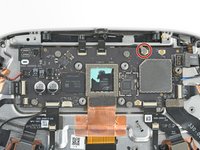
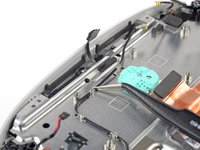
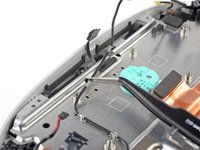
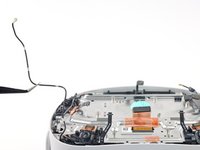
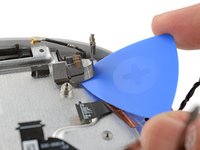
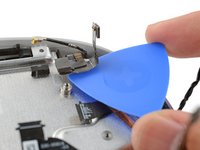
    • Use a pair of tweezers to grasp the metal neck of the top-right antenna cable.

    • Lift the antenna connector straight up to disconnect it.

    • Guide the antenna cable out of its metal clip holding it in place.

    FixBotに聞いてみる
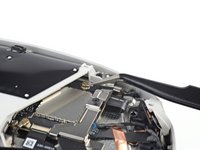
  24. Meta Quest 2 Headset Battery Replacement, Remove the battery cable bracket: 手順 24、 1の画像 1
    • Use a Phillips screwdriver to remove the three screws securing the battery cable bracket:

    • One 4.4 mm‑long screw

    • Two 2.3 mm‑long screws

    FixBotに聞いてみる
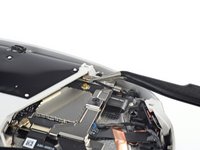
  25. Meta Quest 2 Headset Battery Replacement: 手順 25、 3の画像 1 Meta Quest 2 Headset Battery Replacement: 手順 25、 3の画像 2 Meta Quest 2 Headset Battery Replacement: 手順 25、 3の画像 3
    • Use tweezers or your fingers to grasp the battery cable bracket.

    • Twist the cable bracket slightly so that its bottom left corner unclips from the motherboard.

    • Remove the battery cable bracket.

    FixBotに聞いてみる
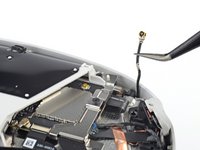
  26. Meta Quest 2 Headset Battery Replacement, Disconnect the battery: 手順 26、 2の画像 1 Meta Quest 2 Headset Battery Replacement, Disconnect the battery: 手順 26、 2の画像 2
    • Use a spudger to pry up and disconnect the battery press connector from the motherboard.

    • The battery press connector can disconnect accidentally during reassembly. Check this connector before you attach the bracket.

    FixBotに聞いてみる
  27. Meta Quest 2 Headset Battery Replacement, Disconnect the antenna: 手順 27、 3の画像 1 Meta Quest 2 Headset Battery Replacement, Disconnect the antenna: 手順 27、 3の画像 2 Meta Quest 2 Headset Battery Replacement, Disconnect the antenna: 手順 27、 3の画像 3
    この手順で使用する道具:
    Tweezers
    $4.99
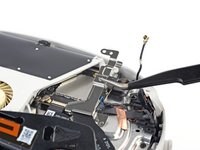
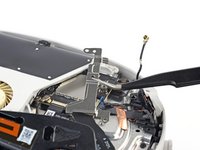
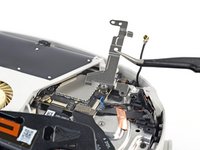
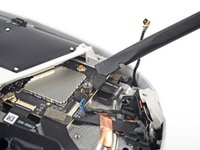
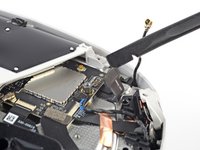
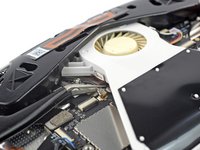
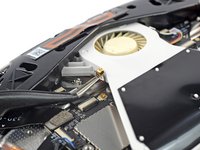
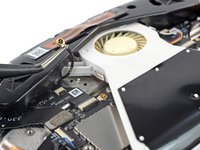
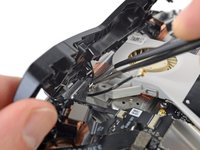
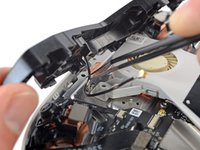
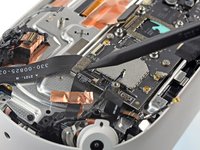
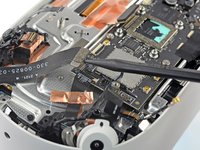
    • Insert one arm of a pair of tweezers under the metal neck of the black antenna cable near the fan assembly.

    • Lift the antenna connector straight up to disconnect it.

    • Guide the antenna cable out of its metal clip holding it in place.

    FixBotに聞いてみる
  28. Meta Quest 2 Headset Battery Replacement, Loosen the front antenna assembly: 手順 28、 2の画像 1 Meta Quest 2 Headset Battery Replacement, Loosen the front antenna assembly: 手順 28、 2の画像 2
    • Use a Phillips screwdriver to remove the eight screws securing the antenna assembly to the headset:

    • Four 4.4 mm‑long screws

    • Two 4.8 mm‑long screws

    • Two 10.7 mm‑long screws

    FixBotに聞いてみる
  29. Meta Quest 2 Headset Battery Replacement: 手順 29、 2の画像 1 Meta Quest 2 Headset Battery Replacement: 手順 29、 2の画像 2
    • Use your fingers to flip up the antenna assembly enough to access the cable underneath it.

    FixBotに聞いてみる
  30. Meta Quest 2 Headset Battery Replacement: 手順 30、 2の画像 1 Meta Quest 2 Headset Battery Replacement: 手順 30、 2の画像 2
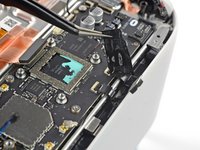
    • Use tweezers to unclip the antenna cable from its metal clip.

    FixBotに聞いてみる
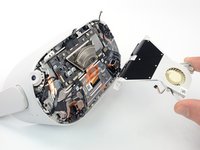
  31. Meta Quest 2 Headset Battery Replacement, Remove the front antenna assembly: 手順 31、 1の画像 1
    • Remove the front antenna assembly.

    FixBotに聞いてみる
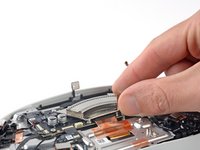
  32. Meta Quest 2 Headset Battery Replacement, Disconnect the fan: 手順 32、 2の画像 1 Meta Quest 2 Headset Battery Replacement, Disconnect the fan: 手順 32、 2の画像 2
    この手順で使用する道具:
    Tweezers
    $4.99
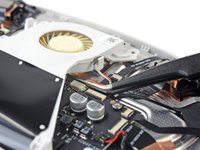
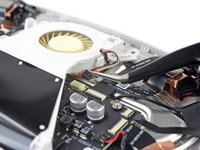
    • Use tweezers to grab the fan connector and carefully slide it out of its socket.

    FixBotに聞いてみる
  33. Meta Quest 2 Headset Battery Replacement, Loosen the LED flex cable: 手順 33、 2の画像 1 Meta Quest 2 Headset Battery Replacement, Loosen the LED flex cable: 手順 33、 2の画像 2
    • Use the point of an opening pick to loosen the adhesive securing the LED flex cable from the top of the fan assembly.

    FixBotに聞いてみる
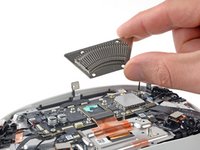
  34. Meta Quest 2 Headset Battery Replacement, Remove the fan assembly: 手順 34、 1の画像 1
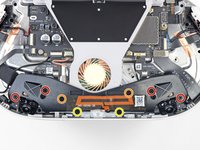
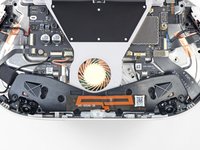
    • Remove the two screws securing the fan assembly to the headset:

    • One 4.4 mm‑long Phillips screw

    • One 3.6 mm‑long Torx T2 screw

    FixBotに聞いてみる
  35. Meta Quest 2 Headset Battery Replacement: 手順 35、 3の画像 1 Meta Quest 2 Headset Battery Replacement: 手順 35、 3の画像 2 Meta Quest 2 Headset Battery Replacement: 手順 35、 3の画像 3
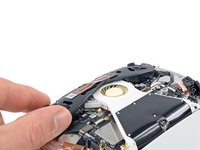
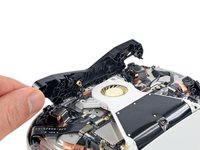
    • Lift the fan assembly and remove it.

    FixBotに聞いてみる
  36. Meta Quest 2 Headset Battery Replacement, Remove the heat sink: 手順 36、 1の画像 1
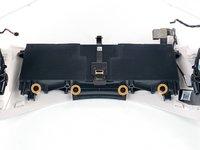
    • Use a Phillips screwdriver to remove the four 2.3 mm‑long screws securing the heat sink to the motherboard.

    FixBotに聞いてみる
  37. Meta Quest 2 Headset Battery Replacement: 手順 37、 2の画像 1 Meta Quest 2 Headset Battery Replacement: 手順 37、 2の画像 2
    この手順で使用する道具:
    iFixit Thermal Putty
    $9.95
    • Use your fingers to lift the heat sink and remove it.

    • You may feel a bit of resistance. This is normal since the midframe is slightly bonded to the heat sink with thermal paste.

    • You can reuse the thermal paste if you keep it clean. Otherwise, use a spudger to scrape off the old paste and apply a small amount of thermal putty or viscous thermal compound (such as K5 Pro) to the processor.

    FixBotに聞いてみる
  38. Meta Quest 2 Headset Battery Replacement, Reassembly note: 手順 38、 2の画像 1 Meta Quest 2 Headset Battery Replacement, Reassembly note: 手順 38、 2の画像 2
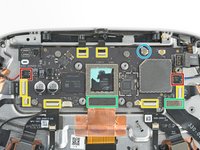
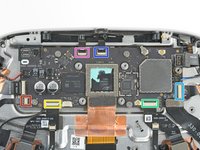
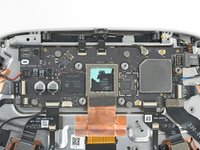
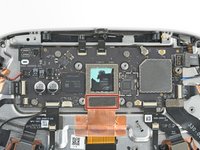
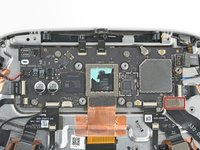
    • During reassembly, stop here and check if these twelve connectors are properly connected to the motherboard:

    • Two speaker connectors

    • Seven ZIF connectors

    • Two press connectors

    • One antenna connector

    • There are additional connectors on the motherboard, but they shouldn't be connected at this point.

    FixBotに聞いてみる
  39. Meta Quest 2 Headset Battery Replacement, Disconnect the speaker connectors: 手順 39、 3の画像 1 Meta Quest 2 Headset Battery Replacement, Disconnect the speaker connectors: 手順 39、 3の画像 2 Meta Quest 2 Headset Battery Replacement, Disconnect the speaker connectors: 手順 39、 3の画像 3
    この手順で使用する道具:
    Tweezers
    $4.99
    • Use tweezers to grip the left speaker cables at the base of their motherboard connector.

    • Lift the connector gently straight up to disconnect it.

    • During reassembly, use the flat end of a spudger to press the speaker cable into the rubber holding clip.

    FixBotに聞いてみる
  40. Meta Quest 2 Headset Battery Replacement: 手順 40、 3の画像 1 Meta Quest 2 Headset Battery Replacement: 手順 40、 3の画像 2 Meta Quest 2 Headset Battery Replacement: 手順 40、 3の画像 3
    • Repeat the disconnection procedure for the right speaker connector.

    • During reassembly, use the flat end of a spudger to press the speaker cable into the rubber holding clip.

    FixBotに聞いてみる
  41. Meta Quest 2 Headset Battery Replacement, Disconnect the ZIF socket flex cables: 手順 41、 2の画像 1 Meta Quest 2 Headset Battery Replacement, Disconnect the ZIF socket flex cables: 手順 41、 2の画像 2
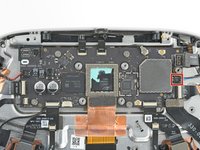
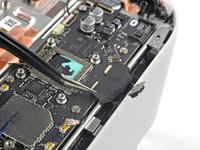
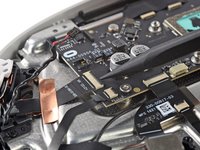
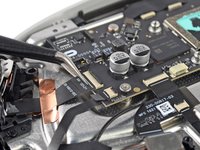
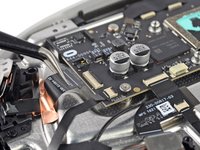
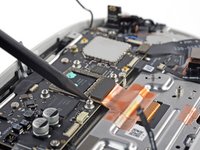
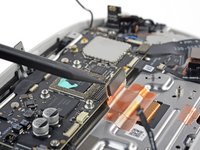
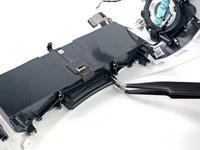
    • Use tweezers to gently peel the black tape covering the two top flex cables.

    • Set the tape aside to be reused during reassembly.

    FixBotに聞いてみる
  42. Meta Quest 2 Headset Battery Replacement: 手順 42、 3の画像 1 Meta Quest 2 Headset Battery Replacement: 手順 42、 3の画像 2 Meta Quest 2 Headset Battery Replacement: 手順 42、 3の画像 3
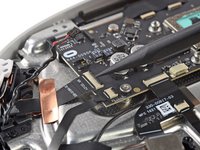
    • Use a clean fingernail or a spudger to pry up the lock tab securing the top left camera cable.

    FixBotに聞いてみる
  43. Meta Quest 2 Headset Battery Replacement: 手順 43、 2の画像 1 Meta Quest 2 Headset Battery Replacement: 手順 43、 2の画像 2
    • Grasp the top left camera cable with tweezers and slide it out of its ZIF connector.

    FixBotに聞いてみる
  44. Meta Quest 2 Headset Battery Replacement: 手順 44、 2の画像 1 Meta Quest 2 Headset Battery Replacement: 手順 44、 2の画像 2
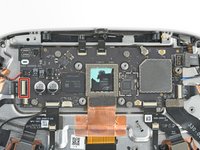
    • Move counter-clockwise around the motherboard and disconnect the remaining six ZIF connectors:

    • Power button and LED board

    • Bottom left camera

    • Bottom right camera

    • Top right camera

    • Face sensor interconnect cable

    • Indicator LED cable

    FixBotに聞いてみる
  45. Meta Quest 2 Headset Battery Replacement, Disconnect the press connectors: 手順 45、 3の画像 1 Meta Quest 2 Headset Battery Replacement, Disconnect the press connectors: 手順 45、 3の画像 2 Meta Quest 2 Headset Battery Replacement, Disconnect the press connectors: 手順 45、 3の画像 3
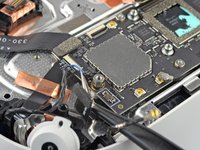
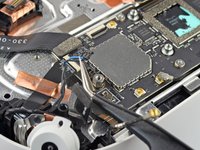
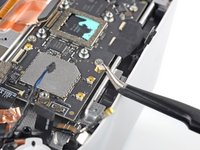
    • Use a spudger to pry up and disconnect the display cable.

    FixBotに聞いてみる
  46. Meta Quest 2 Headset Battery Replacement: 手順 46、 3の画像 1 Meta Quest 2 Headset Battery Replacement: 手順 46、 3の画像 2 Meta Quest 2 Headset Battery Replacement: 手順 46、 3の画像 3
    • Use a spudger to pry up and disconnect the USB‑C and headphone jack cable.

    FixBotに聞いてみる
  47. Meta Quest 2 Headset Battery Replacement: 手順 47、 3の画像 1 Meta Quest 2 Headset Battery Replacement: 手順 47、 3の画像 2 Meta Quest 2 Headset Battery Replacement: 手順 47、 3の画像 3
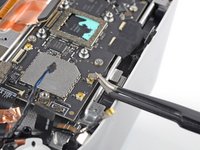
    • Insert one arm of a pair of tweezers under the metal neck of the side antenna cable.

    • Lift the antenna connector straight up to disconnect it.

    FixBotに聞いてみる
  48. Meta Quest 2 Headset Battery Replacement, Remove the motherboard: 手順 48、 1の画像 1
    • Remove the five screws securing the motherboard to the headset:

    • Four 3.8 mm‑long Phillips screws

    • One 6 mm‑long 3.5 mm hex standoff screw

    FixBotに聞いてみる
  49. Meta Quest 2 Headset Battery Replacement: 手順 49、 2の画像 1 Meta Quest 2 Headset Battery Replacement: 手順 49、 2の画像 2
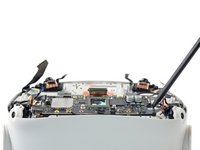
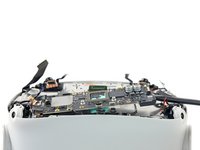
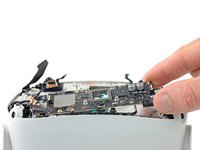
    • At this point, the motherboard should be loose, with some thermal paste sticking it to the headset.

    • Use a spudger to pry up and separate the motherboard from the headset.

    • If it feels like the motherboard is caught on something, check that all the cables are disconnected from it.

    FixBotに聞いてみる
  50. Meta Quest 2 Headset Battery Replacement: 手順 50、 2の画像 1 Meta Quest 2 Headset Battery Replacement: 手順 50、 2の画像 2
    この手順で使用する道具:
    iFixit Thermal Putty
    $9.95
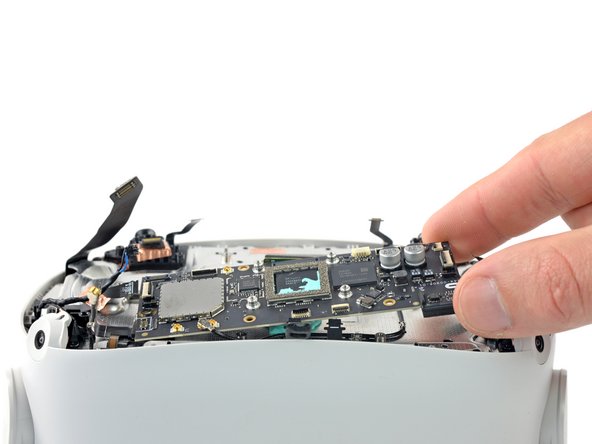
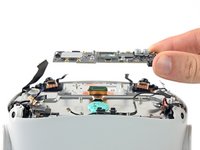
    • Remove the motherboard.

    • You can reuse the thermal paste if you keep it clean. Otherwise, use a spudger to scrape off the old paste and apply a small amount of thermal putty or viscous thermal compound (such as K5 Pro) to the processor.

    FixBotに聞いてみる
  51. Meta Quest 2 Headset Battery Replacement, Remove the camera covers: 手順 51、 3の画像 1 Meta Quest 2 Headset Battery Replacement, Remove the camera covers: 手順 51、 3の画像 2 Meta Quest 2 Headset Battery Replacement, Remove the camera covers: 手順 51、 3の画像 3
    この手順で使用する道具:
    Tweezers
    $4.99
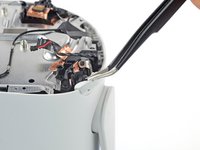
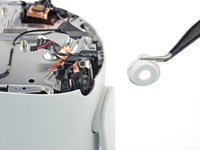
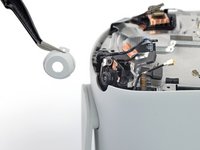
    • Use your fingers or tweezers to peel and remove the two camera covers from the top cameras.

    • During reassembly, align the cutouts on the camera covers to their respective pegs on the headset.

    • The camera covers have different alignment cutouts and aren't interchangeable.

    FixBotに聞いてみる
  52. Meta Quest 2 Headset Battery Replacement, Loosen the screen and lens assembly: 手順 52、 2の画像 1 Meta Quest 2 Headset Battery Replacement, Loosen the screen and lens assembly: 手順 52、 2の画像 2
    • Peel and remove the black tape covering the antenna cable.

    • Set this tape aside to be reused during reassembly.

    FixBotに聞いてみる
  53. Meta Quest 2 Headset Battery Replacement: 手順 53、 3の画像 1 Meta Quest 2 Headset Battery Replacement: 手順 53、 3の画像 2 Meta Quest 2 Headset Battery Replacement: 手順 53、 3の画像 3
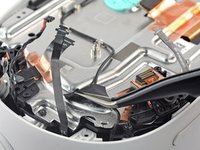
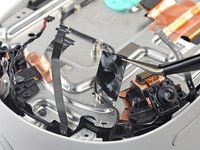
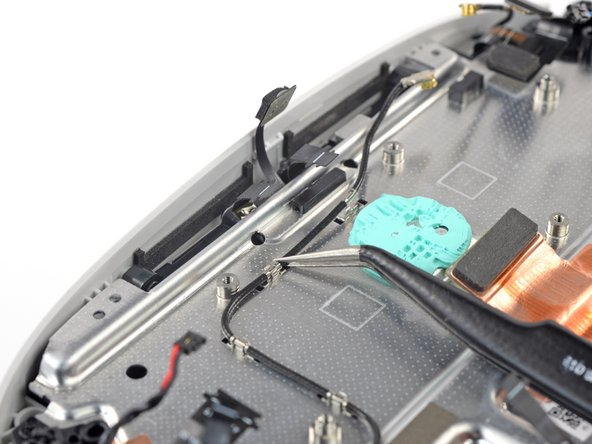
    • Use tweezers to lift and unclip the black antenna cable from the metal grounding clips.

    FixBotに聞いてみる
  54. Meta Quest 2 Headset Battery Replacement: 手順 54、 3の画像 1 Meta Quest 2 Headset Battery Replacement: 手順 54、 3の画像 2 Meta Quest 2 Headset Battery Replacement: 手順 54、 3の画像 3
    • Use a spudger to pry up the black lock tab securing the left microphone flex cable to the left interconnect cable.

    • Use your fingers or tweezers to slide the microphone cable out of the ZIF connector.

    FixBotに聞いてみる
  55. Meta Quest 2 Headset Battery Replacement: 手順 55、 1の画像 1
    • Repeat the procedure to disconnect the right microphone cable.

    FixBotに聞いてみる
  56. Meta Quest 2 Headset Battery Replacement: 手順 56、 2の画像 1 Meta Quest 2 Headset Battery Replacement: 手順 56、 2の画像 2
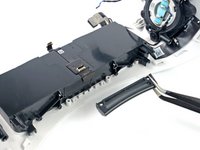
    • Slide the point of an opening pick underneath the battery flex cable to loosen the adhesive securing it from the headset.

    FixBotに聞いてみる
  57. Meta Quest 2 Headset Battery Replacement: 手順 57、 3の画像 1 Meta Quest 2 Headset Battery Replacement: 手順 57、 3の画像 2 Meta Quest 2 Headset Battery Replacement: 手順 57、 3の画像 3
    • Some interconnect cables have been removed in the following images for clarity purposes. You don't have to remove them as part of the procedure.

    • Use a Phillips screwdriver to remove the four screws securing the screen and lens assembly to the frame:

    • Two 6.5 mm‑long screws

    • Two 7.7 mm‑long screws

    FixBotに聞いてみる
  58. Meta Quest 2 Headset Battery Replacement, Remove the screen and frame assembly: 手順 58、 3の画像 1 Meta Quest 2 Headset Battery Replacement, Remove the screen and frame assembly: 手順 58、 3の画像 2 Meta Quest 2 Headset Battery Replacement, Remove the screen and frame assembly: 手順 58、 3の画像 3
    • Grasp the screen and lens assembly with your fingers.

    • Slowly lift and separate the assembly from the outer shell, taking care to reposition any cables that get in the way.

    • Remove the screen and lens assembly.

    FixBotに聞いてみる
  59. Meta Quest 2 Headset Battery Replacement, Reassembly note: 手順 59、 3の画像 1 Meta Quest 2 Headset Battery Replacement, Reassembly note: 手順 59、 3の画像 2 Meta Quest 2 Headset Battery Replacement, Reassembly note: 手順 59、 3の画像 3
    • During reassembly, be careful not to trap the twelve cables as you insert the lens assembly into the outer shell:

    • Three cables along the top edge—two flex cables and one LED flex cable

    • Two cables in the top right corner—the battery connector and an antenna cable

    • Two cables along the right edge—an antenna cable and a wide flex cable

    • Two flex cables along the bottom edge

    • Three cables along the left edge—one antenna cable, one flex cable, and one speaker cable

    • You can use a rubber band to help secure the cables out of the way.

    FixBotに聞いてみる
  60. Meta Quest 2 Headset Battery Replacement, Unfasten the headset battery: 手順 60、 2の画像 1 Meta Quest 2 Headset Battery Replacement, Unfasten the headset battery: 手順 60、 2の画像 2
    • Use a Phillips screwdriver to remove the six 4.5 mm‑long screws securing the battery to the outer shell:

    • Two along the front edge

    • Four along the back edge

    FixBotに聞いてみる
  61. Meta Quest 2 Headset Battery Replacement, Remove the strap bracket: 手順 61、 2の画像 1 Meta Quest 2 Headset Battery Replacement, Remove the strap bracket: 手順 61、 2の画像 2
    この手順で使用する道具:
    Tweezers
    $4.99
    • Use your fingers or tweezers to remove the top strap bracket.

    FixBotに聞いてみる
  62. Meta Quest 2 Headset Battery Replacement, Remove the headset battery: 手順 62、 2の画像 1 Meta Quest 2 Headset Battery Replacement, Remove the headset battery: 手順 62、 2の画像 2
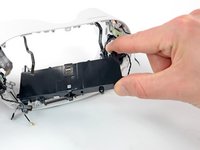
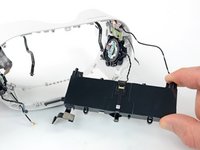
    • Lift and remove the headset battery.

    FixBotに聞いてみる
  63. Meta Quest 2 Headset Battery Replacement, Remove the face sensor interconnect cable: 手順 63、 3の画像 1 Meta Quest 2 Headset Battery Replacement, Remove the face sensor interconnect cable: 手順 63、 3の画像 2 Meta Quest 2 Headset Battery Replacement, Remove the face sensor interconnect cable: 手順 63、 3の画像 3
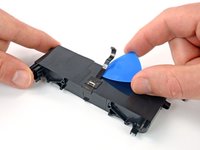
    • Slide an opening pick under the face sensor interconnect cable to loosen the adhesive securing it to the battery.

    • Remove the sensor interconnect cable.

    • Transfer the cable to your replacement battery. Be sure to align it using the two alignment cutouts, and use some double-sided tape such as Tesa tape to secure it.

    FixBotに聞いてみる
  64. Meta Quest 2 Headset Battery Replacement: 手順 64、 1の画像 1
    • Only the headset battery remains.

    FixBotに聞いてみる
終わりに

To reassemble your device, follow these instructions in reverse order.

For optimal performance, after completing this guide, calibrate your newly installed battery.

Take your e-waste to an R2 or e-Stewards certified recycler.

Repair didn’t go as planned? Try some basic troubleshooting, or ask our Answers community for help.

22 の人々がこのガイドを完成させました。

作成者

3人の作成者と共同で作成されました。

Arthur Shi

メンバー登録日: 01/03/18

335,966 ポイント

848のガイドは作成済み

チーム

iFixit iFixit人のメンバー

Staff

123 メンバー

25,720のガイドは作成済み

14件のガイドコメント

Life is too short.

Adam Genesis - 返信 共有

I followed this to change the battery in my son's headset amd I have to say it was a life saver. Very well written and detailed, the photos and coloured circles were of particular help. Thanks for the effort - I'm about to use it again to replace the motherboard! Really frustrating that with a few simple design changes Meta could have made this a five minute job, but well done for helping us all out! :)

Paul Newman - 返信 共有

This was a well written and very thorough how to guide that tool a lot of dedication and I commend you for it. I am contemplating taking on this endeavor on behalf of my adult son who was gracious enough to allow me to use his machine and I am now a huge fan, just in time for the battery to wear out. Still debating if I will attempt but know for sure I would not even begin.to consider it without your guide. Thank you for such a selfless endeavor!

Michael Johnson - 返信 共有

Many thanks!!!

Hugh Calder - 返信 共有

I disassembled my quest because I have water damage. I have cleaned all corrosion, but I would like tot test the battery before I reassemble. How can I check if the battery is in good condition?

Cas - 返信 共有

コメントを追加

統計データ:

過去 24時間: 57

過去 7 日: 501

過去 30 日: 2,033

今までの合計 69,692