はじめに
この修理ガイドを参照して、MacBook Pro 16インチ 2021ヘッドホンジャックを交換します。
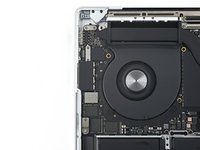
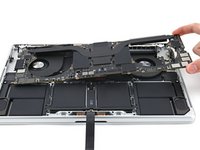
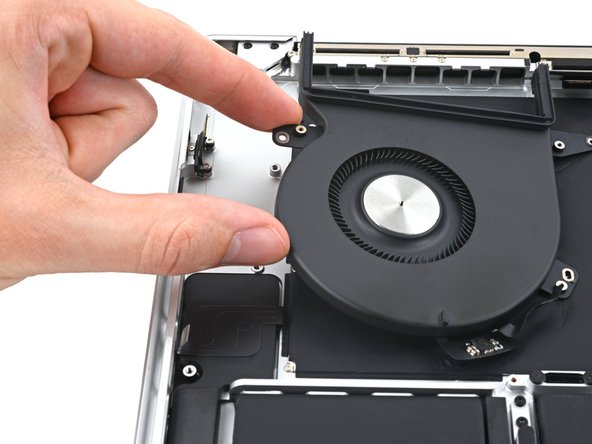
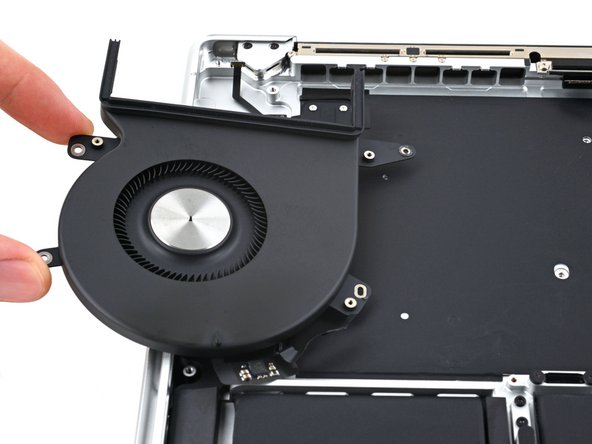
他のパーツの交換とは違い、MacBook Proのファンを交換するには、ロジックボードを外す必要があります。
安全のために、MacBook Proのバッテリー残量を25%以下まで放電してください。アクシデントで充電したリチウムイオンバッテリーに穴を開けてしまうと、危険な火災事故を起こすことがあります。バッテリーが膨張している場合は、 適切な方法で処分してください。
必要な工具と部品
-
この手順で使用する道具:Magnetic Project Mat$19.95
-
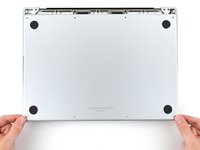
P5ペンタローブドライバーを使って、下部ケースを固定している次の8本のネジを外します。
-
9.1mmネジー4本
-
5mmネジー4本
-
-
-
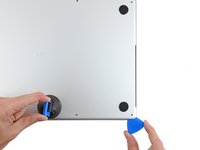
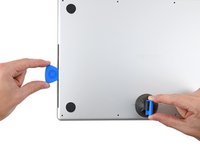
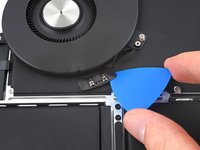
オープニングピックを作ったさ浮間の大に差し込みます。
-
オープニングピックをコーナー周辺までスライドして、それからMacBook Proの短辺側半分までスライドしながら移動させます。
-
-
-
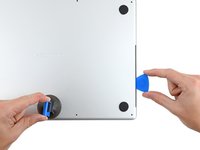
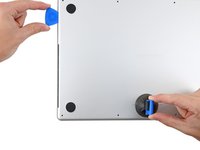
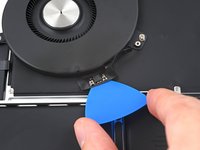
反対側も同じ手順を繰り返して、オープニングピックをスライドさせながら、2番目のクリップを外します。
-
-
-
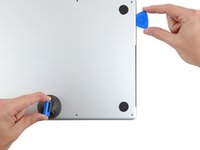
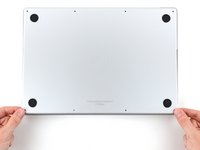
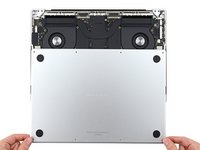
下部ケースを外します。
-
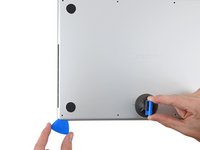
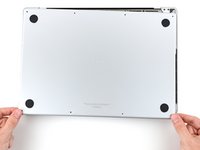
ディスプレイヒンジの近くにクリップをスライドして、位置合わせをします。ヒンジに向けてカバーを押し込んでスライドします。クリップがかみ合うと、これ以上スライドできません。
-
スライドクリップが完全にはまり、下部ケースが正しく装着されたら、ケースをしっかりと押し込み下にある4つの隠しクリップをはめ込みます。カチッと音がして、所定の位置に収まります。
-
-
-
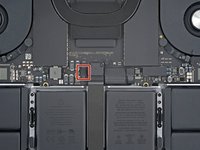
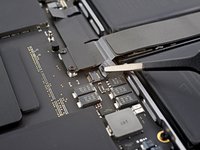
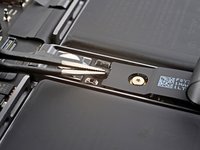
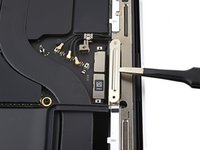
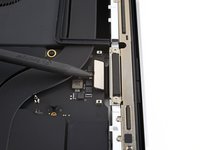
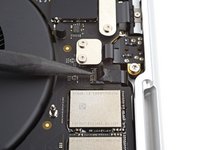
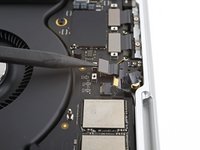
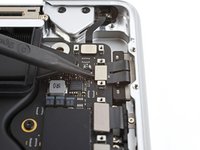
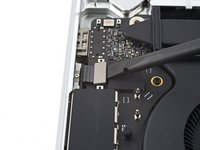
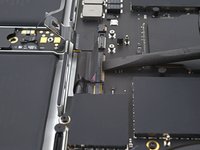
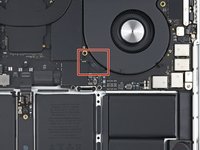
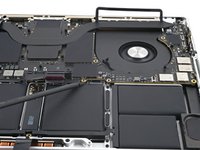
ロジックボード上のバッテリーボードのデータケーブルのコネクタを覆っているテープを剥がします。
This photograph does not match my 2021 Macbook Pro. Fortunately the differences do not impact the removal operation.⏎
There is a different arrangement and number and type of chips to the left of the image.One square grey thing nad five rectangular black things ...
Mine does not have the rows of test points above the track pad cable. -
-
-
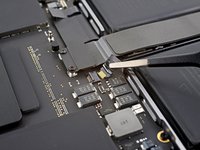
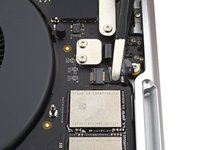
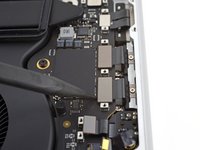
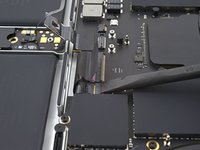
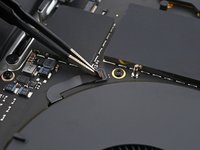
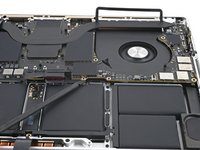
スパッジャーを使って、バッテリーボードデータケーブル用のZIFコネクタのロッキングフラップをゆっくりと跳ねあげます。
This photograph does not match my 2021 Macbook Pro. Fortunately the differences do not impact the removal operation.⏎
There is a different arrangement and number and type of chips to the left of the image.One square grey thing nad five rectangular black things ...
Mine does not have the rows of test points above the track pad cable. -
-
-
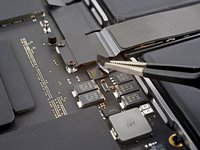
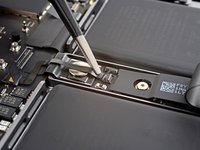
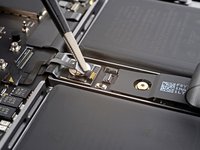
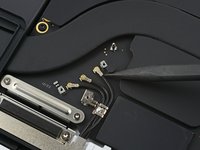
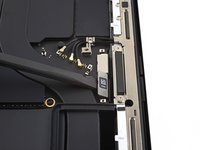
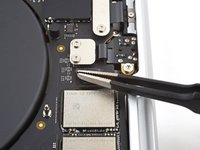
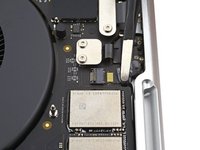
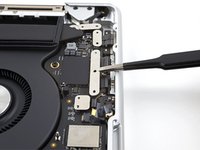
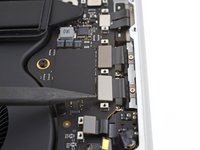
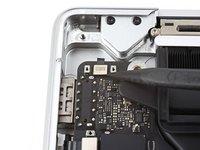
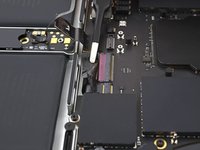
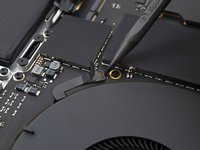
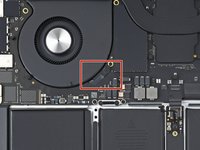
T3トルクスドライバーを使用して、トラックパッドケーブルブラケットをロジックボードに固定している2.1mm長のネジ2本を取り外します。
Das sind T4 Schrauben bei mir
This photograph does not match my 2021 Macbook Pro. Fortunately the differences do not impact the removal operation.⏎
There is a different arrangement and number and type of chips to the left of the image.One square grey thing nad five rectangular black things ...
Mine does not have the rows of test points above the track pad cable. -
-
この手順で使用する道具:Tweezers$4.99
-
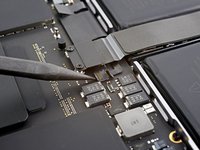
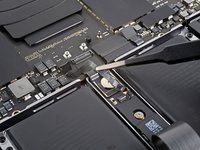
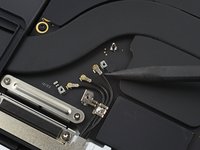
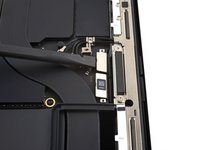
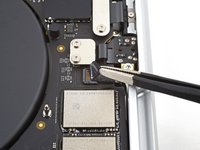
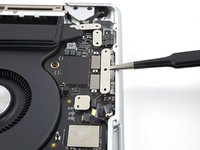
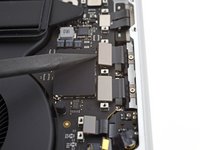
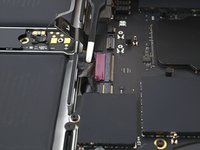
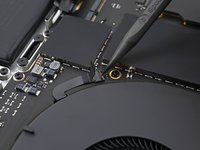
ピンセットもしくは指先で、トラックパッドケーブルのブラケットを外します。
This photograph does not match my 2021 Macbook Pro. Fortunately the differences do not impact the removal operation.⏎
There is a different arrangement and number and type of chips to the left of the image.One square grey thing nad five rectangular black things ...
Mine does not have the rows of test points above the track pad cable. -
-
-
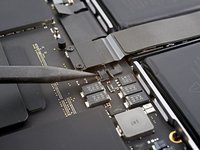
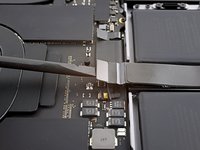
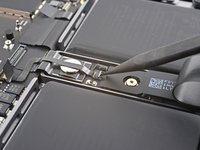
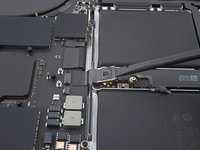
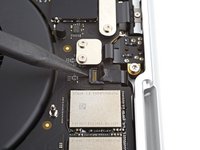
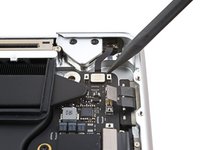
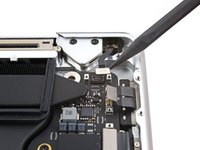
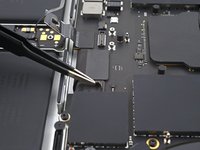
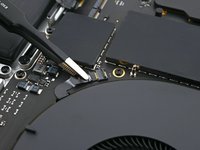
スパッジャーの平面側先端を使って、ロジックボードからトラックパッドケーブルのプレスコネクタをこじ開けて、接続を外します。
This photograph does not match my 2021 Macbook Pro. Fortunately the differences do not impact the removal operation.⏎
There is a different arrangement and number and type of chips to the top/left of the red circle.One square grey thing nad five rectangular black things ...
Mine does not have the rows of test points to the left of the track pad cable. -
-
-
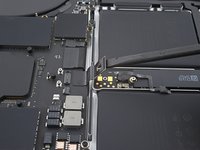
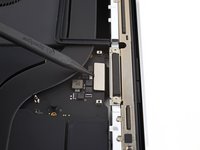
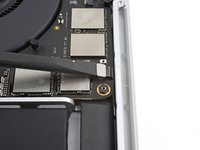
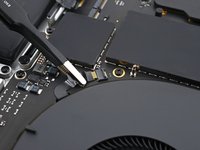
トラックパッドケーブルをデバイスから剥がし、接着面を切り離します。
This photograph does not match my 2021 Macbook Pro. Fortunately the differences do not impact the removal operation.⏎
There is a different arrangement and number and type of chips to the top/left of the red circle.One square grey thing nad five rectangular black things ...
Mine does not have the rows of test points to the left of the track pad cable. -
-
-
接着剤が付いている部分の下に先が鋭利でないピンセットを滑り込ませ、ケーブルとデバイスを分離します。
-
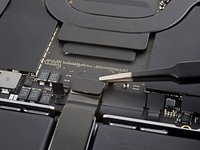
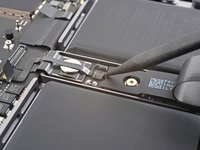
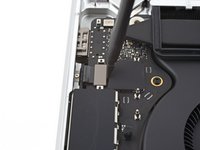
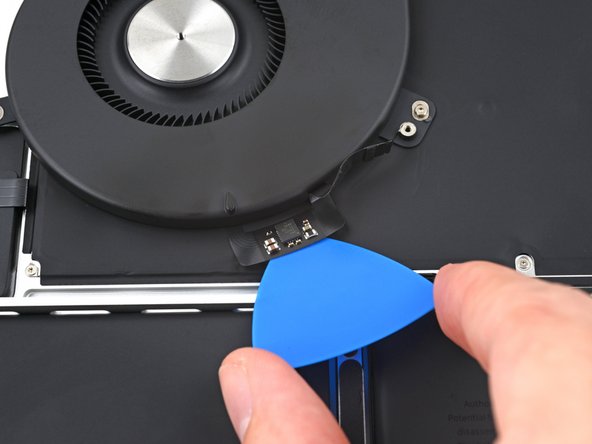
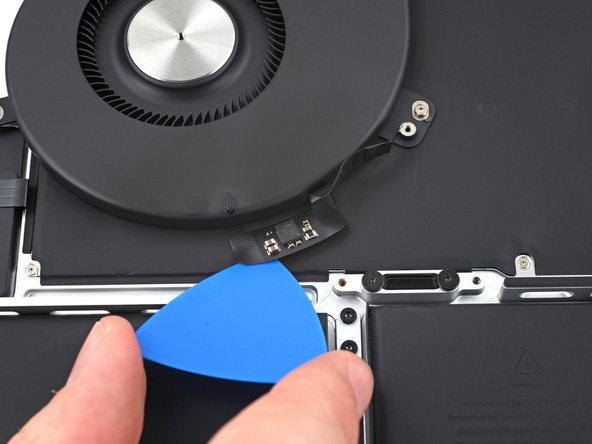
バッテリーボードのデータケーブルを外します。
This photograph does not match my 2021 Macbook Pro. Fortunately the differences do not impact the removal operation.⏎
There is a different arrangement and number and type of chips to the left of the tweezers.One square grey thing nad five rectangular black things ...
-
-
-
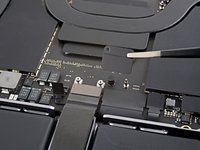
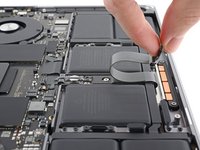
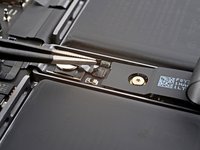
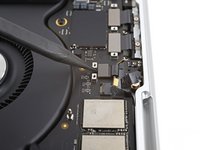
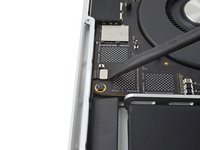
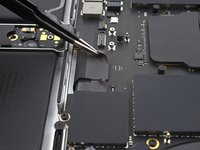
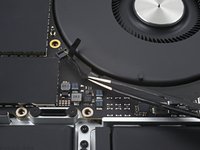
T5トルクスドライバーを使って、バッテリーの電源コネクタを覆っている3.9mmパンケーキネジを外します。
This photograph does not match my 2021 Macbook Pro. Fortunately the differences do not impact the removal operation.
There is a different arrangement and number and type of chips to the top/left of the red circle.One square grey thing nad five rectangular black things ...
-
-
-
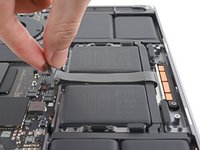
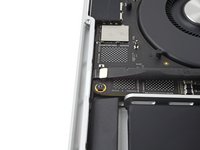
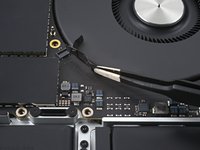
スパッジャーを使って、バッテリーの電源コネクタを持ち上げて、バッテリーの接続を外します。
The previous image did not match my Macbook Pro, this one does.
Two square grey things, three rectangular smaller black things. :-) -
-
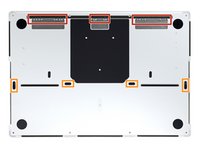
手順20 アンテナバーのコネクタブラケットのネジを外す
注意: 手順 20-54 は、作業進行中としてマークされている ガイド から引用されています。
-
T3トルクスドライバーを使って、フレームにアンテナ用のボードブラケットと同軸ケーブルを固定している、長さ2.1mmのネジを3本外します。
-
-
-
-
T3トルクスドライバーを使って、ディスプレイケーブルカバーを固定している、長さ2.1mmネジを4本外します。
-
-
-
T3トルクスドライバーを使って、右側ケーブルカバーをフレームに固定しているネジを11本外します。
-
2.1 mmネジー9本
-
2mmネジー1本
-
3.5mmネジー1本
-
-
-
スパッジャーの平面側先端を使って、右側スピーカーのプレスコネクタの接続をこじ開けて外します。
-
-
-
T3トルクスドライバーを使って、左側ケーブルカバーをフレームに固定している6本のネジを外します。
-
2.1 mmネジー4本
-
2mmネジー1本
-
3.6mmネジー1本
-
-
-
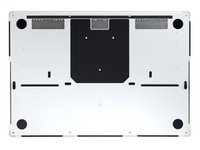
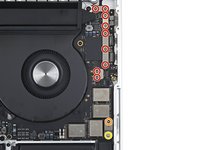
T5トルクスドライバーを使って、フレームにロジックボードを固定しているネジを10本外します。
-
3.8mmネジー6本
-
4.6mmネジー4本
-
4mm六角ドライバーを使って、ロジックボードをフレームに固定している6mmネジを2本外します。
-
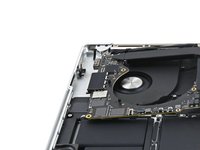
T6トルクスドライバーを使って、ヒートシンクをロジックボードとフレームに固定している6mmネジを2本外します。
The parts list for this step links to the wrong part on an external site. It threw me off and it took some investigation to determine that this kit has the appropriate 4mm hex bit that you need: Mako Driver Kit - 64 Precision Bits
-
-
-
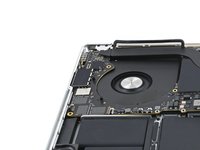
スパッジャーをロジックボード右側とフレームの間に差し込みます。
-
スパッジャーでクリップからロジックボードをこじ開けて外します。
-
-
-
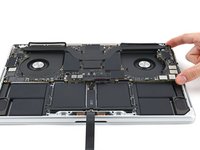
ゆっくりとロジックボードの右側をつまんで持ち上げて、クリップから外します。
-
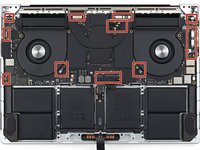
ロジックボードをデバイス左側から引き抜いて、HDMIとSDXCポートをフレーム内のスロットから引き抜きます。
-
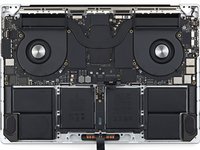
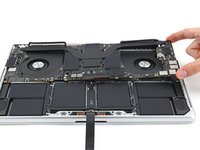
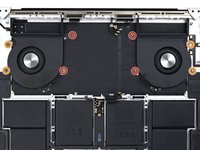
ロジックボードを取り出します。
-
-
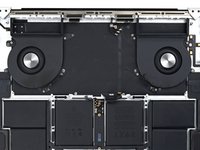
There are several connectors on the right side that are not highlighted. Closely inspect all open ports to make sure a connector ribbon isn't hidden below.
-
-
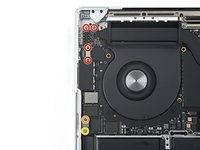
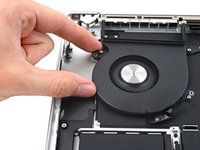
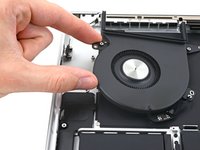
スパッジャーを使って、4箇所のネジカバーを外します。
-


このデバイスを再組み立てするには、インストラクションを逆の順番に従って作業を進めてください。
オリジナルのパーツと交換用パーツをよく見比べてください。交換用パーツに付いていない残りのコンポーネントや接着シールなどは、インストールする前に新パーツに移植する必要があります。
修理がうまく進みませんか?ベーシックな トラブルシューティングを試してみるか、MacBook Pro 16インチ 2021 アンサーコミュニティを参照してください。
このデバイスを再組み立てするには、インストラクションを逆の順番に従って作業を進めてください。
オリジナルのパーツと交換用パーツをよく見比べてください。交換用パーツに付いていない残りのコンポーネントや接着シールなどは、インストールする前に新パーツに移植する必要があります。
修理がうまく進みませんか?ベーシックな トラブルシューティングを試してみるか、MacBook Pro 16インチ 2021 アンサーコミュニティを参照してください。
2 の人々がこのガイドを完成させました。
以下の翻訳者の皆さんにお礼を申し上げます:
100%

Midori Doiさんは世界中で修理する私たちを助けてくれています! あなたも貢献してみませんか?
翻訳を始める ›


4 件のコメント
Hello!
While doing this process I accidentally broke the locking flap of the fan (step 46), and after turning on, the fan is not working. Apple diagnostics gives ppf004, ppf001, ppf003.
Is there a way to replace the locking flap?
Hi there.
There is a way to replace the locking flap, but it's rather hard. Here's a guide on how to do the procedure, and here's some extra info and possible alternatives. Let us know how it goes! Good luck!
Do you need to put the screw covers back on after replacing the fan or is it ok if you forgot to put them on ? Sorry for the basic question I just want to make sure .
Hello! While attempting to screw a 2mm T3 screw back after completing my repair, it snapped in half. The tip is stick inside the thread and the head fell out, which means the cable cover is loose (see steps 37 and 38). Is there any way I can remove this screw? The hole is so small I can't even get a thin-tipped tweezer in there. Also, once removed, where can I get a replacement screw from? Thank you.