はじめに
This repair guide was authored by the iFixit staff and hasn’t been endorsed by Google. Learn more about our repair guides here.
Use this guide to correctly apply replacement adhesive to your Pixel or Pixel XL display after a repair.
Some replacement displays do not come with an earpiece speaker grille. If your replacement screen doesn't have one, be sure to transfer the grille from your old display to the new one before you install it. Alternatively, you can buy a new one here.
Before you begin, you should have already removed your Pixel’s display assembly and set it aside. Detailed instructions for each model can be found at the following links:
必要な工具と部品
-
-
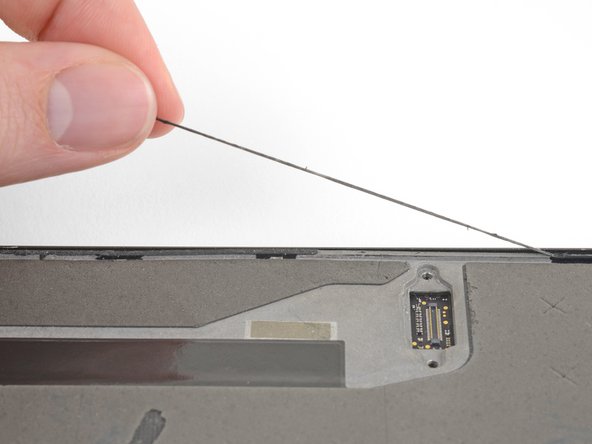
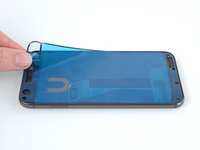
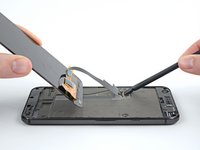
Peel away and remove all the old display adhesive from the body of your phone.
-
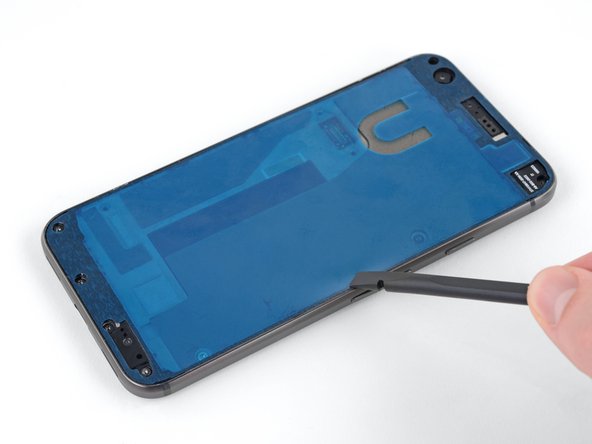
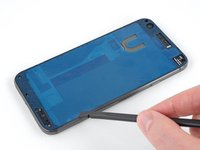
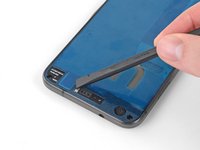
Use the point of your spudger to scour away and remove any lingering adhesive.
-
For best results, clean the area underneath the removed adhesive with 90% or greater isopropyl alcohol to prep the surface for the new adhesive.
 FixBotに聞いてみる
-
-
-
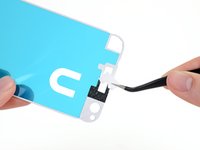
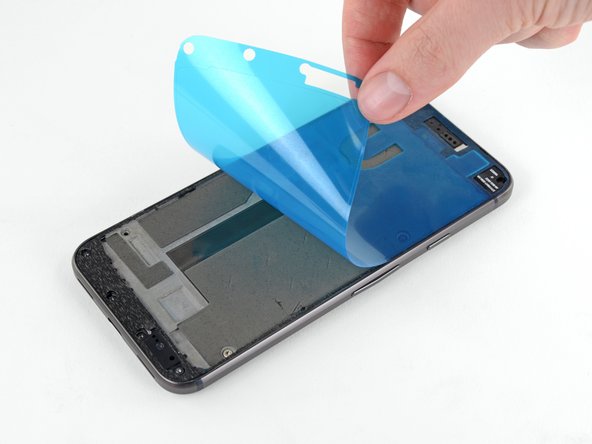
The replacement adhesive should only be applied to the edges of the frame, but may come with the center filled in.
-
To remove the unnecessary center section of the adhesive strip, carefully peel away the center portion of both the white (paper) and black (adhesive) layers, starting with the U-shaped cutout.
-
-
-
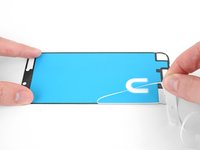
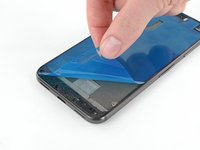
Peel off and discard the remaining paper liner, exposing the adhesive underneath.
-
-
-
-
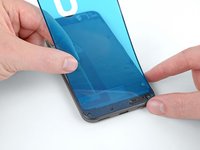
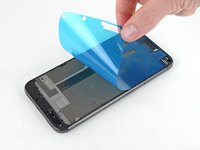
Hold the adhesive sheet with the exposed adhesive facing down, and carefully align it into the lower edge of the phone.
-
When it's correctly aligned, lower the rest of the adhesive sheet into the phone.
-
-
-
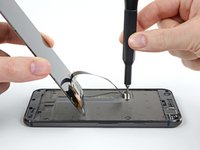
Re-attach the display cable connector.
-
Screw the connector bracket back in place.
-
Power on your phone to make sure your repair was successful.
-
-
-
Once you are sure the display is functioning properly, carefully align it with the chassis and firmly press it into place.
-


Take your e-waste to an R2 or e-Stewards certified recycler.
Repair didn’t go as planned? Check out our Answers community for troubleshooting help.
48 の人々がこのガイドを完成させました。

2件のガイドコメント
What is the included tesa tape for?
The Tesa tape is to adhere the battery to the frame. You don't want anything moving around inside your phone--that can stress, damage, or disconnect ribbon connectors.
David Bauman - 返信 共有