はじめに
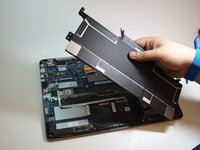
If your Asus ZenBook UX330U or UX330UA never holds a charge or has a short battery life, then you may need to replace the battery. Before using this guide, look at the troubleshooting page located here for possible fixes that do not require any disassembly. This guide can be used to remove the back panel and battery for the ASUS ZenBook UX330U or UX330UA.
The battery is an essential part of the Asus Zenbook- it gives your laptop life. Before removing the battery, inspect it to make sure that it is not swollen, and that all power has been discharged from the battery. For more information about battery safety, please look at this guide that iFixit has provided.
Before beginning any device disassembly, please power off and unplug your device.
必要な工具と部品
-
-
Before starting any device dissasembly, please put on the anti-static bracelet provided by iFixit. Make sure the metal part of the bracelet is touching your skin.
-
Remove the alligator clip at the end of the bracelet by simply pulling it off, to reveal the bullet connector.
-
Insert the bullet connector into the ground port of an outlet.
-
-
-
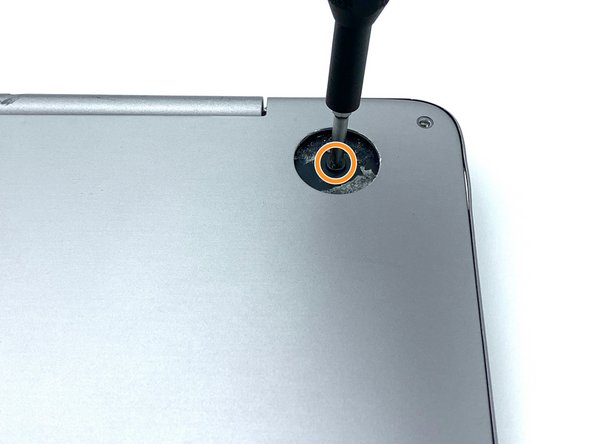
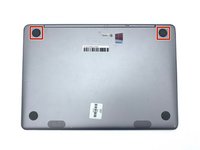
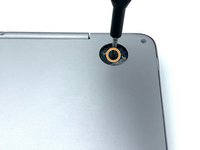
Remove the eight 3.1 mm screws using the T5 Torx screwdriver.
-
Remove the longer 5.1 mm screw using the T5 Torx screwdriver.
-
-
-
-
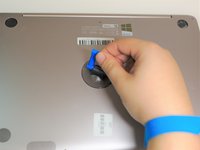
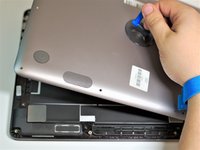
Press the suction handle on the center of the back cover, and gently lift up.
-
-
-
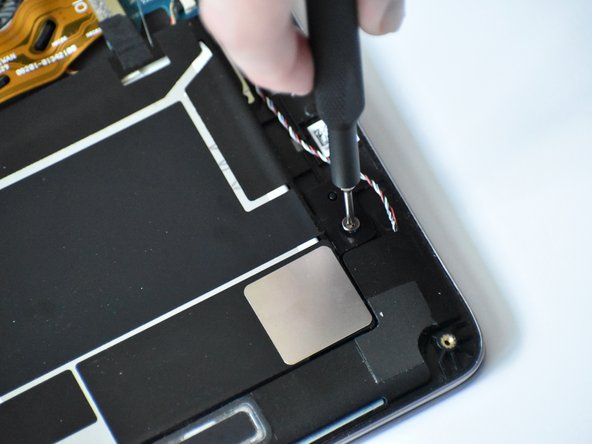
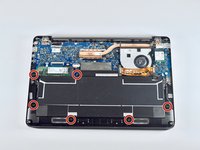
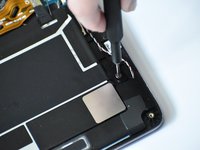
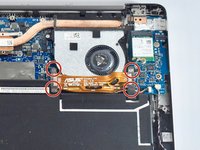
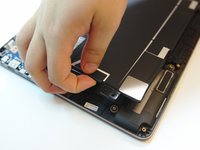
Unscrew the six 3.7mm screws using the Philips #0 screwdriver bit.
Why do you need to remove the battery? You can see the SSD just above the left of the battery.
You can skip pass step 5 and go to 10, or I am missing something?
-
-
この手順で使用する道具:Tweezers$4.99
-
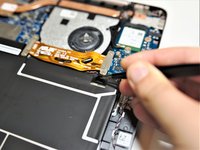
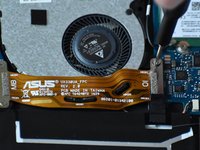
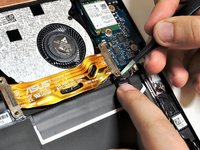
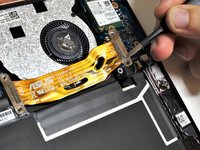
Remove the motherboard ribbon connector by pulling up on the metal ends with the blunt nose tweezers.
-
-
-
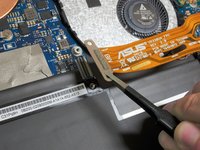
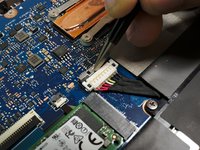
Pull back the silver battery connector lock with the blunt nose tweezers. This should slide back and should require minimal force.
-
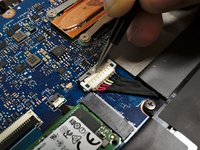
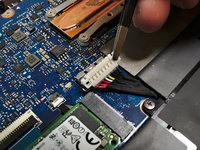
Lift the battery connector vertically using the blunt nose tweezers to remove it from the socket.
-
To reassemble your device, follow these instructions in reverse order.
For optimal performance, after completing this guide, calibrate your newly installed battery.
Take your e-waste to an R2 or e-Stewards certified recycler.
Repair didn’t go as planned? Try some basic troubleshooting, or ask our Answers community for help.
23 の人々がこのガイドを完成させました。
19 Guide Comments
It would be nice if you mentioned the model of battery the Asus UX330 uses, even of you don’t carry it.
Other than that, great instructions. I’ve ordered tools from you folks and would have ordered the battery if you stocked it.
My wife can hardly wait for me to fix her computer!
Thanks!
Mike
Glad the guide was helpful! We (students) did this project as part of a course for our university and compiled all the information ourselves. I don’t remember if we ever found a part number for the battery, which would explain why one wasn’t provided in the guide.
The battery model number is C31N1602
dunxd -
I was pleasantly surprised at how easy the battery replacement turned out to be, partly due to the design of the ASUS UX330, but also due to the excellent repair guide. Thanks!
Glad it helped!
I must be a klutz. I attempted this procedure, but when finished the laptop booted but has very dim display and the network adapter didn’t stay powered up. So, I took things apart again and tried to put it back together more solidly, and then the network came back, but the display is still quite dim. I suspect I made a poor connection at the motherboard bridge, but I don’t know how to fix it. (I would not expect a new, but bad, battery would dim the laptop when on power, right?
Ted Wobber - 返信
Hey there, I’m one of the students that compiled this guide. First of all, I’d suggest checking your brightness settings in Windows, as it may have reset when all power was removed from the laptop. If your brightness setting is maxed out on the computer, it is possible that the backlight ribbon cable got unplugged, in which case you’d have to take it apart again and look for that specific connector.
Thank you for a concise and accurate guide. The pictures were clear and the circles and arrows helped locate all the screws, even that one next to the battery connector. Total time was about half an hour because I also did some cleaning to get rid of about three years worth of gunk.
The battery model number on my original is C31N1602. Rated at 11.55 V 57Wh, min 4800 Ah. Hope that helps anyone. I bought a replacement for about $50.
Hi Mark,
Thank you for the detail of the model.
Where did you buy the replacement battery?
Kind regards
Clem
I used this guide to replace the battery but now have a very strange problem. I replaced the battery without a problem, reconnected everything in the reverse order and screwed the case back together. When I plugged in the power cable, the the power light on the side, the on on/off button on the keyboard , F2 and Caps Lock all lit up. The laptop did nothing. I took everything apart again and carefully repeated all steps again with the same result. I even put back in the old battery and still the same result. In much trial and error I found out that everything works fine with the new battery (the machine starts properly and the battery starts charging as long as I do not reassemble the case. As soon as I put just one screw in the the rear cover and tighten it I get the problem.
After changing my battery if no problem. (thank you). Zenbook cannot find network adapter period. Help!
Thank you for this well detailed guide. It helped a lot. Published from an Asus Zenbook UX330UA with a brand new battery!
Unfortunately, I bricked my computer trying this repair, and do not recommend others try it. Issues I encountered:
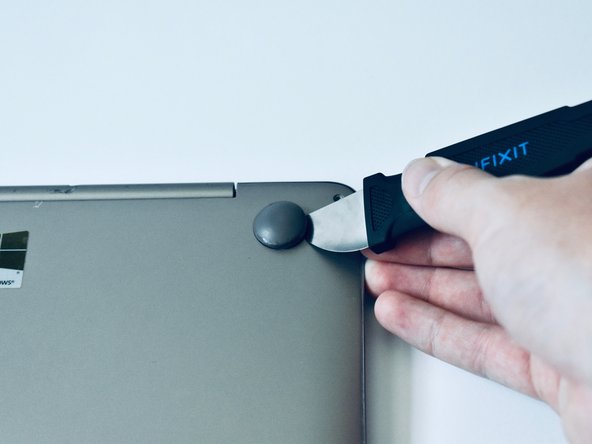
1) The rubber feet at the bottom are *incredibly* well glued on. I cut myself on the recommended Jimmy. Another guide recommended using a flatheaded screwdriver instead, and I found that easier to brace against my finger.
2) The battery itself didn’t quite fit correctly. While the same part number, it was not the exact same, with a slightly different battery connector cable (which couldn’t be latched down in the computer).
3) My kit shipped with *angled* tweezers instead of *blunt* ones. I believe attempting to use the angled ones where the blunt ones were called for, combined with the issues I had with fit, may have damaged some components
I found both the motherboard ribbon and the battery connector very difficult to try to secure with the new battery in, and after giving up on that and going back to the old battery, my computer won’t boot at all. I hope others have more success than I did.
Just had a very similar experience with trying to use the Asus UX330UA fix kit. The rubber feet were glued on tightly, so using a screwdriver helped. Blunt tweezers are indeed not included in the kit - I went and grabbed tweezers that I owned, but that is something to consider. The battery connector cable was too long, so I will have to make a return, making my efforts useless. It is more worth your time, effort, and money taking your laptop to an Asus service center.
probably should update this line in Step 1: "Before starting any device disassembly, please put on the anti-static bracelet provided by iFixit. Make sure the metal part of the bracelet is touching your skin."
As my 'kit' of Battery and 'Kit' did not include the anti-static bracelet noted in this step.
Step 8: 'Pull back the silver battery connector lock with the blunt nose tweezers.' The action is not obvious as 'back' is relative to where you are sitting and the orientation. Back in this case is ?? The back of the computer? Towards the rear of the computer? Suggest something of the sort: Slide the metal 'lock' away from the white connector. The 'lock' is sliding horizontally away from you and away from the white connector as seen in the first image.
The iFixit battery that I received was physically the same size as the original, but the plastic tabs that align the battery and have the screw holes and alignment holes, were off by about 1 mm left to right - too narrow. This made the 're-assembly' tricky.
In general, this step-by-step guide is very good. That's why I buy most of my repair parts from iFixit; clear instructions and guides.
The 'kit' that one can by with the battery does not have the tools outlined in this article. For instance, there are no 'blunt nose tweezers,' but rather sharp nose tweezers.
Small differences, but significant when a sharp nose tweezers could damage something when a blunt nose tweezer is the right tool.
The kit is awesome with its labeling and great 'top' to hold the parts organized by sector. Allowed me to keep the one 5.1mm screw in step 2 isolated and very easy to find. I have all these tools but having them in an organized kit is icing on the cake. Highly recommend it.


