はじめに
これはバッテリーを交換する際に、カスタムカット接着剤を装着するための一般的なガイドです。
このガイドでは、デモンストレーションのためにSamsung Galaxyモデルを使用して撮影しています。このガイドに従って他の携帯電話を使用する場合、接着剤は若干異なって見えますが、手順は同じです。
代用として、両面テープを使用する場合は、テープを装着する作業用の一般ガイドとして参照してください。
必要な工具と部品
-
-
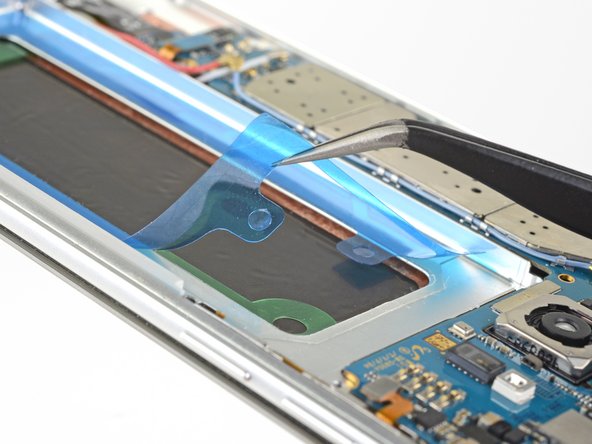
デバイス本体フレームから、残った接着剤をすべて取り除き、接着部分をイソプロピルアルコールと糸くずの出ないリントフリーのクロスで拭き取ります。
-
-


'''バッテリーの最適化のために、この手順を完了後、新しく搭載したバッテリー容量をキャリブレーション(調整)するには、こちらのガイドを参照してください。
167 の人々がこのガイドを完成させました。
以下の翻訳者の皆さんにお礼を申し上げます:
100%

Midori Doiさんは世界中で修理する私たちを助けてくれています! あなたも貢献してみませんか?
翻訳を始める ›


23件のガイドコメント
Fantastic job on the instructions ! I only wish I was able to find a solution, for removing the original glue from the back cover.
That is all I have left to do, and I have been unsuccessful for 6 to 8 hours of trying to find a way to get it off.
Hey Lee,
Your best chance is using high concentration (over 90%) isopropyl alcohol . If you can’t get the surface completely clean, that’s alright. Just try to get all large adhesive residue off, so that the battery and new adhesive will lie flat in the battery well.
I accidentally rubbed off some of the black paste thing under the battery when cleaning it for the new battery adhesive strip. Should I be worried??
Henry Dang - 返信
Hi Henry,
The black paste is possibly the graphite pad stuck onto the back of the display, which channels heat from the phone to dissipate through the display. There shouldn’t be any damage to your phone!
Hi Arthur,
A big respect & thank you for the instruction to replace the battery. I couldn't be more happier because I did it myself thanks to you & ifixit team. It only took 30 minutes from start to finish. Just waiting on the back glass to arrive other wise excellent job on your side and awesome job to ifixit. I will have to buy higher concentration of isopropyl to wipe those big adhesive before I put the glass.