はじめに
In case you haven’t heard, there’s a new Switch on the block: it’s the Nintendo Switch Lite, and it comes with less in order to cost you less. It also arrives in some hot new colors—which only distract us momentarily, before we remember we’re here for a teardown. Grab your tools and let’s take apart the new Switch Lite.
YouTube? Instagram? Twitter? Facebook? Take your pick and give us a click, and let’s keep in touch on all future teardowns. And if a newsletter is more your style, we do that too.
必要な工具と部品
ビデオの概要
-
-
A wild Switch Lite appeared! What does the Nintendex say about it?
-
Custom NVIDIA Tegra processor
-
Built-in 5.5" capacitive touchscreen LCD with 1280 × 720 resolution
-
32 GB of internal storage (up to 2 TB additional storage via microSDHC or microSDXC card)
-
802.11 a/b/g/n/ac Wi-Fi, Bluetooth 4.1, NFC, USB Type-C port (charging only), and 3.5 mm audio jack
-
Built-in accelerometer and gyroscope
-
Rechargeable lithium-ion battery capable of 3.0 - 7.0 hours play time
-
Evolved with un-detachable controllers
-
-
-
Before we begin, we turn on our X-ray Game Genie, courtesy of our pals at Creative Electron.
-
Compared with modern smartphones, there's a lot of bezel on this device, so our usual teardown wallpaper treatment may not quite cut it. Maybe if we also made a skin ...
-
-
-
We yanked really hard on the controls in the hope of scoring two new bright yellow Joy-Cons, but alas, they don't detach.
-
It seems a more traditional disassembly will be required.
-
The integrated controls do include an honest-to-goodness D-pad, however.
-
Other exterior changes: the IR blaster from the right Joy-Con got the axe, and the speakers have migrated from the front (OG Switch) to the bottom (Switch Lite).
-
The Lite also lacks the original Switch's kickstand, making this the most aerodynamic Switch ever.
-
-
-
The way is blocked by impassable (tri-point) screws. We can't progress further until we find and acquire the special tool.
-
No distracting side quests today—we're on a mission and we brought all the tools needed to beat the game. Y00 driver, we choose you!
-
Under the back cover, we find: another cover. Moving on.
-
We note here that the SD card reader is now permanently attached to the main board—whereas on the old Switch, we had already removed it by this point.
-
Modularity is generally good for repair, so this is minor step backwards from our point of view.
-
Let's peek under the metal shield and get our first look at the internals in the visible light spectrum.
-
-
-
-
Here we take a moment to blow the cover off our revised-for-2019 Switch and do some Lite comparisons.
-
Most important change: the battery in the Lite is no longer upside-down. This alone makes our teardown worth the price of admission.
-
When it comes to other changes, here are two truths and a lie: (1) The battery is physically smaller and sits next to a lighter-gauge heat pipe. (2) The headphone jack has gone fully modular. (3) The bubblegum securing the heat sink is now cherry-flavored.
-
Muscling up the battery, we find... a wet paper towel? Maybe someone was trying to wipe off all this sticky battery adhesive.
-
This 13.6 Wh battery is all you need for 3-7 hours of playtime, according to Nintendo. That's more than you could get from the original Switch and its 16 Wh battery (but less than the updated Switch, which can last up to 9 hours).
-
-
-
More efficient hardware not only makes for longer battery life, but also less waste heat. So we're pleasantly unsurprised to see this Switch packing a downsized heat sink and fan.
-
Another slight difference: the previous L and R triggers pressed directly against a button on a PCB, but the new triggers switch to a membrane-style key. This could help with ingress protection, and definitely gives the triggers a more pleasing actuation distance.
-
The speaker drivers look to be the same as those in the original Switch, but the housings are all new.
-
Not only are they now downward-firing, but they've also expanded up into the space formerly held down by the two Joy-Con batteries. Although we haven't done a head-to-head sound test, we'd be surprised if the Lite didn't come out on top.
-
-
-
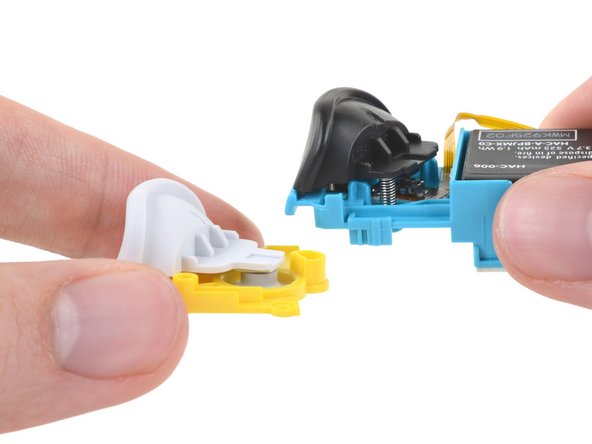
Pulling aside a dedicated mini-joycon board, we get down to a source of recent controversy in the Switch—the joystick.
-
Initially, these joysticks look pretty similar to the 2019 Switch joysticks as we crack open their cases—but the design of the clasps around the edges is a bit different, and the case is easier to open overall.
-
Hoping to find some kind of drift-related improvement, we open up both the Switch Lite (top) and 2019 Switch (bottom) joystick assemblies and lay them out for your viewing pleasure.
-
Things on the inside don't immediately seem too different, but we do notice some new trace routing, a narrower stick click button, and slightly wider-looking metal sliders.
-
-
-
Removing the board, we note that the formerly modular flash storage is also now soldered down. (DIY storage swaps in the original Switch didn't work, but were at least physically possible.)
-
Side A of this silicon capybara:
-
Nvidia ODNX10-A1 (Tegra X1-based SoC, presumably a custom riff on the T210B01 variant)
-
2x Samsung K4U6E3S4AM-MGCJ LPDDR4X DRAM 16 Gb (4 GB total)
-
Samsung KLMBG2JETD-B041 32 GB eMMC flash storage
-
ST Microelectronics ST21NFCD NFC controller and FingerTip touch screen controller
-
Realtek ALC5639 audio codec
-
Cypress CYW4356X 802.11ac Wi-Fi + Bluetooth 5.0 SoC
-
-
-
Let's turn that capybara around for some more chips:
-
ST Microelectronics STM32F038C6 32-bit microcontroller w/ 32 KB flash
-
B1913 GCBRG HAC STD T1056719A1 secure MCU (likely)
-
Maxim Integrated MAX77620HEWJ power management IC
-
Rohm BM92T10MWV-Z USB-C power delivery controller
-
Texas Instruments BQ24193 battery charge management
-
Maxim Integrated MAX17050 battery fuel gauge
-
Ricoh RP602Z330C 1.5 A buck-boost regulator
-
-
-
Light on the wallet, light on the features, Lite in the layout.
-
Modularity is definitely a feature that was cut for this diet Switch, lacking swappable controllers, storage, and SD card tray.
-
A non-fused display and digitizer bode well, as well as a replaceable Game Card reader and headphone jack.
-
Not quite as cool as the Switch, and not quite as over-featured as the 3DS, this Lite seems to fit just right. But what about that reparability score?
-
- Screws, rather than adhesives, secure most components.
- Many components, including the joysticks, fan, and headphone jack, are modular and can be replaced independently.
- The battery, though strongly glued down, can be replaced shortly after removing the rear case.
- The digitizer and display are not fused, but are firmly glued in place.
- The flash storage and SD card reader are now soldered directly to the motherboard.
- Uncommon tri-point screws hinder all repairs.


まとめ
リペアビリティのスコア


(10点が最も修理しやすい指標です)
34 件のコメント
Ethan…..first of all why is it important that you posted first? Second of all, you said, “Looks like the Switch Lite is based off of the original Switch.” Really, Ethan? You think? Sorry for the sarcasm but c’mon man, how is your comment helping?
You are getting waeker and weaker. No exact descripton or OEM of the fan. Boy that’s weak for because the bearing of the fan can be an issue over time too. Sleevebearings would be horror for a unit like this. I hope it is ball or hydrodynamic. This fan has to run high speeds becaus of its small diameter.
TheLOD2010 - 返信
So now this begs the question, can you reuse the joycons from the OG switch, remove the buttons and place them into the lite?
Say if you wanted a different color for your buttons, seems the triggers are a nono since they use a different button system but what about a,b,x,y,+,- ect?
awful teardown guide, please give better details regarding screw placement, etc