手順 18を翻訳中
手順18


-
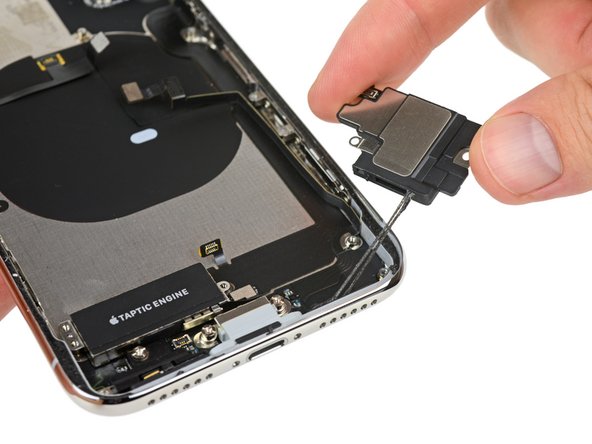
The end is in sight, and we're powering through the remaining components in the rear case.
-
This first little bracket is covered in spring connectors and EMI grounding fingers, and has a ribbon cable stuck to the back.
-
Next out is the lower speaker enclosure, replete with ooey gooey waterproofing adhesive around the port.
-
And lastly, the Taptic Engine and famed barometric vent are freed. Apple's Taptic Engine continues to be a linear oscillator vibration motor.
クリエイティブコモンズのオープンソース著作権のもと、あなたの投稿は著作権の対象となります。