メインコンテンツにスキップ

MacBook Air 13インチ Late 2010の上部ケースの交換

英語
日本語

手順 6を翻訳中

手順6
MacBook Air 13" Late 2010 Upper Case Replacement: 手順 0、 2の画像 1 MacBook Air 13" Late 2010 Upper Case Replacement: 手順 0、 2の画像 2
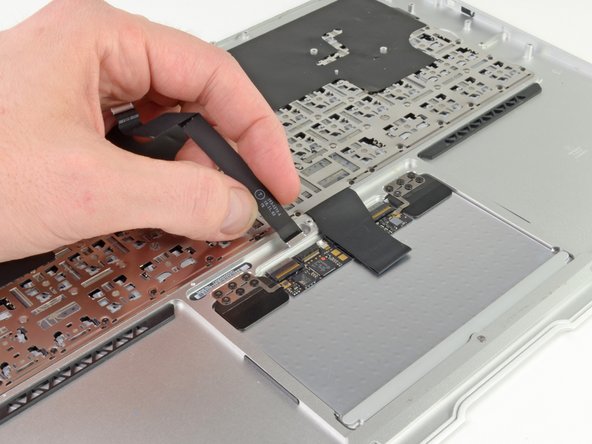
  • Use the tip of a spudger or your fingernail to flip up the retaining flap on the trackpad ribbon cable ZIF socket.

  • Be sure you are prying up on the hinged retaining flap, not the socket itself.

  • Pull the trackpad ribbon cable straight out of its socket toward the rear edge of the Air.

スパッジャーの先端もしくは指先を使って、トラックパッドのリボンケーブルZIFソケット上の固定フラップを持ち上げます。

ソケット自体ではなく、ヒンジ付きの固定フラップ上をこじ開けてください。

トラックパッドのリボンケーブルを、Airの背面端に向けてソケットをまっすぐ引き抜きます。

クリエイティブコモンズのオープンソース著作権のもと、あなたの投稿は著作権の対象となります