メインコンテンツにスキップ

Desmontaje de Rayos X de Apple Watch

英語
スペイン語

手順 2を翻訳中

手順2
Apple Watch X-ray Teardown: 手順 0、 3の画像 1 Apple Watch X-ray Teardown: 手順 0、 3の画像 2 Apple Watch X-ray Teardown: 手順 0、 3の画像 3
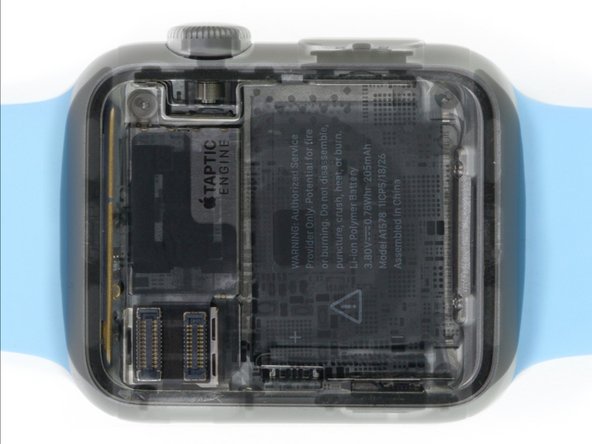
  • One of the first things we notice is that, while the battery dominates the interior space of the watch, it barely shows up in X-ray images. (It's the sort of smoky-looking patch on the right.)

  • Like everything in the Apple Watch, the battery was designed to be small and super thin. In larger devices such as smartphones, the thicker batteries absorb more X-rays, and thus are easier to spot.

  • The densest (and therefore darkest) components in the picture are the magnets—such as in the speakers on the lower left, the Taptic Engine, and the small magnet in the center that aligns the charger.

Una de las primeras cosas que notamos es que, si bien la batería domina el espacio interior del reloj, apenas aparece en las imágenes de rayos X. (Es el tipo de parche de aspecto ahumado a la derecha).

Como todo en el Apple Watch, la batería fue diseñada para ser pequeña y súper delgada. En dispositivos más grandes, como los teléfonos inteligentes, las baterías más gruesas absorben más rayos X y, por lo tanto, son más fáciles de detectar.

Los componentes más densos (y, por lo tanto, más oscuros) de la imagen son los imanes, como los altavoces de la esquina inferior izquierda, el motor táptico y el pequeño imán del centro que alinea el cargador.

クリエイティブコモンズのオープンソース著作権のもと、あなたの投稿は著作権の対象となります