メインコンテンツにスキップ

Acer Liquid E1 Teardown

英語
日本語

手順 9を翻訳中

手順9
Acer Liquid E1 Teardown: 手順 0、 3の画像 1 Acer Liquid E1 Teardown: 手順 0、 3の画像 2 Acer Liquid E1 Teardown: 手順 0、 3の画像 3
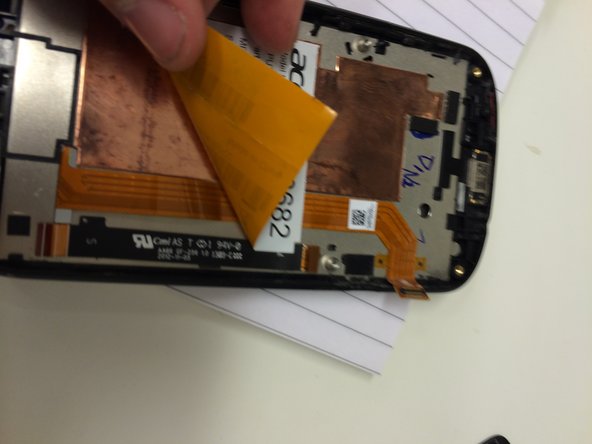
  • To remove the LCD, remove the sticker on the back of the midframe. It conseals the LCD-flex

  • Be careful when removing the sticker. It's glued tightly and too much stress will tear the LCD-flex

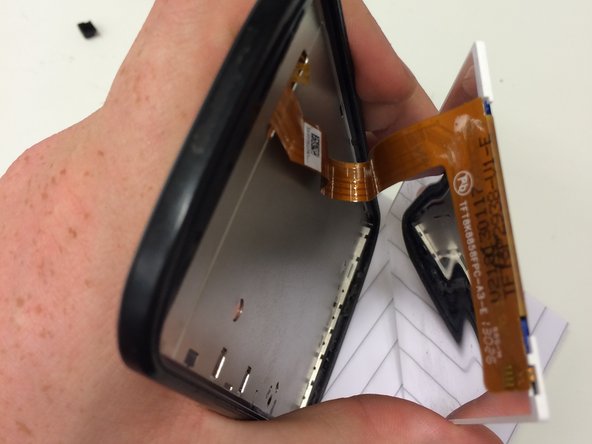
  • Remove the LCD by pulling the whole cable through the midframe.

ここに翻訳を挿入する

ここに翻訳を挿入する

ここに翻訳を挿入する

クリエイティブコモンズのオープンソース著作権のもと、あなたの投稿は著作権の対象となります