メインコンテンツにスキップ

Acer Liquid E1 Teardown

英語
日本語

手順 8を翻訳中

手順8
Acer Liquid E1 Teardown: 手順 0、 3の画像 1 Acer Liquid E1 Teardown: 手順 0、 3の画像 2 Acer Liquid E1 Teardown: 手順 0、 3の画像 3
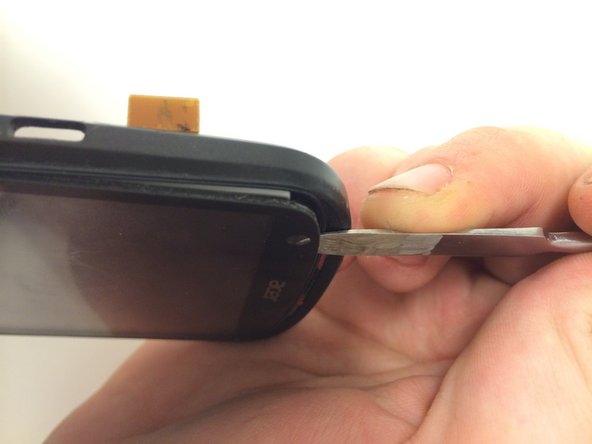
  • Let the remaining heat at 95°C for about 3-5 minutes to soften the adhesive

  • Use an opening tool to pry at the top, between your digitizer and the middleframe

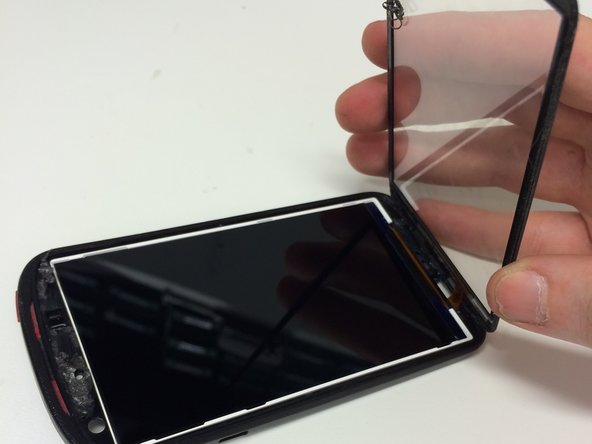
  • Open it from the top, your digitizer-flex runs at the bottom

  • Be careful when using a heat-gun. Heat-guns don't distribute heat evenly and LCD-burns may occur

ここに翻訳を挿入する

ここに翻訳を挿入する

ここに翻訳を挿入する

ここに翻訳を挿入する

クリエイティブコモンズのオープンソース著作権のもと、あなたの投稿は著作権の対象となります