メインコンテンツにスキップ

Google Pixel 8aのスクリーン交換

英語
日本語

手順 25を翻訳中

手順25
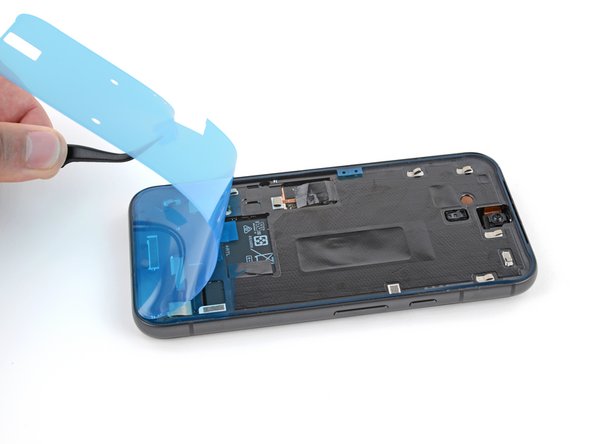
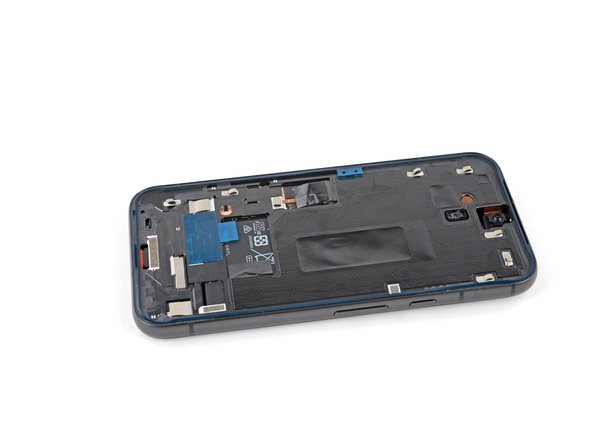
Google Pixel 8a Screen Replacement: 手順 0、 3の画像 1 Google Pixel 8a Screen Replacement: 手順 0、 3の画像 2 Google Pixel 8a Screen Replacement: 手順 0、 3の画像 3
  • Grab the pull tab in the center of the left edge and slowly peel and remove the liner.

  • If the adhesive starts to peel up with the liner, check that you’ve pushed all of it into place with your spudger. If it continues to peel up, hold it down with the point of your spudger as you go.

左端の中央にあるプルタブを掴んでからゆっくり剥がして、剥離紙を取り除いて下さい。

もし剥離紙と一緒に接着剤が剥がれてしまう場合は、スパッジャーで全周にわたって押し付けたかどうか確認して下さい。それでもまだ接着剤が剥がれてくる場合は、作業の進行に合わせてスパッジャーの尖っている方の先で押し付けて下さい。

クリエイティブコモンズのオープンソース著作権のもと、あなたの投稿は著作権の対象となります