手順 4を翻訳中
手順4


-
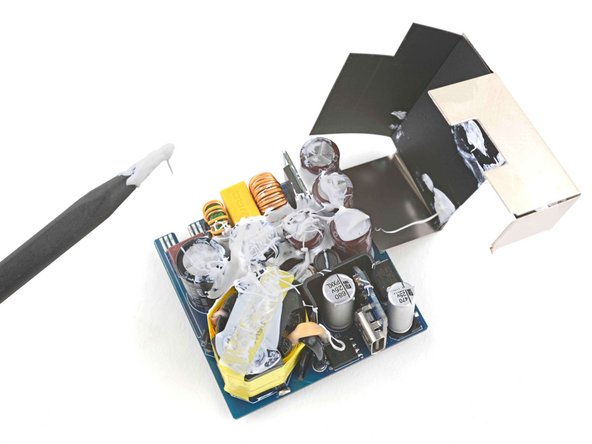
Underneath the shielding, most of the device is covered in thermal compound. We're not big fans of glue, in general, but it's really important for fast charging performance that nothing in here gets too hot.
-
This thermal compound conducts heat away from the electrical components, then out through the shielding. It also helps stabilize the components.
-
The compound cures soft (you can see how it coated our spudger!), which means that any component-level repair will be messy.
クリエイティブコモンズのオープンソース著作権のもと、あなたの投稿は著作権の対象となります。