手順 3を翻訳中
手順3


-
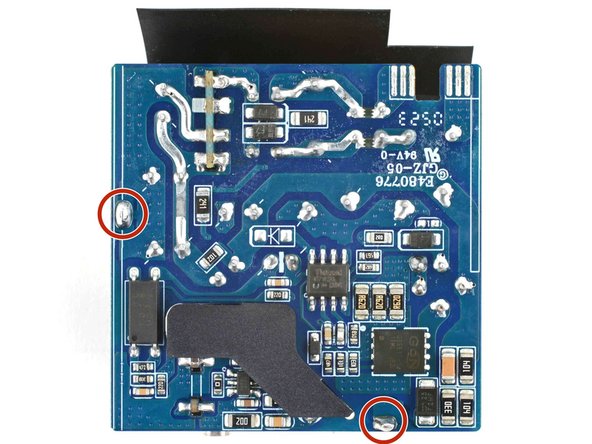
There's an electromagnetic interference shield that doubles as a heatsink on top of the charger. It's soldered to the board with two through-hole pins.
-
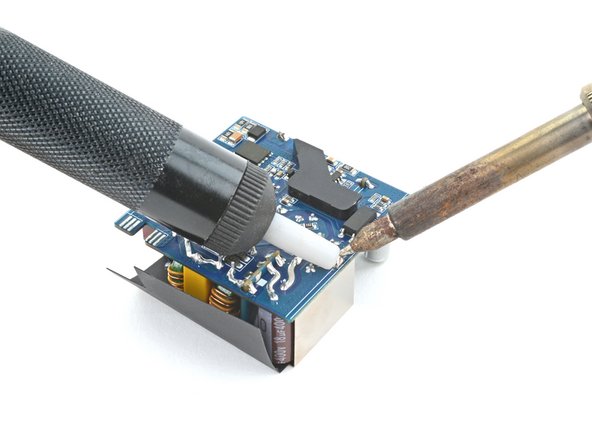
Release the shielding from the board by desoldering these pins, using a soldering iron and desoldering pump.
クリエイティブコモンズのオープンソース著作権のもと、あなたの投稿は著作権の対象となります。