はじめに
Use this guide to replace the rear-facing camera.
必要な工具と部品
ビデオの概要
-
-
Power off your iPhone before beginning disassembly.
-
Remove the two 3.6 mm P2 Pentalobe screws next to the Lightning connector.
-
-
この手順で使用する道具:Clampy - Anti-Clamp$24.95
-
Pull the blue handle backwards to unlock the Anti-Clamp's arms.
-
Slide the arms over either the left or right edge of your iPhone.
-
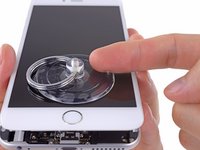
Position the suction cups near the bottom edge of the iPhone just above the home button—one on the front, and one on the back.
-
Squeeze the cups together to apply suction to the desired area.
-
-
-
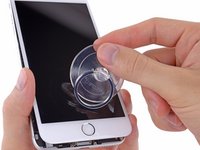
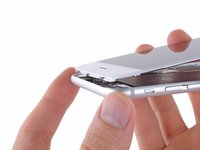
Use a single suction cup to lift the front panel:
-
Press a suction cup onto the screen, just above the home button.
-
-
-
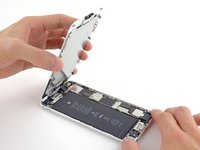
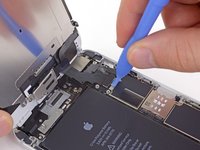
Pull the home button end of the front panel assembly away from the rear case, using the top of the phone as a hinge.
-
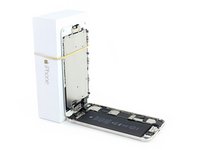
Open the display to about a 90º angle, and lean it against something to keep it propped up while you're working on the phone.
-
Add a rubber band to keep the display securely in place while you work. This prevents undue strain on the display cables.
-
-
-
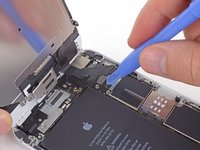
この手順で使用する道具:Tweezers$4.99
-
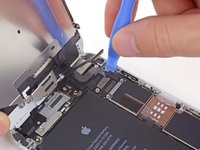
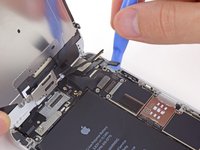
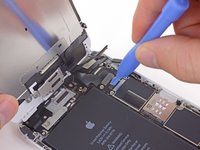
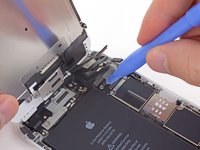
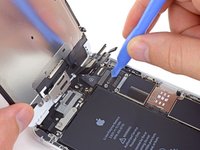
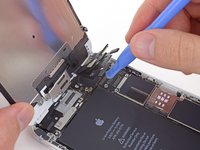
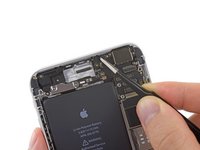
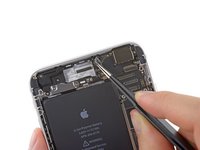
Use a pair of tweezers to peel back the piece of tape covering the hidden screw securing the rear-facing camera bracket to the rear case.
-


To reassemble your device, follow these instructions in reverse order.
To reassemble your device, follow these instructions in reverse order.
152 の人々がこのガイドを完成させました。

22 件のコメント
Great how-to article. I was able to follow it and fix my son's camera within an hour. Patience is key -- take your time and stay organized and you'll get through this.
After the replacement the LCD started to freezing.
after my replacement with the ifixit camera, my camera twitches and will not focus :(