はじめに
iPhone 5s のホームボタンアセンブリを交換するにはこの手順をご利用ください。
新規購入時の携帯電話に装着されているホームボタンアセンブリのみTouch ID 機能がついています。新しいホームボタンを取り付けた際は、通常のホームボタン機能を回復できますが、Touch ID機能は回復できません。
この手順を使って、次のパーツを交換することもできます。
必要な工具と部品
ビデオの概要
-
-
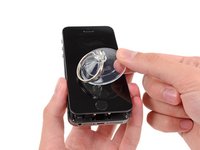
フロントガラスが割れている場合、ガラスに透明な補強テープを貼りましょう。作業中ガラスが飛び散ったりして怪我をしないようご注意ください。
-
画面全体を何重にも貼り、しっかりと固定します。
-
-
-
この作業でどんなツールを使ってもディスプレイ全体を本体から完全に取り外してください。
-
スクリーンが離れてきたら、第1番目の画像にあるように、プラスチック製の開口ツールをフレームとメタル製本体の間に差し込み、ケースからメタルクリップを外します。
-
-
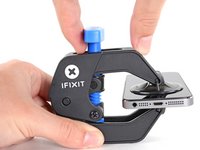
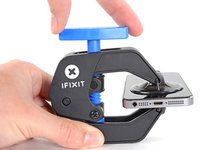
この手順で使用する道具:Clampy - Anti-Clamp$24.95
-
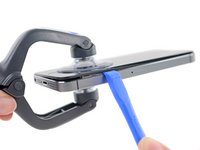
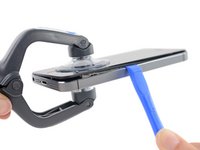
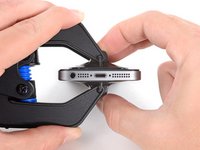
青いハンドルを後ろ側に引いて、クランプのアームをロック解除します。
-
iPhoneの右端もしくは左端上にアームをスライドして乗せます。
-
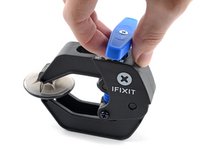
吸盤カップを、ホームボタンすぐ上のiPhoneの下端付近に装着します。上部に一つ、下部に1つずつ取り付けます。
-
両側のカップをしっかりと押し付けて、取り付けたい位置に装着します。
-
-
-
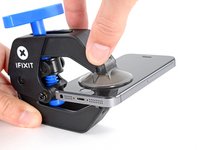
リバースクランプをご利用にならない場合は、フロントパネルを持ち上げるため、シングルタイプの吸盤カップを使います。
-
カップをしっかりとホームボタン上部のスクリーンにしっかりと装着させます。
-
-
-
iPhone を片手でしっかりと抑えながら、吸盤カップを少しずつ引き上げて、本体リアケースからフロントパネルのホームボタン端を引き離します。
-
吸盤カップを引き上げながら、プラスチック製の開口ツールで、ゆっくりとリアケースの端からフロントパネルアセンブリをこじ開けていきます。
-
-
この手順で使用する道具:Tweezers$4.99
-
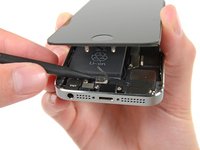
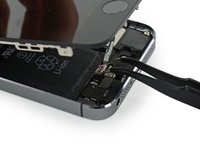
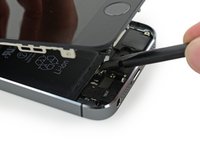
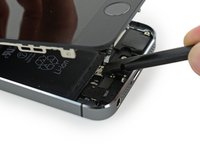
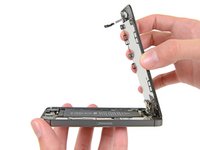
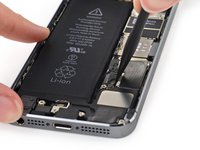
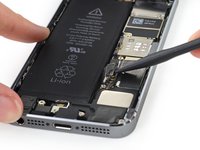
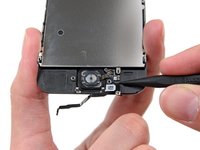
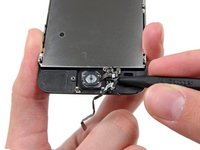
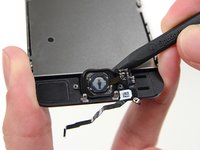
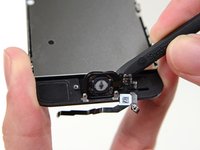
ホームボタンケーブルを覆うメタル製ブラケットが取り出せる程度まで本体を開きます。
-
新規購入時のオリジナルのホームボタンアセンブリではTouch IDが使用できます。ケーブルの破損後、新しいホームボタンを取り付けた場合、ホームボタンとしての機能は回復できますが、Touch IDは使用できなくなります。
-
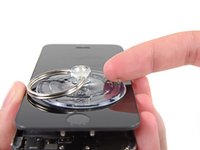
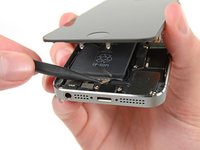
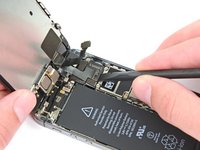
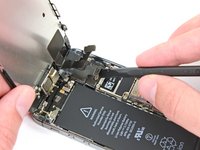
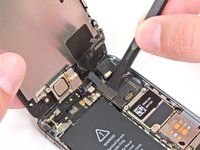
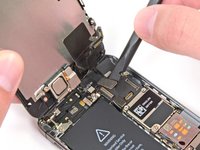
スパッジャーの先端を使ってブラケットを外し、ピンセットで取り出します。
-
-
-
-
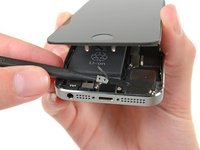
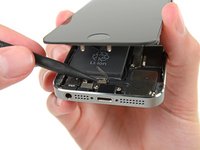
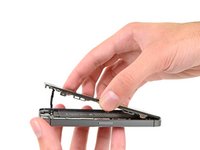
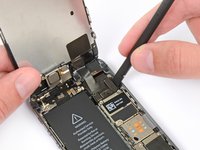
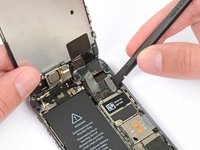
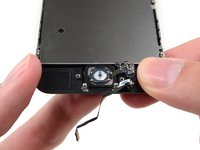
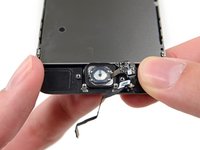
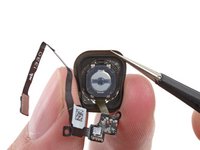
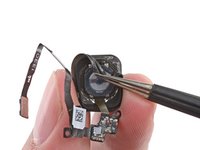
コネクターの接続が外れたら、本体上部を蝶番のようにして、アセンブリのホームボタン先端をリアケースから引き上げます。
-
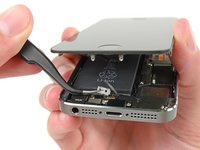
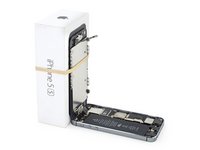
ディスプレイを約90度で開き、作業中固定するため、ディスプレイの後ろに衝立を用意します。
-
作業中、輪ゴムでディスプレイを固定してください。これはディスプレイケーブルに過度な圧力が加わらないようにするためです。
-


デバイスを再組み立てする際は、これらの手順を逆の順番に従って作業を進めてください。
デバイスを再組み立てする際は、これらの手順を逆の順番に従って作業を進めてください。
328 の人々がこのガイドを完成させました。
以下の翻訳者の皆さんにお礼を申し上げます:
100%

これらの翻訳者の方々は世界を修理する私たちのサポートをしてくれています。 あなたも貢献してみませんか?
翻訳を始める ›


39 件のコメント
Has anyone attempted to replace the metal ring around the finger scanner?
I was unable to find any info on this, I'd like to offer this as a custom service, I'd be great to get some guidance without wrecking a few of em first.
If you’ve got a iPhone 5S with a broken touch ID button or flex cable, you’re pretty much stuck! The iPhone 5S touch ID and motherboard are linked specifically to each other and there is no way to swap out the touch ID and still have the fingerprint sensors work.
Don’t ever attempt to change the iPhone 5S home button from the flex cable. The sensor is glued to the sapphire with very strong adhesive. Disassembling the button from the chip will cause irreversible damage. The electronic components will be different if you attempt to connect another button to the touch ID flex and will not function. You can’t recalibrate the sensor and it will never read fingerprints again. It will however function as a home button.
ben -
Steps 11-16 are not really needed. Just replaced the home button on an iPhone 5s and there is no need to fully detach the front from the back of the phone. After step 10 just prop the phone open so that the button can be removed. Replace button. Reconnect cable and then then close the phone up. Otherwise a really a good guide.
tynfoylaat - 返信
So you don't need to remove the home button ribbon cable?
brian -
if the fingerprint touch id cable is damaged..the cable only can be repaired?