この修理ガイドは変更されています。最新の未承認バージョンに切り替えます。
はじめに
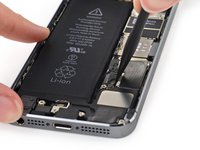
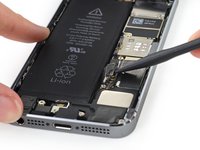
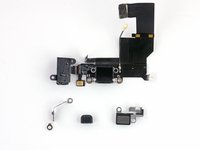
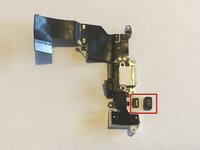
Lightningポートのクリーニングを試しても効果がなかった場合、この手順を使って、ヘッドホンジャックとセルラーアンテナ、マイクを含む、機能しないLightningコネクターアセンブリを交換してください。
また、この手順を使って次のパーツを交換することもできます。
- ヘッドホンジャックの相互接続ケーブル
- マイクガスケット
このビデオは基板の外し方を含む、追加の手順が幾つか含まれています。最新版かつ短縮版ガイドは以下にあるビデオの手順に従ってください。
必要な工具と部品
ビデオの概要
-
-
フロントガラスが割れている場合、ガラスに透明な補強テープを貼りましょう。作業中ガラスが飛び散ったりして怪我をしないようご注意ください。
-
画面全体を何重にも貼り、しっかりと固定します。
-
-
-
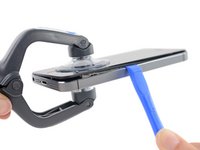
この作業でどんなツールを使ってもディスプレイ全体を本体から完全に取り外してください。
-
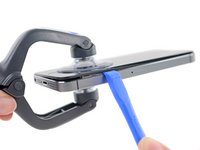
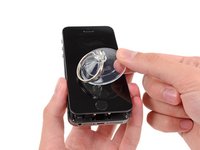
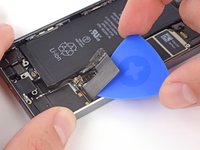
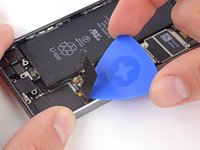
スクリーンが離れてきたら、第1番目の画像にあるように、プラスチック製の開口ツールをフレームとメタル製本体の間に差し込み、ケースからメタルクリップを外します。
-
-
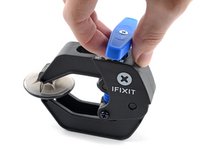
この手順で使用する道具:Clampy - Anti-Clamp$24.95
-
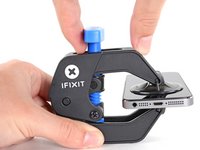
青いハンドルを後ろ側に引いて、クランプのアームをロック解除します。
-
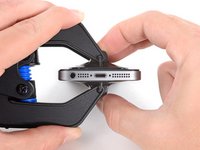
iPhoneの右端もしくは左端上にアームをスライドして乗せます。
-
吸盤カップを、ホームボタンすぐ上のiPhoneの下端付近に装着します。上部に一つ、下部に1つずつ取り付けます。
-
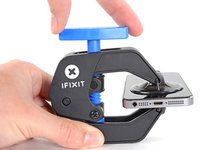
両側のカップをしっかりと押し付けて、取り付けたい位置に装着します。
-
-
-
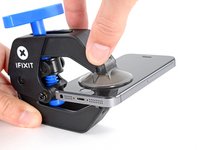
リバースクランプをご利用にならない場合は、フロントパネルを持ち上げるため、シングルタイプの吸盤カップを使います。
-
カップをしっかりとホームボタン上部のスクリーンにしっかりと装着させます。
-
-
-
iPhone を片手でしっかりと抑えながら、吸盤カップを少しずつ引き上げて、本体リアケースからフロントパネルのホームボタン端を引き離します。
-
吸盤カップを引き上げながら、プラスチック製の開口ツールで、ゆっくりとリアケースの端からフロントパネルアセンブリをこじ開けていきます。
-
-
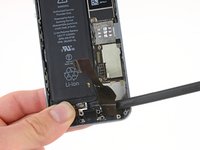
この手順で使用する道具:Tweezers$4.99
-
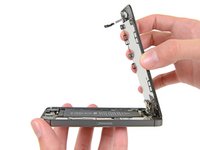
ホームボタンケーブルを覆うメタル製ブラケットが取り出せる程度まで本体を開きます。
-
新規購入時のオリジナルのホームボタンアセンブリではTouch IDが使用できます。ケーブルの破損後、新しいホームボタンを取り付けた場合、ホームボタンとしての機能は回復できますが、Touch IDは使用できなくなります。
-
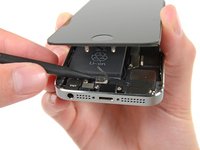
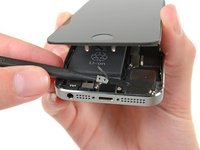
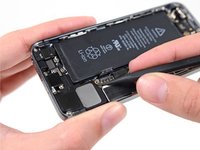
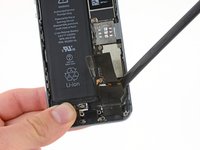
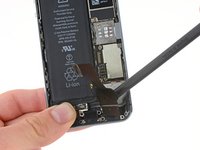
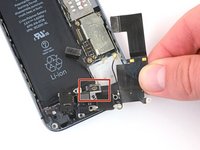
スパッジャーの先端を使ってブラケットを外し、ピンセットで取り出します。
-
-
-
-
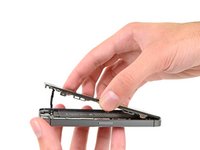
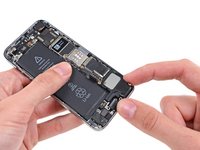
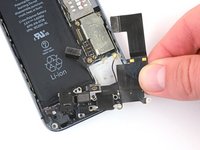
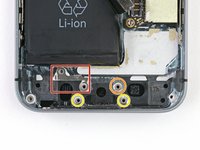
コネクターの接続が外れたら、本体上部を蝶番のようにして、アセンブリのホームボタン先端をリアケースから引き上げます。
-
ディスプレイを約90度で開き、作業中固定するため、ディスプレイの後ろに衝立を用意します。
-
作業中、輪ゴムでディスプレイを固定してください。これはディスプレイケーブルに過度な圧力が加わらないようにするためです。
-
-
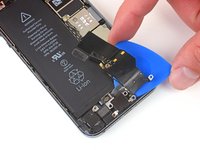
この手順で使用する道具:Tweezers$4.99
-
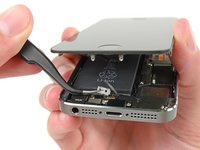
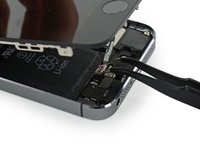
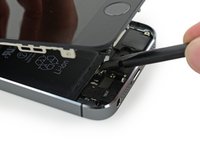
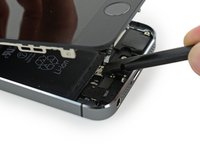
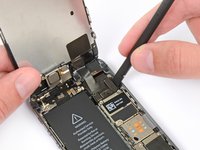
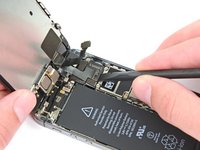
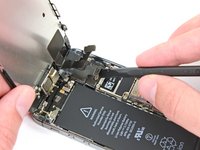
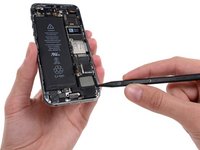
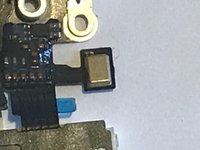
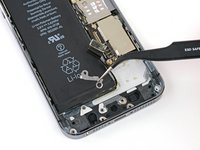
マイクケーブルを折り曲げてまっすぐにします。
-
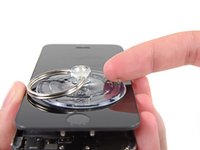
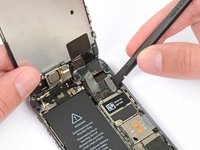
指またはピンセットを使って、マイクカバーをマイクから引き抜いてください。
-
-
-
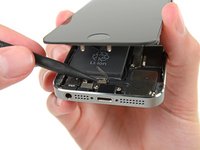
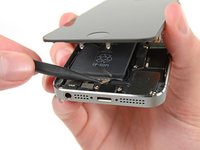
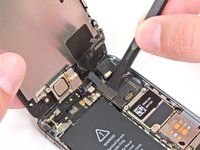
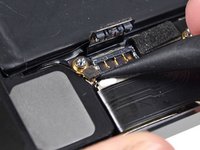
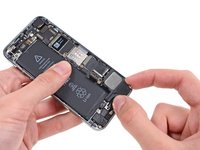
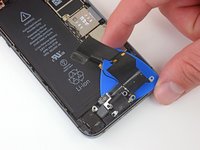
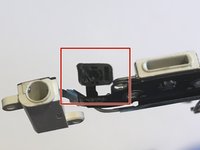
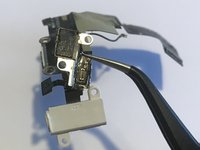
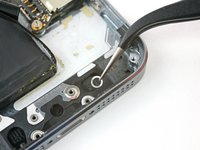
Touch IDケーブルとコネクタをLightningコネクタアセンブリの裏側に回転させて、Touch IDケーブルをブラケットから剥がします。
-
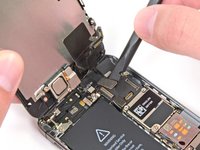
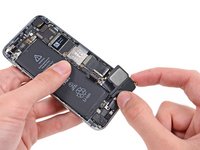
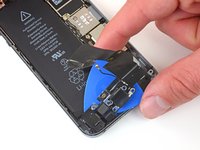
交換用LightningケーブルアセンブリのTouch IDケーブルを画像のようにブラケットに通します。Touch IDケーブルをB-7000などの接着剤でブラケットに固定してください。
-


デバイスを再組み立てする際は、この手順を逆の順番に従って作業を進めてください。
デバイスを再組み立てする際は、この手順を逆の順番に従って作業を進めてください。
399 の人々がこのガイドを完成させました。
以下の翻訳者の皆さんにお礼を申し上げます:
100%

これらの翻訳者の方々は世界を修理する私たちのサポートをしてくれています。 あなたも貢献してみませんか?
翻訳を始める ›


43 件のコメント
Can't you replace just the lightning port itself by soldering on a new one?
Josh Bacon - 返信
It's not even worth soldering another one on when it's pretty cheap to buy another charging port flex assembly.
Ben -
I got through this successfully and it solved my problem (phone wouldn't charge/iTunes wouldn't recognize it when plugged in). With the new part it works perfectly.
Two cautions: I bought a new lightning connector assembly and I had to transfer two items from the old assembly that were not mentioned in the steps.
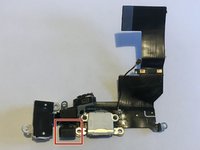
(1) There is a small black rubber "boot" which you can see in the step 38 photo. (on the very bottom between the lightning port and the headphone jack) Pull this off and put it in the same place on your new lightning connector assembly. It attaches to a fitting on the bottom wall of the aluminum case.
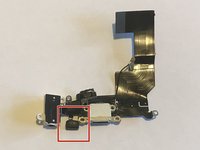
(2) There is a bracket that holds the home button connector socket in place. This is the socket that is exposed when you disconnect the home button cable in step 9. When you remove the old lightning connector assembly, this bracket needs to be transferred to the new assembly. It's attached by a small piece of double sided tape that you can salvage/reuse if you're careful!
Right well that wasn't too much fun. In my case the adhesive connecting the lcd/digitiser and the lcd shield/bracket had gone making opening the device quite difficult. The screen and digitizer were coming up with the suction cup but the lcd shield and the metal bracket with all the clips stayed firmly secured to the main case. My solution was to drive a flat metal prying tool on the battery side between the metal bracket and the inside wall of the main casing. Not for the faint of heart but I got there in the end.
No complaints with the rest of the repair and the iFixit replacement lightning assembly works flawlessly (my lighting port and headphone jack had become loose fitting causing headphones to easily pop out and making charging very difficult).
When all is re-assembled remember to do a hard reset to get touch ID working again as only the home button function works immediately after reassembly (security feature?). Thanks a million iFixit, this brick will live to see another year hopefully :)
Hi Barry,
Can you clarify what type of reset you had to do to get your TouchID working again as like you, only my home button is working after reassembly.
Thanks