はじめに
この手順を参照して、iPad mini 4 Wi-Fiの経年劣化したバッテリーを交換しましょう。
バッテリーが膨張している場合、適切な予防処置をとってください。
必要な工具と部品
-
-
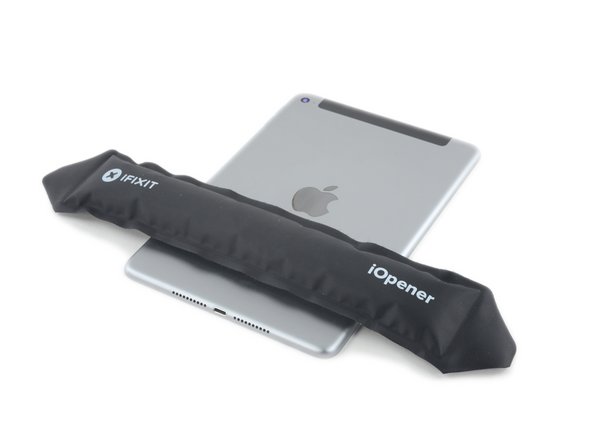
鍋を十分な量のお湯で満たして、iOpener を完全に沈めます。
-
お湯を沸かして熱くなったら火を止めます。
-
iOpenerを熱湯の中に約2−3分間沈めます。iOpener全体が完全に浸かっているか確認してください。
-
トングなどを浸かって、温まったiOpenerをお湯から取り出します。
-
タオルでiOpener全体を拭き取ります。
-
iOpenerの準備は整いました。iOpenerを再度温める必要がある場合は、お湯を沸騰させて、火を止めてからiOpenerを2-3分間浸してください。
-
-
-
-
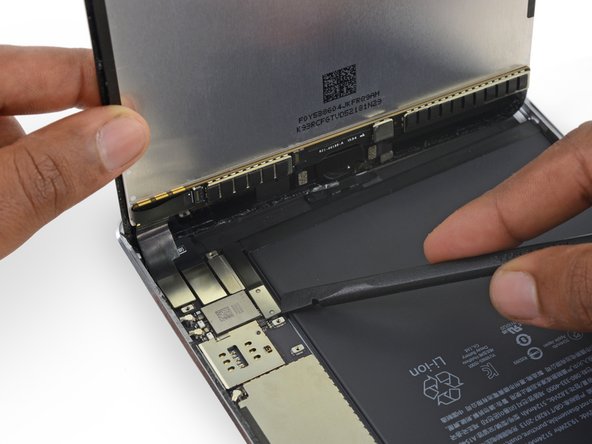
スパッジャーの鋭利な先端を使って、ロジックボード上のソケットからディスプレイデータコネクタの接続を外します。
-
スパッジャーの鋭利な先端を使って、ロジックボード上のソケットからデジタイザーケーブルコネクタの接続を外します。
-
-
-
ディスプレイアセンブリを取り外します。
-
ディスプレイアセンブリを再装着するには、ディスプレイ接着剤を交換する必要があります。当社のディスプレイ接着剤の装着ガイドを参照して、ディスプレイ用接着剤を再塗布し、デバイスを再封印してください。
-


デバイスを再度組み立てるには、この説明書の逆の順番で組み立ててください。
デバイスを再度組み立てるには、この説明書の逆の順番で組み立ててください。
72 の人々がこのガイドを完成させました。

22 件のコメント
This guide is great for disassembly. I’ve just successfully removed the battery from my device by following these instructions. However, it does not provide any guidance for applying the new adhesive strips before assembling the screen. For that reason, this guide seems incomplete.
[can’t edit the guide]
Cleaningoff the old adhesive:
Remove the old adhesive from underside of the glass and the edges of the case. This was the most time consuming part. Took 2-3 hours, because the original adhesive was really gummy and i didn’t want to damage any parts with harsh solvents. (I used a series of methods": citrus oil adhesive remover, methylated spirits, sticky tape stick and lift off.)
Making sure the edges of the glass and case are spotless ensures a good result when applying the new adhesive strips. New strips can be gently applied, peeled back and reapplied to make 100% sure they are in the right place. If adhesive residue is still present the new strips could get stuck in the wrong place and be impossible to reposition.
[can’t edit the guide]
Reassembly:
Replacement double sided adhesive strips are applied to the case first. Figure which strips go top, bottom and sides. Start with the top or bottom corner. Apply the side strips last so you can figure which side is which.
Make sure the front camera and its window are clean. Use a strong magnifying glass and air duster. You won’t be able to get any dirt out unless you have more adhesive strips to use.
When you are ready to assemble, peel the backing off the double sided adhesive.
Support the screen at 90deg to case. Reattach cable connectors. Attach new battery connector then carefully position new battery with exposed adhesive into position in the case.
Attach connector clamp plate with 4 screws.
Carefully position the screen in case starting from the bottom edge. When it fits all the way around, press firmly round the edges to seal.
The guide is rated at a medium difficulty, which is out of step with a few iPhone battery replacement guides that are at a hard difficulty. Compared to the iPhone, the iPad is significantly more difficult to service. Even though there are few steps, it’s far easier to damage the device.
I’d rate it the hardest repair in earth!
cheongi -