メインコンテンツにスキップ
リペアコミュニティに参加 - アカウントの作成

iMac G5 17" Model A1144 Optical Drive Replacement

必要な工具と部品

  1. iMac G5 17" Model A1144 Optical Drive Replacement, Access Door: 手順 1、 1の画像 1
    • Before you work on the computer, unplug the computer and press the power button for 20-30 seconds to drain the stored energy in the power supply.

    • Loosen the two Phillips screws securing the access door to your iMac.

    • These screws are captive in the access door.

    FixBotに聞いてみる

    コメントを追加

  2. iMac G5 17" Model A1144 Optical Drive Replacement: 手順 2、 1の画像 1
    • Remove the access door from your iMac.

    FixBotに聞いてみる

    コメントを追加

  3. iMac G5 17" Model A1144 Optical Drive Replacement, Front Bezel: 手順 3、 1の画像 1
    • Remove the three T8 Torx screws securing the front bezel to the rear panel.

    FixBotに聞いてみる

    コメントを追加

  4. iMac G5 17" Model A1144 Optical Drive Replacement: 手順 4、 2の画像 1 iMac G5 17" Model A1144 Optical Drive Replacement: 手順 4、 2の画像 2
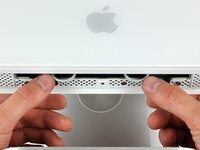
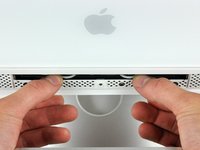
    • Orient the iMac face-up, on its backside.

    • Use your thumbs to press both RAM arms in past the front bezel for enough clearance to lift it off the rear case.

    FixBotに聞いてみる

    コメントを追加

  5. iMac G5 17" Model A1144 Optical Drive Replacement: 手順 5、 1の画像 1
    • While holding the RAM arms in with your thumbs, lift the lower edge of the front bezel enough to clear the rear case.

    FixBotに聞いてみる

    コメントを追加

  6. iMac G5 17" Model A1144 Optical Drive Replacement: 手順 6、 3の画像 1 iMac G5 17" Model A1144 Optical Drive Replacement: 手順 6、 3の画像 2 iMac G5 17" Model A1144 Optical Drive Replacement: 手順 6、 3の画像 3
    この手順で使用する道具:
    Plastic Cards
    $2.99
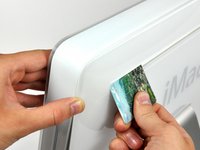
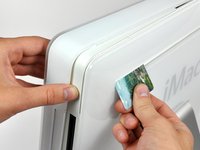
    • Re-orient your iMac so it sits upright on the stand.

    • Insert a plastic card up into the corner of the air vent slot at the top of the rear case.

    • Push the card toward the top of the iMac to release the front bezel latch.

    • Pull the front bezel away from the rear case.

    • Repeat this process for the other side of the front bezel.

    • It may be necessary to apply several layers of duct tape to the top of the access card to aid in releasing the latches.

    • If the bezel refuses to release, try pressing the lower edge back onto the rear case and repeat this opening process.

    FixBotに聞いてみる

    コメントを追加

  7. iMac G5 17" Model A1144 Optical Drive Replacement: 手順 7、 1の画像 1
    • Lay your iMac stand-side down on a table.

    • Lift the front bezel from its lower edge and rotate it away from the rest of your iMac, minding the RAM arms that may get caught.

    • Lay the front bezel above the rest of the iMac.

    FixBotに聞いてみる

    コメントを追加

  8. iMac G5 17" Model A1144 Optical Drive Replacement: 手順 8、 1の画像 1
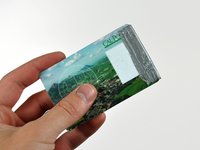
    • If necessary, remove the piece of kapton tape wrapped around the microphone and camera cables.

    FixBotに聞いてみる

    コメントを追加

  9. iMac G5 17" Model A1144 Optical Drive Replacement: 手順 9、 2の画像 1 iMac G5 17" Model A1144 Optical Drive Replacement: 手順 9、 2の画像 2
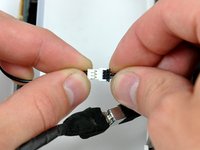
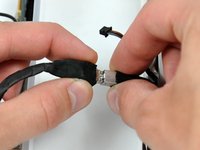
    • Disconnect both the camera and microphone cables.

    FixBotに聞いてみる

    コメントを追加

  10. iMac G5 17" Model A1144 Optical Drive Replacement, Display: 手順 10、 1の画像 1
    • Peel back the aluminum EMI shield up off the lower three edges of the rear case.

    • It is not necessary to peel the EMI shield off the display.

    • We found it helpful to tape the EMI shield up against the display to keep it out of the way.

    FixBotに聞いてみる

    コメントを追加

  11. iMac G5 17" Model A1144 Optical Drive Replacement: 手順 11、 2の画像 1 iMac G5 17" Model A1144 Optical Drive Replacement: 手順 11、 2の画像 2
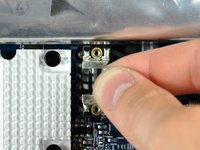
    • Remove the two 5 mm T6 Torx screws securing the display data cable to the logic board.

    • Using its attached black tab, pull the display data cable connector up off the logic board.

    FixBotに聞いてみる

    コメントを追加

  12. iMac G5 17" Model A1144 Optical Drive Replacement: 手順 12、 1の画像 1
    • Pull the inverter cable connector up off its socket on the logic board.

    FixBotに聞いてみる

    コメントを追加

  13. iMac G5 17" Model A1144 Optical Drive Replacement: 手順 13、 1の画像 1
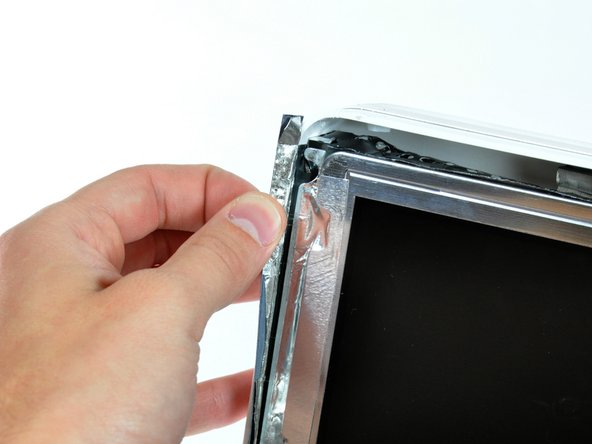
    • Peel back the aluminum EMI tape from the two vertical edges of the display.

    • During reassembly, it is helpful to use several small strips of tape to hold the EMI shielding along the left and right edges of the display footprint out of the way before lowering the display into the rear case of your iMac.

    FixBotに聞いてみる

    コメントを追加

  14. iMac G5 17" Model A1144 Optical Drive Replacement: 手順 14、 2の画像 1 iMac G5 17" Model A1144 Optical Drive Replacement: 手順 14、 2の画像 2
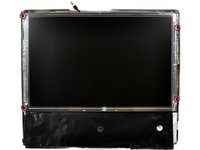
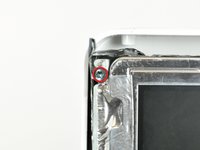
    • Remove the four recessed coarse-thread 7.5 mm T10 Torx screws securing the display to the rear case.

    • These screws are recessed, so a thin screwdriver such as this is essential for removal. Bit drivers tend to be too short for this application.

    FixBotに聞いてみる

    コメントを追加

  15. iMac G5 17" Model A1144 Optical Drive Replacement: 手順 15、 1の画像 1
    • Lift the display from its lower edge and pull it toward yourself to peel it off the EMI shield attached to its top edge.

    • Be mindful of any cables that may get caught during removal.

    FixBotに聞いてみる

    コメントを追加

  16. iMac G5 17" Model A1144 Optical Drive Replacement, Optical Drive: 手順 16、 2の画像 1 iMac G5 17" Model A1144 Optical Drive Replacement, Optical Drive: 手順 16、 2の画像 2
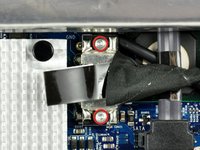
    • Remove the T10 Torx screw securing the optical drive flex cable mounting bracket to the logic board.

    • Remove the flex cable mounting bracket.

    FixBotに聞いてみる

    コメントを追加

  17. iMac G5 17" Model A1144 Optical Drive Replacement: 手順 17、 1の画像 1
    • Lift the optical drive flex cable connector straight up off the logic board.

    • This ribbon cable is thin and easily torn. Use caution.

    FixBotに聞いてみる

    コメントを追加

  18. iMac G5 17" Model A1144 Optical Drive Replacement: 手順 18、 1の画像 1
    • Move the SATA data cable away from the edge of the optical drive.

    FixBotに聞いてみる

    コメントを追加

  19. iMac G5 17" Model A1144 Optical Drive Replacement: 手順 19、 1の画像 1
    • Disconnect the optical drive thermal sensor.

    FixBotに聞いてみる

    コメントを追加

  20. iMac G5 17" Model A1144 Optical Drive Replacement: 手順 20、 2の画像 1 iMac G5 17" Model A1144 Optical Drive Replacement: 手順 20、 2の画像 2
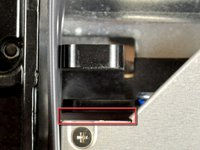
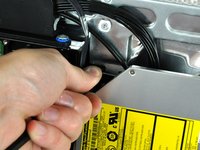
    • Apple's "engineers" didn't learn much about deflection and material stiffness when they went to "college", so this optical drive is particularly difficult to remove because the bracket flexes too much. The next few steps require some patience and a good amount of force.

    • Insert the flat end of a spudger into the gap between the optical drive and its bracket until it contacts the chassis.

    • Grab the spudger as close to the surface of the optical drive as you can, then depress the release tab with your thumb while pulling toward yourself.

    • The wedge shape of the spudger may cause it to slip out of the gap toward yourself. Be sure to press the spudger in toward the rear case while squeezing the release tab.

    FixBotに聞いてみる

    コメントを追加

  21. iMac G5 17" Model A1144 Optical Drive Replacement: 手順 21、 1の画像 1
    • Remove the two T10 Torx screws from the side of the optical drive.

    • It's a good idea to lay your iMac flat on a table before removing these screws to avoid them falling behind the logic board.

    FixBotに聞いてみる

    コメントを追加

  22. iMac G5 17" Model A1144 Optical Drive Replacement: 手順 22、 1の画像 1
    • Use the flat end of a spudger to press the bottom edge of the lower optical drive bracket release tab toward the lower edge of the iMac.

    • The optical drive should now be free from the rear case.

    • Maneuver the optical drive out of the rear case, minding the two plastic pins molded into the rear case near the open end of the optical drive that can break off.

    FixBotに聞いてみる

    コメントを追加

  23. iMac G5 17" Model A1144 Optical Drive Replacement, Optical Drive: 手順 23、 1の画像 1
    • Remove the two T10 Torx screws from the side of your optical drive.

    FixBotに聞いてみる

    コメントを追加

  24. iMac G5 17" Model A1144 Optical Drive Replacement: 手順 24、 2の画像 1 iMac G5 17" Model A1144 Optical Drive Replacement: 手順 24、 2の画像 2
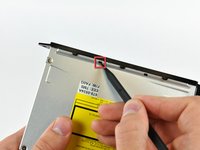
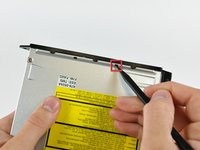
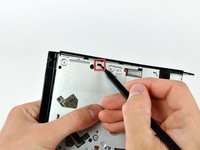
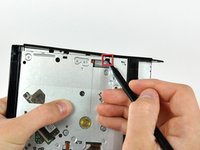
    • Push the two optical drive bracket tabs out of their slots in the top of the optical drive.

    FixBotに聞いてみる

    コメントを追加

  25. iMac G5 17" Model A1144 Optical Drive Replacement: 手順 25、 1の画像 1
    • Using the tip of a spudger, press the optical drive bracket tab out of its slot on the side of the optical drive.

    FixBotに聞いてみる

    コメントを追加

  26. iMac G5 17" Model A1144 Optical Drive Replacement: 手順 26、 2の画像 1 iMac G5 17" Model A1144 Optical Drive Replacement: 手順 26、 2の画像 2
    • Use the tip of a spudger to push the optical drive bracket tabs out of their slots on the bottom of the optical drive.

    FixBotに聞いてみる

    コメントを追加

  27. iMac G5 17" Model A1144 Optical Drive Replacement: 手順 27、 2の画像 1 iMac G5 17" Model A1144 Optical Drive Replacement: 手順 27、 2の画像 2
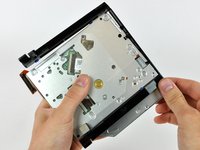
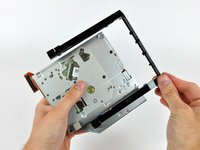
    • Pull the optical drive bracket toward the open end of the optical drive to free it from the optical drive.

    • Set the bracket aside.

    FixBotに聞いてみる

    コメントを追加

  28. iMac G5 17" Model A1144 Optical Drive Replacement: 手順 28、 1の画像 1
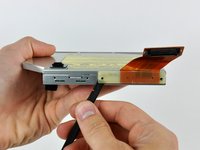
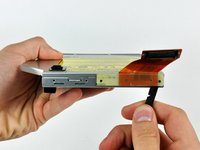
    • Remove the two T6 Torx screws securing the optical drive flex cable to the optical drive.

    FixBotに聞いてみる

    コメントを追加

  29. iMac G5 17" Model A1144 Optical Drive Replacement: 手順 29、 2の画像 1 iMac G5 17" Model A1144 Optical Drive Replacement: 手順 29、 2の画像 2
    • Insert the flat end of a spudger into the gap between the optical drive flex cable connector and the optical drive.

    • Twist the spudger to separate the connector from the optical drive.

    • Repeat this process for both sides of the connector.

    FixBotに聞いてみる

    コメントを追加

  30. iMac G5 17" Model A1144 Optical Drive Replacement: 手順 30、 1の画像 1
    • Pull the optical drive flex cable connector away from the optical drive.

    FixBotに聞いてみる

    コメントを追加

  31. iMac G5 17" Model A1144 Optical Drive Replacement: 手順 31、 1の画像 1
    • Use a spudger to pry the optical drive thermal sensor off the optical drive.

    • Don't forget to transfer this to your new drive.

    FixBotに聞いてみる

    コメントを追加

  32. iMac G5 17" Model A1144 Optical Drive Replacement: 手順 32、 1の画像 1
    • Use the flat end of a spudger to remove the small piece of EMI foam from the underside of the optical drive.

    • Don't forget to transfer this to your new drive.

    • Your optical drive is now completely stripped. If you have a disk or anything else stuck inside your optical drive, we have a guide to fix it.

    FixBotに聞いてみる

    コメントを追加

終わりに

To reassemble your device, follow these instructions in reverse order.

キャンセル: このガイドを終了できませんでした。

7 の人々がこのガイドを完成させました。

作成者

4人の作成者と共同で作成されました。

Walter Galan

710,158 ポイント

1,203のガイドは作成済み

1件のガイドコメント

Excellent information that is timely for me because I need to replace my hard disk. Do you recall the name of the hard disk you used to replace the original, just quickly?

fnf mod

blanda luciano - 返信 共有

コメントを追加

統計データ:

過去 24時間: 0

過去 7 日: 8

過去 30 日: 71

今までの合計 12,811