メインコンテンツにスキップ

左側 Joy-Con 充電レールの交換

英語
日本語

手順 15を翻訳中

手順15
Left Joy-Con Charging Rail Replacement: 手順 0、 2の画像 1 Left Joy-Con Charging Rail Replacement: 手順 0、 2の画像 2
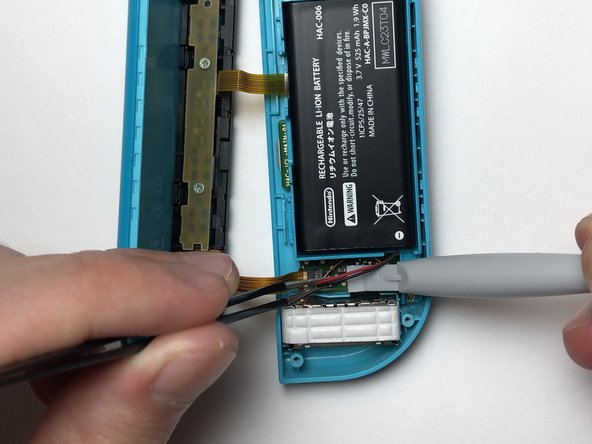
  • Place the battery into the mid-frame.

  • Use tweezers to align the battery plug over the socket and with a pry tool or an object with a flat edge, press the plug into the socket.

バッテリーをミッドフレームに取り付けます。

ピンセットを使って、バッテリーのプラグをソケットに位置合わせをして、開口ツールや先端が平坦なツールを使って、プラグをソケットに押し込みます。

クリエイティブコモンズのオープンソース著作権のもと、あなたの投稿は著作権の対象となります