メインコンテンツにスキップ

Google Pixel XL Daughterboard Replacement

英語
日本語

手順 8を翻訳中

手順8
Google Pixel XL Daughterboard Replacement: 手順 0、 3の画像 1 Google Pixel XL Daughterboard Replacement: 手順 0、 3の画像 2 Google Pixel XL Daughterboard Replacement: 手順 0、 3の画像 3
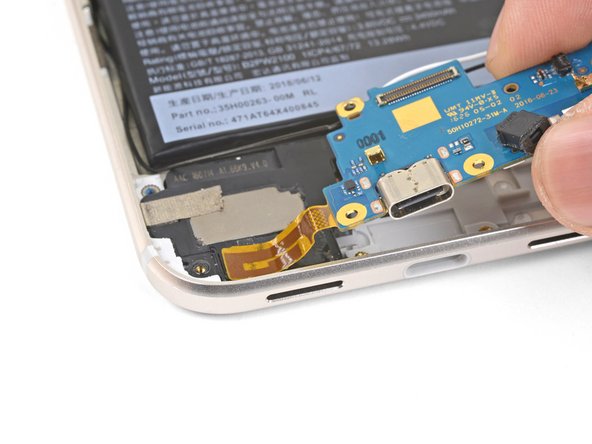
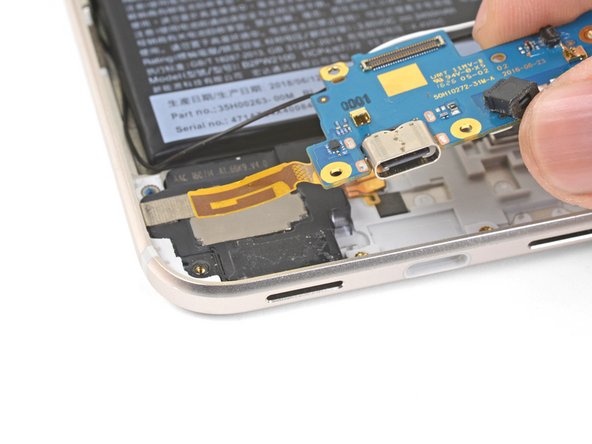
  • Slowly lift the left edge of the daughterboard up, pulling the antenna patch off of the loudspeaker.

  • You can insert an opening pick under the antenna patch to help separate it from the loudspeaker.

  • If the antenna patch begins to rip, stop pulling. Heat an iOpener, apply it to the corner for a minute, and use an opening pick to help remove it from the loudspeaker.

ここに翻訳を挿入する

ここに翻訳を挿入する

ここに翻訳を挿入する

クリエイティブコモンズのオープンソース著作権のもと、あなたの投稿は著作権の対象となります