メインコンテンツにスキップ

ZTE Blade X Max LCD Replacement

必要な工具と部品

  1. ZTE Blade X Max LCD Replacement, Back Cover: 手順 1、 2の画像 1 ZTE Blade X Max LCD Replacement, Back Cover: 手順 1、 2の画像 2
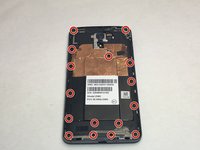
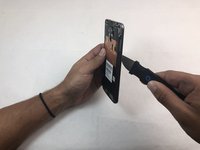
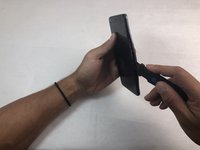
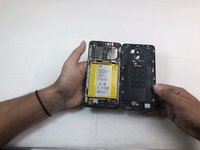
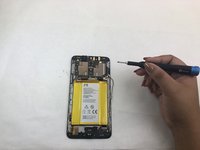
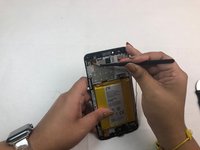
    • Use the iOpener or heating pad to heat around the edges of the phone to melt the adhesive.

    • It will take about ten minutes for the adhesive to be heated enough to remove the backing.

    • You will have to reheat the iOpener or heating pad a few times.

  2. ZTE Blade X Max LCD Replacement: 手順 2、 3の画像 1 ZTE Blade X Max LCD Replacement: 手順 2、 3の画像 2 ZTE Blade X Max LCD Replacement: 手順 2、 3の画像 3
    • Slide the Jimmy along the under backing and lightly push the plastic up.

    • You will hear a snapping sound as you slide the Jimmy along the backing. This is from the closures releasing. There should be seven total closures on either side of the device, and three on the top and bottom.

  3. ZTE Blade X Max LCD Replacement: 手順 3、 1の画像 1
    • Carefully remove the backing from the phone once the closures are released.

    • If you do not open all of the closures on the backing do not attempt to pry it off.

    • Be careful when opening the back of the phone. The fingerprint scanner is connected by a thin film that will tear if pulled too roughly.

  4. ZTE Blade X Max LCD Replacement: 手順 4、 3の画像 1 ZTE Blade X Max LCD Replacement: 手順 4、 3の画像 2 ZTE Blade X Max LCD Replacement: 手順 4、 3の画像 3
    • Remove the opaque yellow sticker that indicates where the fingerprint scanner is connected to the back of the device.

  5. ZTE Blade X Max LCD Replacement: 手順 5、 3の画像 1 ZTE Blade X Max LCD Replacement: 手順 5、 3の画像 2 ZTE Blade X Max LCD Replacement: 手順 5、 3の画像 3
    • Remove the two 1mm Phillips #000 screws on the small panel that was underneath the sticker.

    • Use the tweezers to remove the panel.

  6. ZTE Blade X Max LCD Replacement: 手順 6、 2の画像 1 ZTE Blade X Max LCD Replacement: 手順 6、 2の画像 2
    • Use the tweezers to pull at the base of the film to remove the fingerprint scanner.

  7. ZTE Blade X Max LCD Replacement, Midframe: 手順 7、 1の画像 1
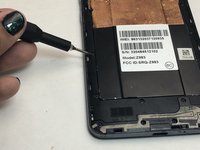
    • Remove the SD and SIM cards by pulling out the card tray from the slot on the right side of the device.

  8. ZTE Blade X Max LCD Replacement: 手順 8、 3の画像 1 ZTE Blade X Max LCD Replacement: 手順 8、 3の画像 2 ZTE Blade X Max LCD Replacement: 手順 8、 3の画像 3
    • Remove the sixteen 1mm Phillips #000 screws from the midframe of the phone.

  9. ZTE Blade X Max LCD Replacement: 手順 9、 3の画像 1 ZTE Blade X Max LCD Replacement: 手順 9、 3の画像 2 ZTE Blade X Max LCD Replacement: 手順 9、 3の画像 3
    • Use the Jimmy to remove the midframe from the device.

  10. ZTE Blade X Max LCD Replacement, Front Camera: 手順 10、 3の画像 1 ZTE Blade X Max LCD Replacement, Front Camera: 手順 10、 3の画像 2 ZTE Blade X Max LCD Replacement, Front Camera: 手順 10、 3の画像 3
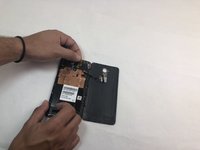
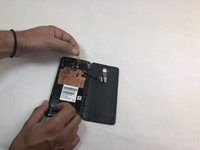
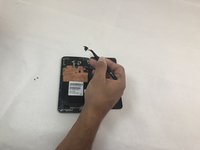
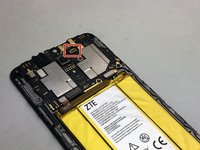
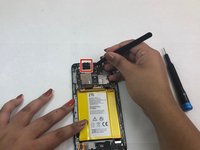
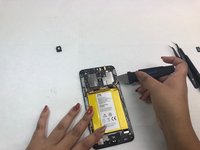
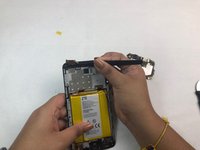
    • Once the motherboard is exposed, locate the front camera connection in the top right corner of the motherboard.

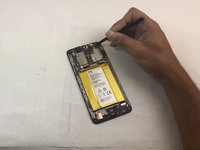
    • Use the tweezers to remove the front camera.

  11. ZTE Blade X Max LCD Replacement, Battery: 手順 11、 1の画像 1
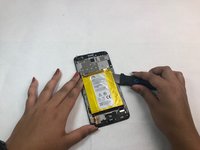
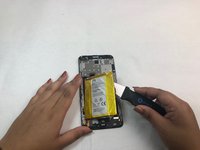
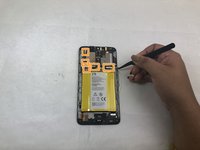
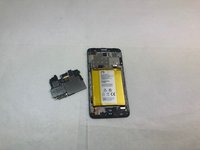
    • Use the iOpener or heating pad to heat the phone. This will loosen the adhesive below the battery.

    • Do not apply the iOpener directly to the battery. Place the iOpener on the opposite side of the phone to indirectly melt the battery's adhesive.

  12. ZTE Blade X Max LCD Replacement: 手順 12、 3の画像 1 ZTE Blade X Max LCD Replacement: 手順 12、 3の画像 2 ZTE Blade X Max LCD Replacement: 手順 12、 3の画像 3
    • Use the spudger to pry the battery out of its slot after it has been thoroughly heated.

    • If the adhesive is still strong, reheat the opposite side of the phone until you can easily remove the battery.

  13. ZTE Blade X Max LCD Replacement, Motherboard: 手順 13、 3の画像 1 ZTE Blade X Max LCD Replacement, Motherboard: 手順 13、 3の画像 2 ZTE Blade X Max LCD Replacement, Motherboard: 手順 13、 3の画像 3
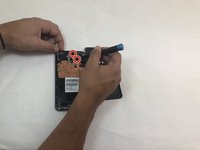
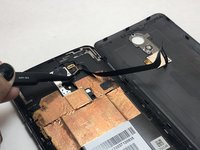
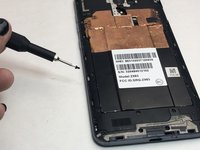
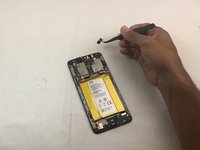
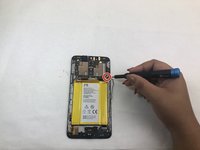
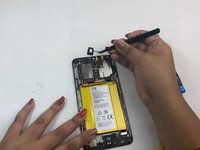
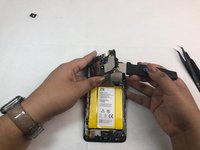
    • Remove the single 1mm Phillips #000 screw from the motherboard.

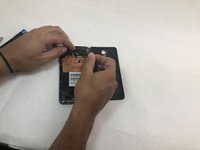
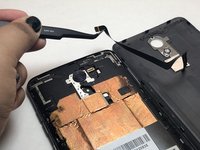
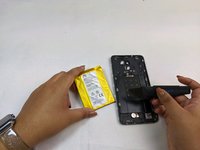
    • Detach the five flat connectors.

  14. ZTE Blade X Max LCD Replacement: 手順 14、 2の画像 1 ZTE Blade X Max LCD Replacement: 手順 14、 2の画像 2
    • Use tweezers to remove the protective foam surrounding the headphone jack at the top left of the device.

    • The foam is attached with a thin layer of adhesive which is easy to remove.

  15. ZTE Blade X Max LCD Replacement: 手順 15、 3の画像 1 ZTE Blade X Max LCD Replacement: 手順 15、 3の画像 2 ZTE Blade X Max LCD Replacement: 手順 15、 3の画像 3
    • Use the Jimmy to pry the motherboard out of the phone.

  16. ZTE Blade X Max LCD Replacement, LCD: 手順 16、 2の画像 1 ZTE Blade X Max LCD Replacement, LCD: 手順 16、 2の画像 2
    • The LCD cable will be completely exposed once the motherboard is removed.

    • Use the tweezers to remove the protective sticker and the entire component.

  17. ZTE Blade X Max LCD Replacement: 手順 17、 1の画像 1
    • The LCD and its frame are now free to be replaced with a new component.

終わりに

To reassemble your device, follow these instructions in reverse order.

ある他の人がこのガイドを完成しました。

作成者

4人の作成者と共同で作成されました。

Celeste Holmes

メンバー登録日: 09/17/19

624 ポイント

6のガイドは作成済み

チーム

0 件のコメント

コメントを追加

統計データ:

過去 24時間: 0

過去 7 日: 0

過去 30 日: 4

今までの合計 685