メインコンテンツにスキップ
リペアコミュニティに参加 - アカウントの作成

Sony a7 Rear Disassembly Replacement

必要な工具と部品

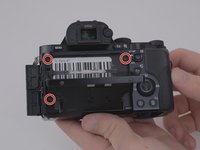
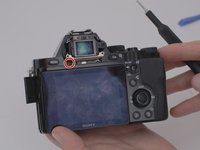
    1. Sony a7 Rear Disassembly  Replacement, Rear Disassembly: 手順 1、 1の画像 1
      • Remove the eyepiece cover by removing the four M1.5x4mm screws with a PH00 Phillips screwdriver.

      • Remove the M1.5x4mm screw that retains the adjustment wheel with a PH00 Phillips screwdriver.

      FixBotに聞いてみる

      コメントを追加

    2. Sony a7 Rear Disassembly  Replacement: 手順 2、 3の画像 1 Sony a7 Rear Disassembly  Replacement: 手順 2、 3の画像 2 Sony a7 Rear Disassembly  Replacement: 手順 2、 3の画像 3
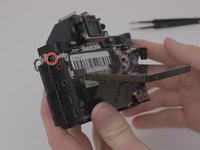
      • Remove the six M1.5x4mm screws with a PH00 Phillips screwdriver.

      FixBotに聞いてみる

      コメントを追加

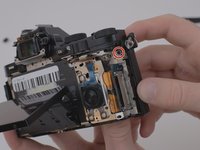
    3. Sony a7 Rear Disassembly  Replacement: 手順 3、 1の画像 1
      • Remove one M1.5x4mm screw with a PH00 Phillips screwdriver.

      FixBotに聞いてみる

      コメントを追加

    4. Sony a7 Rear Disassembly  Replacement: 手順 4、 2の画像 1 Sony a7 Rear Disassembly  Replacement: 手順 4、 2の画像 2
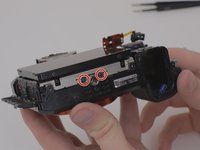
      • Remove the four M 1.5x2mm screws.

      FixBotに聞いてみる

      コメントを追加

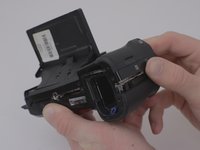
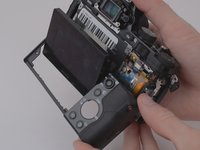
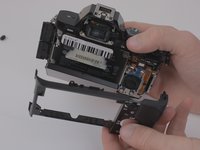
    5. Sony a7 Rear Disassembly  Replacement: 手順 5、 3の画像 1 Sony a7 Rear Disassembly  Replacement: 手順 5、 3の画像 2 Sony a7 Rear Disassembly  Replacement: 手順 5、 3の画像 3
      • Once the screws have been removed, unsnap and lift the rear plastic cover off of the camera.

      FixBotに聞いてみる

      コメントを追加

    6. Sony a7 Rear Disassembly  Replacement: 手順 6、 1の画像 1
      この手順で使用する道具:
      Tweezers
      $4.99
      • Using the blunt tweezers, remove the blue ribbon cable.

      • For additional guidance and tips on how to properly attach and detach connector cables, please reference iFixit's guide to connector cables here.

      FixBotに聞いてみる

      コメントを追加

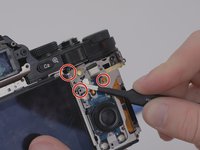
    7. Sony a7 Rear Disassembly  Replacement: 手順 7、 2の画像 1 Sony a7 Rear Disassembly  Replacement: 手順 7、 2の画像 2
      • Place the tweezers on the side of the circuit board and lift it from underneath so as to free it from the three retaining tabs.

      FixBotに聞いてみる

      コメントを追加

    8. Sony a7 Rear Disassembly  Replacement: 手順 8、 3の画像 1 Sony a7 Rear Disassembly  Replacement: 手順 8、 3の画像 2 Sony a7 Rear Disassembly  Replacement: 手順 8、 3の画像 3
      • Remove four M1.5x4mm screws using a PH00 Phillips screwdriver.

      FixBotに聞いてみる

      コメントを追加

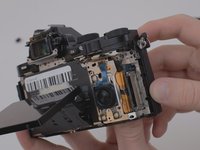
    9. Sony a7 Rear Disassembly  Replacement: 手順 9、 1の画像 1
      • Lift the metal plate and LCD screen away from the camera body.

      FixBotに聞いてみる

      コメントを追加

    10. Sony a7 Rear Disassembly  Replacement: 手順 10、 1の画像 1
      • Detach the amber ribbon cable from the motherboard.

      • For additional guidance and tips on how to properly attach and detach connector cables, please reference iFixit's guide to connector cables here.

      FixBotに聞いてみる

      コメントを追加

終わりに

To reassemble your device, follow these instructions in reverse order.

キャンセル: このガイドを終了できませんでした。

9 の人々がこのガイドを完成させました。

作成者

4人の作成者と共同で作成されました。

Jeffrey Coleman

メンバー登録日: 01/14/20

1,364 ポイント

6のガイドは作成済み

0件のガイドコメント

コメントを追加

統計データ:

過去 24時間: 6

過去 7 日: 21

過去 30 日: 102

今までの合計 9,705