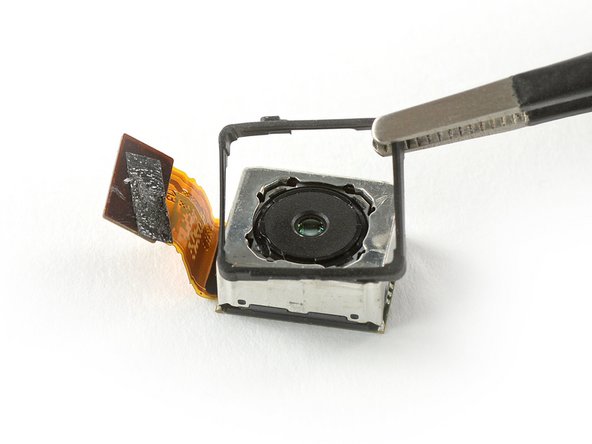
メインコンテンツにスキップ

Sony Xperia Z5 Rear Camera Replacement

必要な工具と部品

  1. Sony Xperia Z5 Rear Camera Replacement, Back Cover: 手順 1、 1の画像 1
    • Before you begin, switch off your phone.

    • Apply a heated iOpener to the edges on the back of the phone to loosen the adhesive beneath the rear glass. Apply the iOpener for at least two minutes.

  2. Sony Xperia Z5 Rear Camera Replacement: 手順 2、 2の画像 1 Sony Xperia Z5 Rear Camera Replacement: 手順 2、 2の画像 2
    • Secure a suction handle to the bottom of the rear glass, as close to the edge as possible.

    • Pull up the suction handle to generate a gap.

    • Insert an opening pick into the gap to further separate the rear glass from the phone assembly.

    • The adhesive of the Xperia Z5 is fairly weak and it is possible to remove the rear glass without the use of an opening pick. In case you‘re having trouble you can have a peek at the opening procedure of the Xperia Z4.

  3. Sony Xperia Z5 Rear Camera Replacement: 手順 3、 2の画像 1 Sony Xperia Z5 Rear Camera Replacement: 手順 3、 2の画像 2
    • Carefully lift and remove the rear glass.

    • After installing the rear glass, apply strong, steady pressure to your phone for several minutes to help the adhesive form a good bond—a stack of heavy books works well.

  4. Sony Xperia Z5 Rear Camera Replacement, Battery Disconnect: 手順 4、 2の画像 1 Sony Xperia Z5 Rear Camera Replacement, Battery Disconnect: 手順 4、 2の画像 2
    • Use a spudger to pry up and disconnect the battery flex cable.

  5. Sony Xperia Z5 Rear Camera Replacement, Rear Camera: 手順 5、 2の画像 1 Sony Xperia Z5 Rear Camera Replacement, Rear Camera: 手順 5、 2の画像 2
    • Use a spudger to pry up and disconnect the rear camera flex cable.

  6. Sony Xperia Z5 Rear Camera Replacement: 手順 6、 3の画像 1 Sony Xperia Z5 Rear Camera Replacement: 手順 6、 3の画像 2 Sony Xperia Z5 Rear Camera Replacement: 手順 6、 3の画像 3
    この手順で使用する道具:
    Tweezers
    $4.99
    購入する
    • Remove the rear camera with a pair of tweezers.

    • Compare your new replacement part to the original part — you may need to transfer a rubber gasket to your new part before installing.

終わりに

To reassemble your device, follow these instructions in reverse order.

Take your e-waste to an R2 or e-Stewards certified recycler.

Repair didn’t go as planned? Check out our Answers community for troubleshooting help.

ある他の人がこのガイドを完成しました。

作成者

2人の作成者と共同で作成されました。

Dominik Schnabelrauch

メンバー登録日: 11/23/16

211,788 ポイント

682のガイドは作成済み

チーム

iFixit iFixit人のメンバー

Staff

140 メンバー

18,077のガイドは作成済み

0 件のコメント

コメントを追加

統計データ:

過去 24時間: 0

過去 7 日: 2

過去 30 日: 8

今までの合計 537