はじめに
This guide will show you how to properly install a new power cord to your Ryobi CSB125 circular saw. If the cord is plugged into a power source but the saw fails to make any movement when the trigger is pressed in, then most likely the power cord has gone bad. This troubleshooting page will help diagnose any potential problems occurring due to a faulty power cord. In the event that a new power cord is needed, this guide will show the steps to properly install a new one. The only tools you will need are a Phillips #2 screwdriver and a pair of wire strippers. This guide will cover how to access the internal wires from the power cord.
必要な工具と部品
-
-
-
-
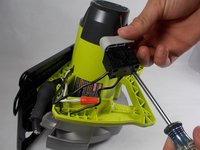
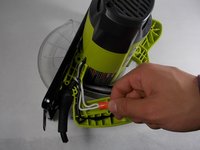
To remove the plug from the saw you will need to disconnect the two wires that come from the plug.
-
Remove the black wire by unscrewing it from the trigger switch using the Phillips #2 screwdriver.
-
Remove the white wire by twisting off the plastic wire nut to separate the two white wires.
-

 FixBotに聞いてみる



To reassemble your device, follow these instructions in reverse order.
5 の人々がこのガイドを完成させました。

チーム

UMass Dartmouth, Team S2-G1, Barthe Fall 2019 UMass Dartmouth, Team S2-G1, Barthe Fall 2019人のメンバー
UMASSD-BARTHE-F19S2G1
3 メンバー
5のガイドは作成済み
