メインコンテンツにスキップ
リペアコミュニティに参加 - アカウントの作成

Ryobi CSB125 Motor Replacement

必要な工具と部品

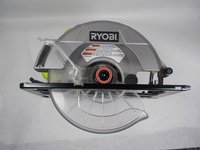
    1. Ryobi CSB125 Motor Replacement, Motor: 手順 1、 1の画像 1
      • Place the saw on a flat surface with the blade facing up.

      • Make sure that the saw is unplugged from any power source.

      FixBotに聞いてみる

      コメントを追加

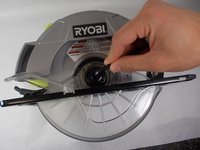
    2. Ryobi CSB125 Motor Replacement: 手順 2、 2の画像 1 Ryobi CSB125 Motor Replacement: 手順 2、 2の画像 2
      • Remove the bumper by using the T20 torx screwdriver to loosen the M5 x 20mm screw.

      FixBotに聞いてみる

      コメントを追加

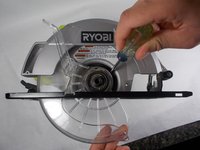
    3. Ryobi CSB125 Motor Replacement: 手順 3、 2の画像 1 Ryobi CSB125 Motor Replacement: 手順 3、 2の画像 2
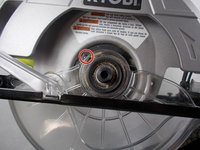
      • Use the 7”/32 allen key to loosen the 5/16-18 x 9/16 in. blade screw.

      FixBotに聞いてみる

      コメントを追加

    4. Ryobi CSB125 Motor Replacement: 手順 4、 1の画像 1
      • Remove the 5/16-18 x 9/16 in. blade screw, spring washer, the outer blade washer, the blade, and the inner blade washer.

      FixBotに聞いてみる

      コメントを追加

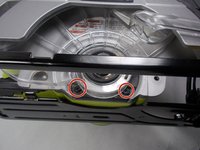
    5. Ryobi CSB125 Motor Replacement: 手順 5、 3の画像 1 Ryobi CSB125 Motor Replacement: 手順 5、 3の画像 2 Ryobi CSB125 Motor Replacement: 手順 5、 3の画像 3
      • Use the #2 Phillip screwdriver to remove the four M4x16mm screws shown.

      • You will need to rotate the protective shell around in order to access them.

      FixBotに聞いてみる

      コメントを追加

    6. Ryobi CSB125 Motor Replacement: 手順 6、 1の画像 1
      • Remove the lower blade guard support assembly from the rest of the saw.

      FixBotに聞いてみる

      コメントを追加

    7. Ryobi CSB125 Motor Replacement: 手順 7、 1の画像 1
      • Flip the saw over and place the saw down on a flat surface with the motor facing up.

      FixBotに聞いてみる

      コメントを追加

    8. Ryobi CSB125 Motor Replacement: 手順 8、 1の画像 1
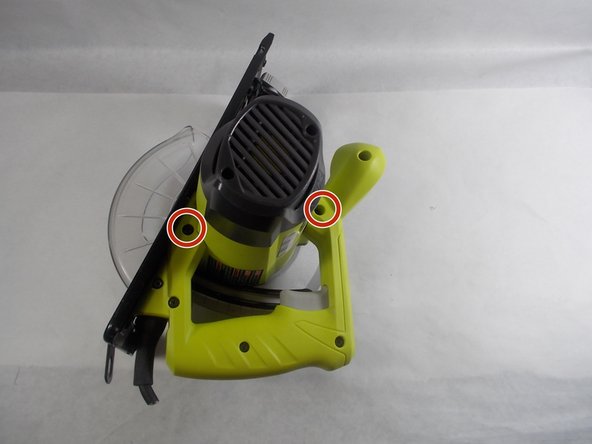
      • Use the Phillips #2 screwdriver to remove the five M4x16mm screws.

      FixBotに聞いてみる

      コメントを追加

    9. Ryobi CSB125 Motor Replacement: 手順 9、 1の画像 1
      • Use the Phillips #2 screwdriver to remove the two M45x35mm screws.

      FixBotに聞いてみる

      コメントを追加

    10. Ryobi CSB125 Motor Replacement: 手順 10、 2の画像 1 Ryobi CSB125 Motor Replacement: 手順 10、 2の画像 2
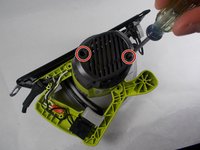
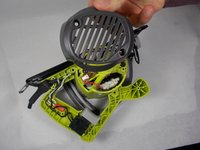
      • Use the Phillips #2 screwdriver to remove the two M4x16mm screws holding down the end cover.

      • Pull off the end cover.

      FixBotに聞いてみる

      コメントを追加

    11. Ryobi CSB125 Motor Replacement: 手順 11、 1の画像 1
      • Use the Phillips #2 screwdriver to remove the M45x35mm screw holding down the motor housing.

      FixBotに聞いてみる

      コメントを追加

    12. Ryobi CSB125 Motor Replacement: 手順 12、 1の画像 1
      • Remove the motor housing for access to the internal motor components.

      FixBotに聞いてみる

      コメントを追加

終わりに

To reassemble your device, follow these instructions in reverse order.

キャンセル: このガイドを終了できませんでした。

3 の人々がこのガイドを完成させました。

作成者

1人の作成者と共同作成されました。

Curtis Melo

メンバー登録日: 10/31/19

1,093 ポイント

5のガイドは作成済み

チーム

UMass Dartmouth, Team S2-G1, Barthe Fall 2019 UMass Dartmouth, Team S2-G1, Barthe Fall 2019人のメンバー

UMASSD-BARTHE-F19S2G1

3 メンバー

5のガイドは作成済み

0件のガイドコメント

コメントを追加

統計データ:

過去 24時間: 1

過去 7 日: 10

過去 30 日: 41

今までの合計 1,172