この翻訳は、ソースガイドの最新の更新を反映していない可能性があります。 翻訳の更新に協力してください。 または ソースガイドを参照してください。
必要な工具と部品
-
-
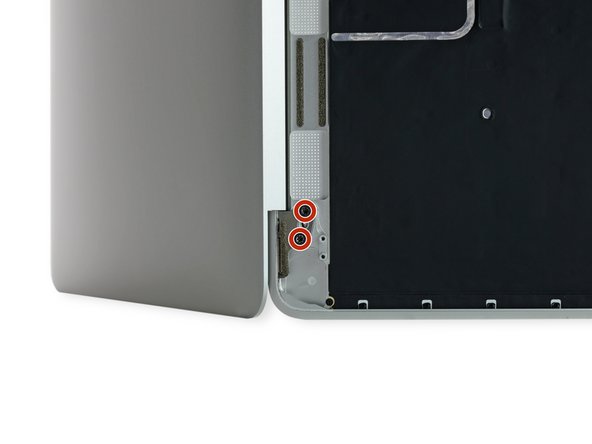
下部ケースを固定している次の8本のネジを取り外します:
-
2本の1.8 mm P5ペンタローブネジ
-
4本の2.9 mm P5ペンタローブネジ
-
2本の6.1 mm P5ペンタローブネジ
-
-
-
追加の予防策として、ロジックボードとバッテリーコネクタの間にバッテリー絶縁ピックを挿入して、バッテリーを物理的に外すことができます。
-
-
-
この手順は未翻訳です。 翻訳を手伝う。
-
Holding the display assembly with one hand and the upper case with the other, push them together slightly to move the hinges out of their recesses in the the upper case.
-
Push the upper case forward while pulling back gently on the display.
-
Once the two display hinges have cleared the upper case, remove the display and set it aside.
-


20 の人々がこのガイドを完成させました。

4 件のコメント
please where do i have to put the mushrooms screws? 923-01012
If you look closely at this image in Step 36 you can see them pretty clearly.
I changed the keyboard itself; you follow the instructions to step 35 (skipping 29 to 30, microphone removal) and then remove the keyboard ribbon cable connector to the trackpad (step 45). Maybe the most complicated step is ungluing the black backing stuck to the back of the keyboard and then there are almost a hundred tiny screws holding the keyboard to the frame, mostly only an eye strain. Got the keyboard through ebay (spanish keyboard layout).
I replaced my keyboard and it won’t turn on.