はじめに
For most repairs, you have to open the device. This isn’t a big problem with the EP models.
Note: EP 5xxx models are from an older Saeco line. Compare with Saeco Minuto.
The instructions can also help with Saeco- models and with other fully automatic coffee machines from Philips und Gaggia - the devices all come from the same manufacturer and are very similarly built.
必要な工具と部品
-
-
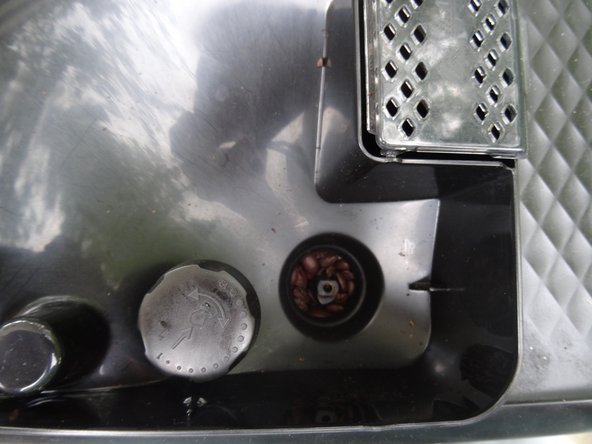
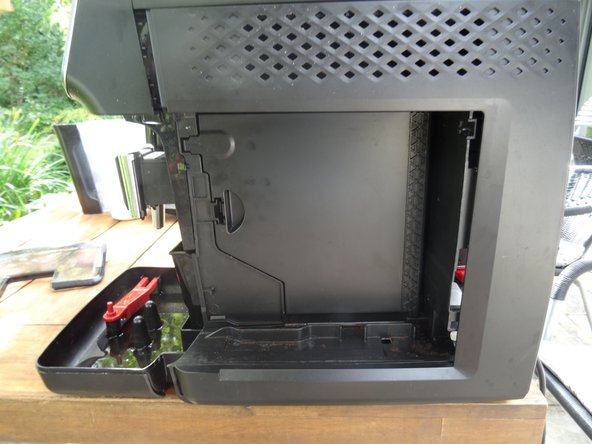
Remove all attachments, like the water reservoir, the brewing chamber, the bean compartment lid, and the drip tray. Remove all of the coffee beans.
-
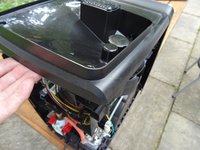
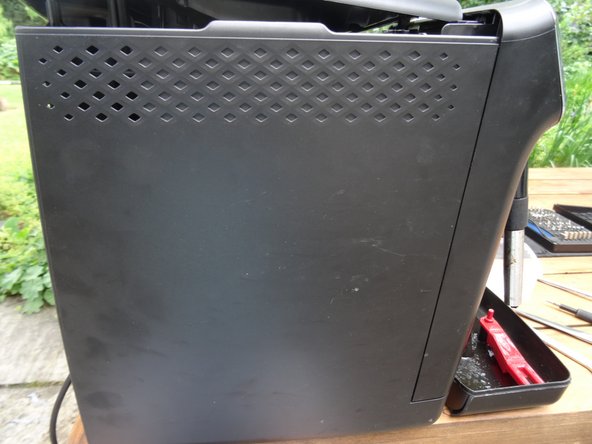
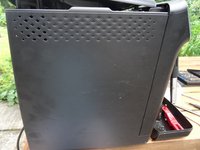
Turn the machine around so the back is facing you. Remove the two T10 Torx screws at the bottom edge. Pull out the back at the bottom edge and lift it down.
-
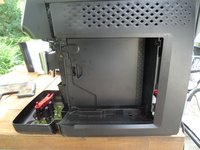
It's important that the parts are readily visible:
-
The motherboard
-
The pump
-
The flow meter
-
The heating element
 FixBotに聞いてみる
-
-
-
-
Remove all the beans from the opening on the finger guard of the grinder. A T10 Torx screw will become visible.
-
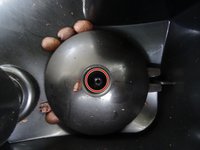
Unscrew the T10 Torx screw from the finger guard.
-
Lift the finger guard up.
-
-
-
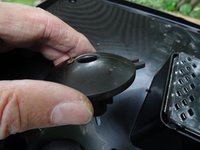
Slightly lift the top cover up at the back edge.
-
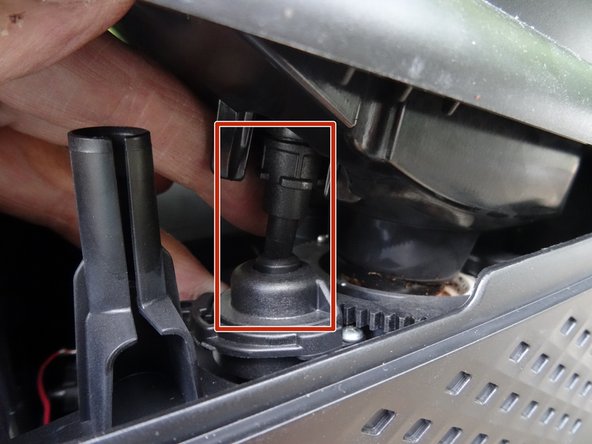
When putting it back together, make sure the grinder control is sitting right.
-
-
-
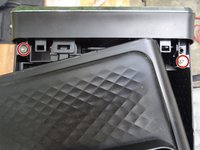
Pull the upper cover out from under the front cover and lay it slightly offset.
-
Remove both of the T10 Torx screws attached to the side covers.
-
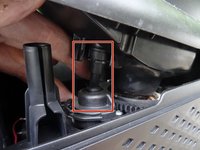
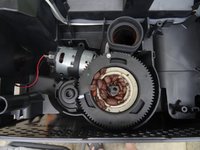
Picture 2 shows the grinder, which can now be easily taken off.
-
If you want to repair the grinder: here are the instructions Replacing the Philips ceramic grinder motor and sensor
-
-
-
Both side panels are still screwed to the lower edge of the front. Unscrew both of the T10 Torx screws out from here.
-
Slide both side panels back a bit, and take them out from the bottom edge.
-


Complete the steps in reverse order to reassemble your device.
9 の人々がこのガイドを完成させました。
以下の翻訳者の皆さんにお礼を申し上げます:
100%


これらの翻訳者の方々は世界を修理する私たちのサポートをしてくれています。 あなたも貢献してみませんか?
翻訳を始める ›
チーム

8件のガイドコメント
Leider stimmt diese Anleitung nicht für alle EP Modelle, ich besitze die Saeco Philips EP5960-10 diese zu öffnen ist eine Katastrophe. Da gibt es keine einzelne Wände, ich muss unbedingt unten an den Stromanschluss, da meine Maschine Plötzlich nicht mehr angeht, eventuell ist da eine Sicherung verbaut. Phillips will 200 € haben, da lege ich 100 drauf dann bekommt man was neues.
Danke für den Hinweis. Diese Modelle gehen auf eine ältere Linie zurück. Vergleiche mit der Saeco Exprelia.
@michaelkollek ... oder Saeco Minuto