はじめに
Use this guide to replace a worn-out or dead battery in your OnePlus Nord.
If your battery is swollen, take appropriate precautions. For your safety, discharge your battery below 25% before disassembling your phone. This reduces the risk of a dangerous thermal event if the battery is accidentally damaged during the repair.
You’ll need replacement adhesive to reattach components when reassembling the device.
必要な工具と部品
-
-
Switch off your phone.
-
Heat an iOpener to loosen the adhesive beneath the rear glass. Apply the iOpener for at least two minutes. If you have a heatbed with precise temperature control (like any FDM 3D printer with heatbed) 45°C is enough. You might want to repeat this step several times during the rear glass removal.
-
-
-
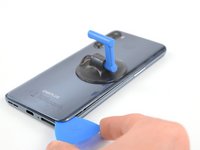
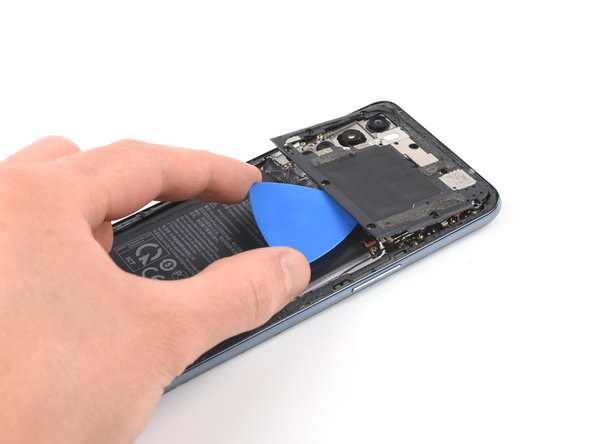
Apply a suction cup to the back of the phone, as close as possible to the center of the right edge.
-
Pull on the suction cup to create a gap between the rear glass and the frame.
-
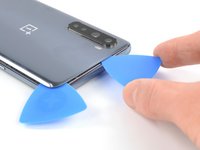
Insert an opening pick into the gap.
-
-
-
Slide the opening pick along the edge to the bottom right corner.
-
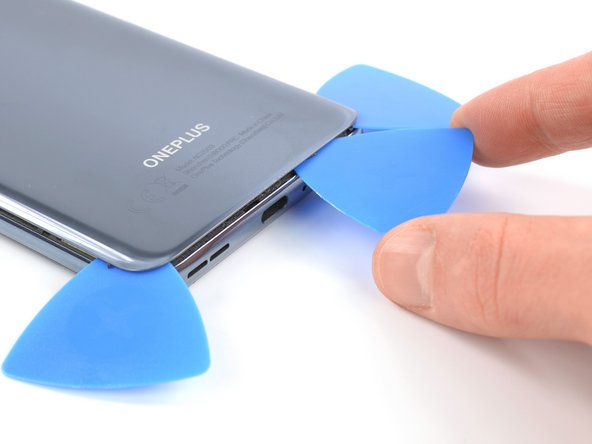
Leave the opening pick in its place to prevent the adhesive from resealing.
-
-
-
-
Use a Phillips #00 screwdriver to remove the ten 3.6 mm-long screws from the motherboard cover.
-
-
-
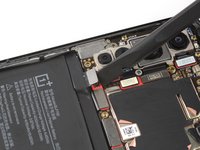
Use a spudger to disconnect the battery by prying the connector straight up from its socket.
-
-
-
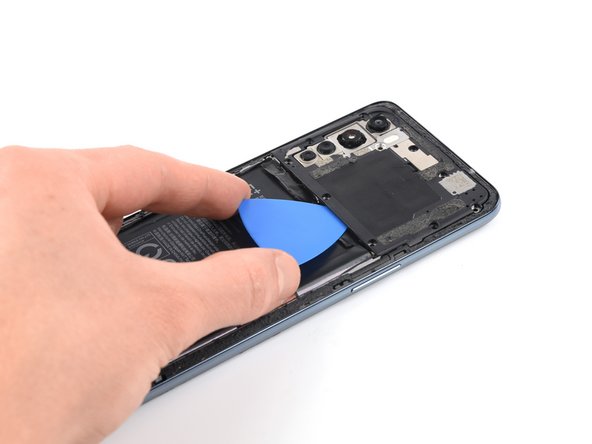
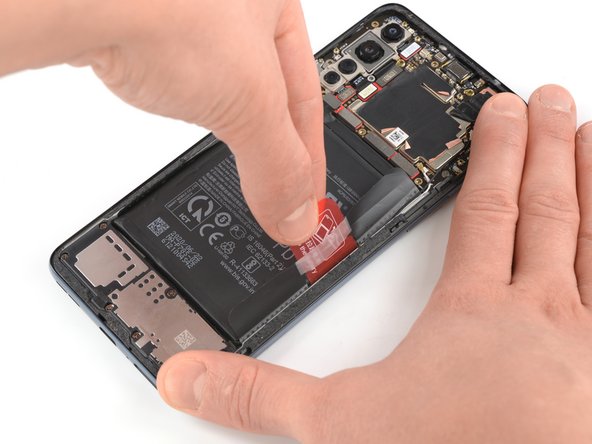
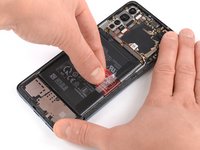
Peel back the red pull tab and the black sticker from the edge of the battery.
-
Pull the tab up steadily to break up the adhesive holding the battery in place.
-


If possible, turn on your device and test your repair before installing new adhesive and resealing.
Secure the new battery with pre-cut adhesive or double-sided adhesive tape. In order to position it correctly, apply the new adhesive into the device at the places where the old adhesive was located, not directly onto the battery. Press the new battery firmly into place.
To reassemble your device, follow these instructions in reverse order. Apply new adhesive where necessary after cleaning the relevant areas with isopropyl alcohol (>90%).
For optimal performance, calibrate your newly installed battery: Charge it to 100% and keep charging it for at least 2 more hours. Then use your device until it shuts off due to low battery. Finally, charge it uninterrupted to 100%.
Take your e-waste to an R2 or e-Stewards certified recycler.
Repair didn’t go as planned? Try some basic troubleshooting, or ask our Answers community for help.
16 の人々がこのガイドを完成させました。


8件のガイドコメント
charger plug is not working
Priya Gulati - 返信 共有
realizan envios a Peru?
Thanks for the guide, just replaced battery in mine.
Radek Věchet - 返信 共有
Thanks for the guide!!
Be Careful ! when removing the motherboard cover - there are actually 11 screws, and one is hidden beneath a white sticker of some sort (lower right corner) in trying to pry the cover off WITHOUT removing this screw, I managed to disconnect a tiny wire. At first I thought it was a solder job and i'd bricked my phone. But it turned out to be a tiny tiny snap, that with extra pairs of glasses I was able to put back. Also, it took AGES to soften the adhesive enough to get a pick in. In the end I manged to get a spudger in. It might have been easier with a scissor-type set of suction cups to pull the sides apart. or maybe I just needed to heat the adhesive more. I used the iOpener - but I think it'd have been quicker and easier with a heat guy. After changing the battery, I felt the vibration when I plugged it in. But I couldn't turn it on. Had to hold the on switch for 20 + seconds.. then it started! Good Luck!