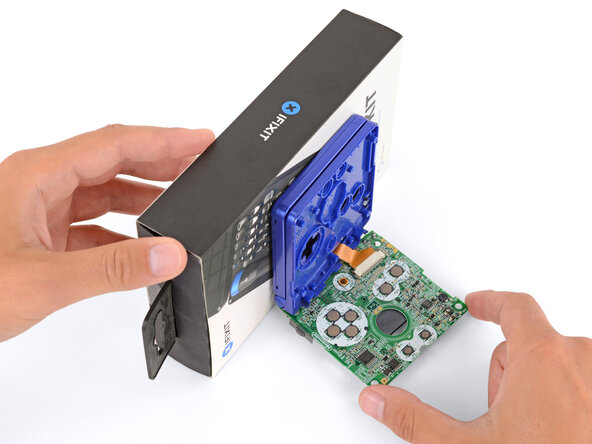
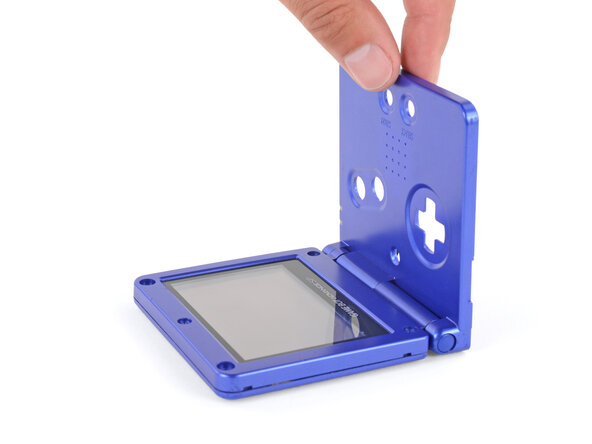
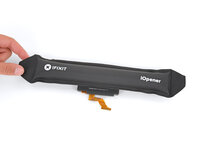
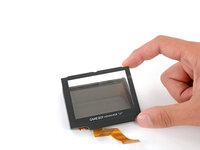
メインコンテンツにスキップ

Nintendo Game Boy Advance SP Screen Lens Replacement

必要な工具と部品

  1. Nintendo Game Boy Advance SP Screen Lens Replacement, Prepare your Game Boy for disassembly: 手順 1、 3の画像 1 Nintendo Game Boy Advance SP Screen Lens Replacement, Prepare your Game Boy for disassembly: 手順 1、 3の画像 2 Nintendo Game Boy Advance SP Screen Lens Replacement, Prepare your Game Boy for disassembly: 手順 1、 3の画像 3
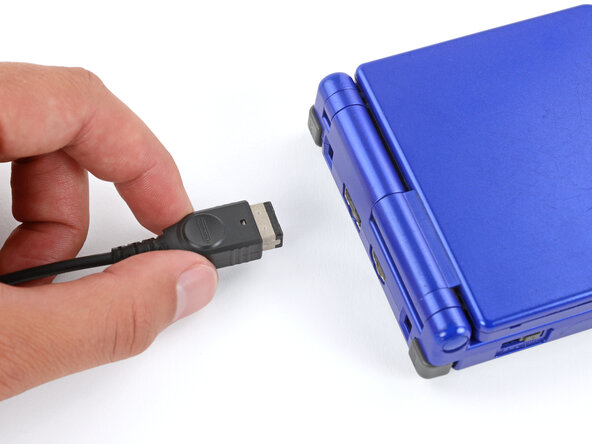
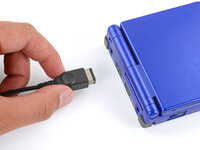
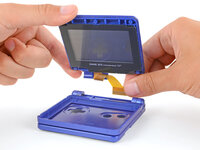
    • Slide the power switch to the OFF position and unplug any cables.

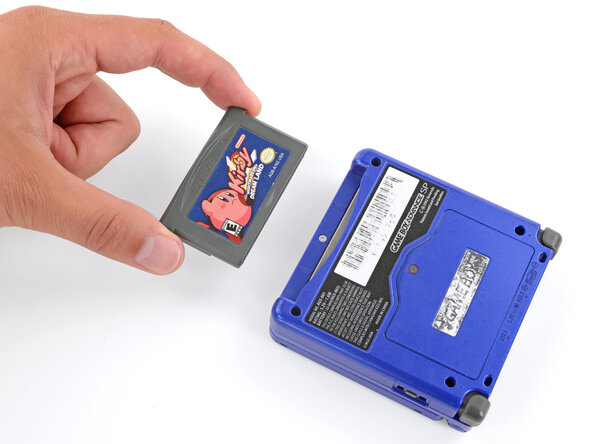
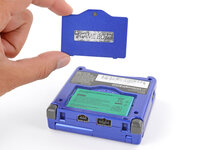
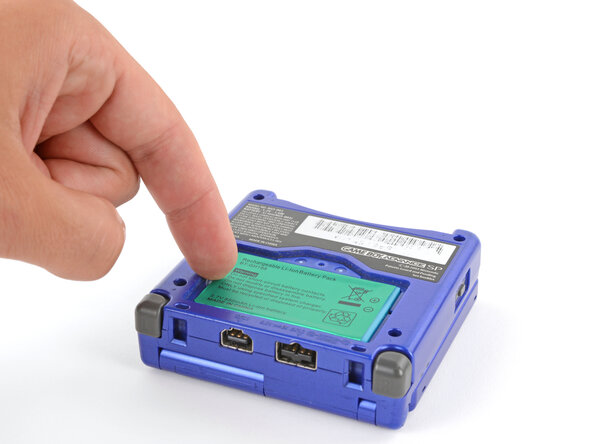
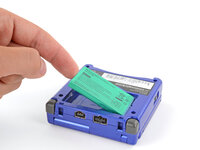
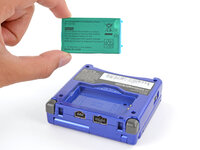
    • If you have a game cartridge in, remove it.

  2. Nintendo Game Boy Advance SP Screen Lens Replacement, Remove the battery cover: 手順 2、 2の画像 1 Nintendo Game Boy Advance SP Screen Lens Replacement, Remove the battery cover: 手順 2、 2の画像 2
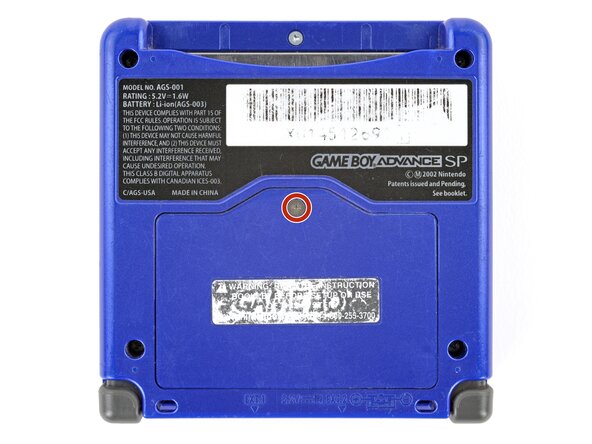
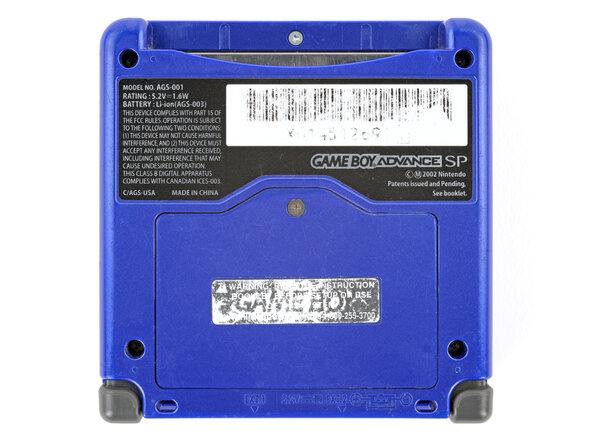
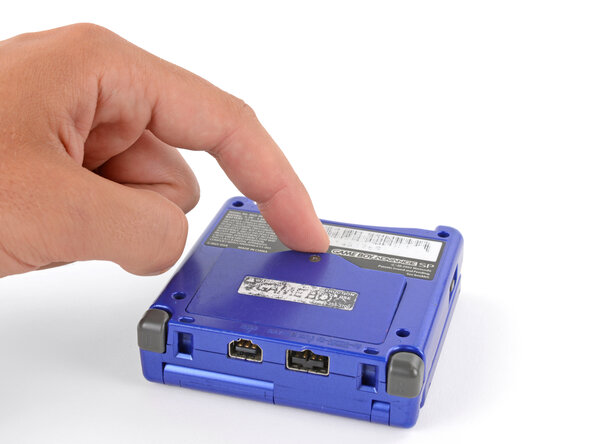
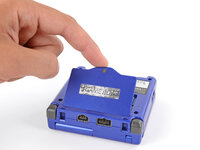
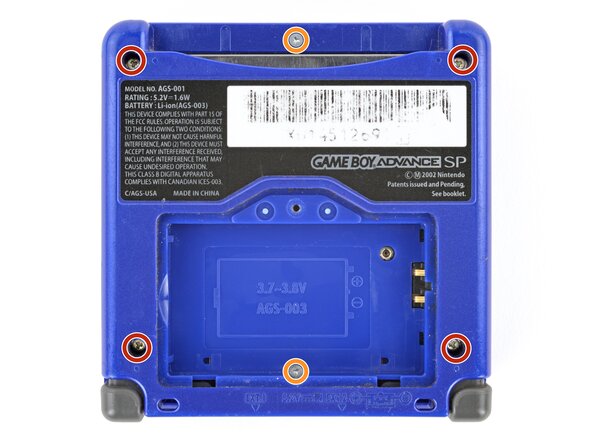
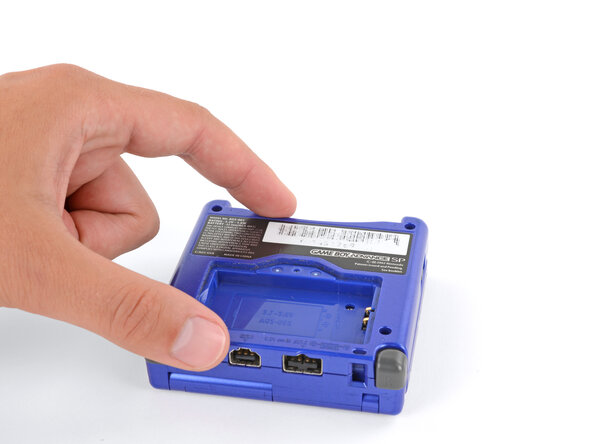
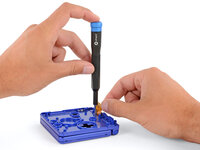
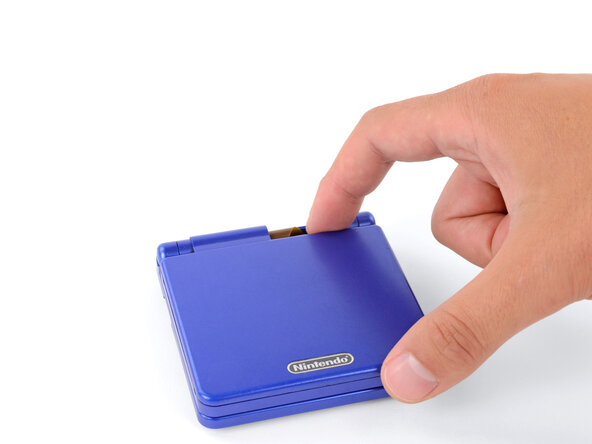
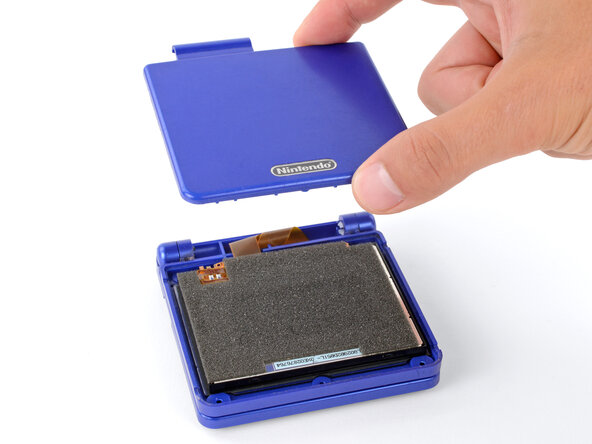
    • Use a JIS 00 screwdriver to loosen the captive screw securing the battery cover.

    • You can try to use a non-iFixit Phillips driver in a pinch, but you risk damaging or stripping the screw. Push down firmly on the driver and twist slowly.

  3. Nintendo Game Boy Advance SP Screen Lens Replacement: 手順 3、 3の画像 1 Nintendo Game Boy Advance SP Screen Lens Replacement: 手順 3、 3の画像 2 Nintendo Game Boy Advance SP Screen Lens Replacement: 手順 3、 3の画像 3
    • Lift the edge of the cover near the screw and remove the cover.

    • During reassembly, hook the tabs on the bottom edge of the cover into their slots and lay the cover into place.

  4. Nintendo Game Boy Advance SP Screen Lens Replacement, Remove the battery: 手順 4、 3の画像 1 Nintendo Game Boy Advance SP Screen Lens Replacement, Remove the battery: 手順 4、 3の画像 2 Nintendo Game Boy Advance SP Screen Lens Replacement, Remove the battery: 手順 4、 3の画像 3
    • Use your finger to lift the battery by the tab on its left edge, then remove it.

    • During reassembly:

    • Never reuse a deformed or damaged battery—it's a fire hazard. Replace it with a new battery.

    • Your replacement battery may come with a plastic enclosure that slides over the battery.

    • Insert the edge of the battery with contacts at a slight downward angle—aligning the contacts with their prongs in the recess—and press the battery into place.

  5. Nintendo Game Boy Advance SP Screen Lens Replacement, Remove the bottom shell: 手順 5、 2の画像 1 Nintendo Game Boy Advance SP Screen Lens Replacement, Remove the bottom shell: 手順 5、 2の画像 2
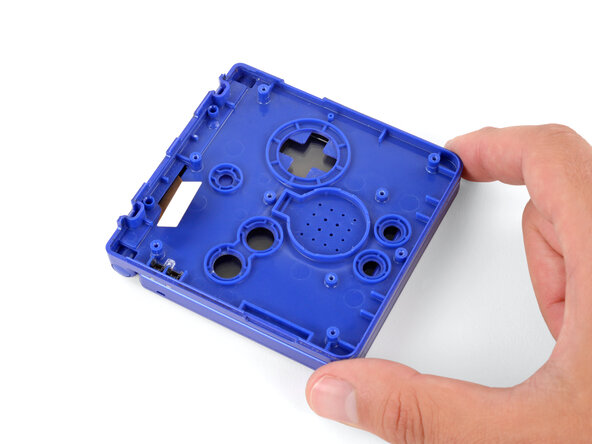
    • Use a tri‑point Y0 screwdriver to remove the six screws securing the bottom shell:

    • Four 6.3 mm‑long recessed screws

    • Two 4.6 mm‑long screws

  6. Nintendo Game Boy Advance SP Screen Lens Replacement: 手順 6、 2の画像 1 Nintendo Game Boy Advance SP Screen Lens Replacement: 手順 6、 2の画像 2
    • Lift the bottom shell straight up and remove it.

  7. Nintendo Game Boy Advance SP Screen Lens Replacement, Remove the power switch cover: 手順 7、 2の画像 1 Nintendo Game Boy Advance SP Screen Lens Replacement, Remove the power switch cover: 手順 7、 2の画像 2
    • Use your fingers to lift and remove the power switch cover.

    • During reassembly:

    • Use your fingers to put the power switch cover (notched side up) into place so the cutout goes around the actual switch.

    • Gently slide the cover back and forth to make sure it's positioned properly and moving the switch.

    • If the switch isn't properly in its cutout, you won't be able to power on your Game Boy.

  8. Nintendo Game Boy Advance SP Screen Lens Replacement, Remove the motherboard screws: 手順 8、 2の画像 1 Nintendo Game Boy Advance SP Screen Lens Replacement, Remove the motherboard screws: 手順 8、 2の画像 2
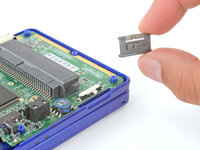
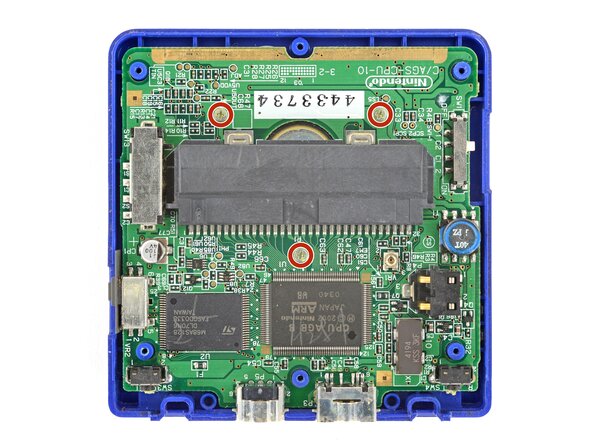
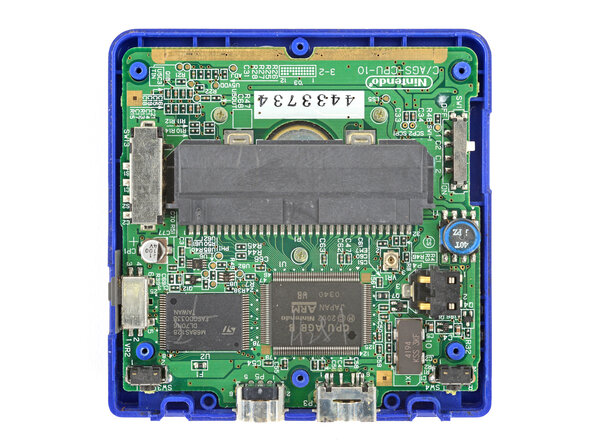
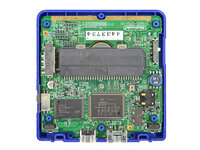
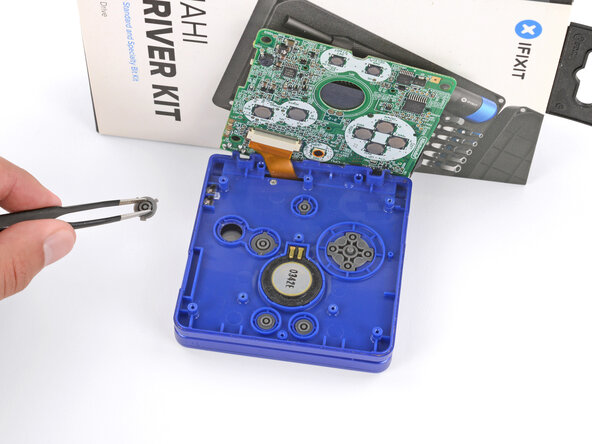
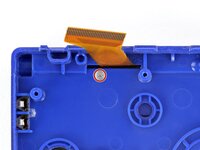
    • Use a JIS 00 screwdriver to remove the three 4.1 mm‑long screws securing the motherboard.

  9. Nintendo Game Boy Advance SP Screen Lens Replacement, Prop up the motherboard: 手順 9、 3の画像 1 Nintendo Game Boy Advance SP Screen Lens Replacement, Prop up the motherboard: 手順 9、 3の画像 2 Nintendo Game Boy Advance SP Screen Lens Replacement, Prop up the motherboard: 手順 9、 3の画像 3
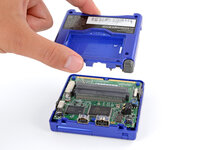
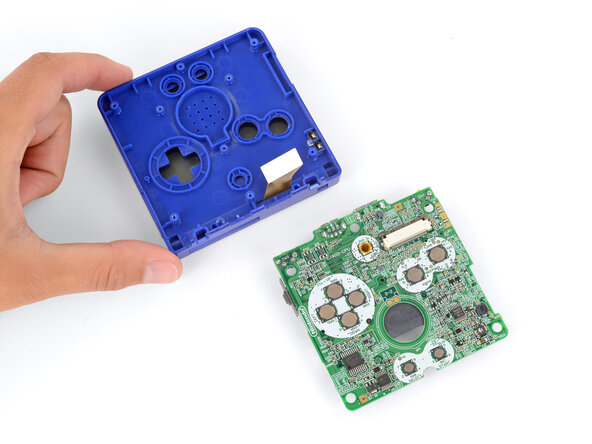
    • Place a sturdy object such as a stack of books or tool case along the edge of your Game Boy with the hinges.

    • Use your fingers to gently flip the motherboard over the hinges and prop it up.

  10. Nintendo Game Boy Advance SP Screen Lens Replacement, Remove the silicone pads: 手順 10、 3の画像 1 Nintendo Game Boy Advance SP Screen Lens Replacement, Remove the silicone pads: 手順 10、 3の画像 2 Nintendo Game Boy Advance SP Screen Lens Replacement, Remove the silicone pads: 手順 10、 3の画像 3
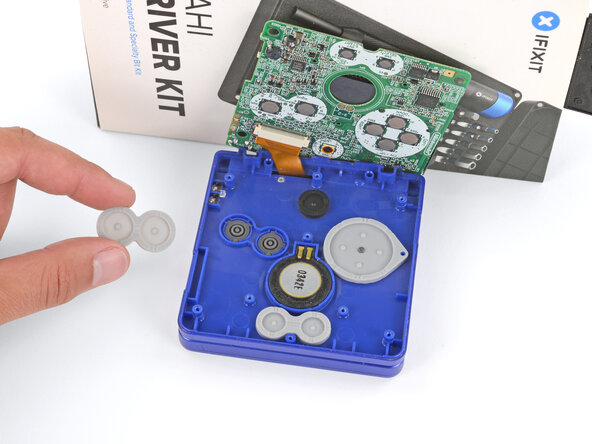
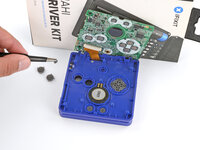
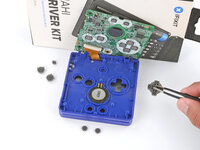
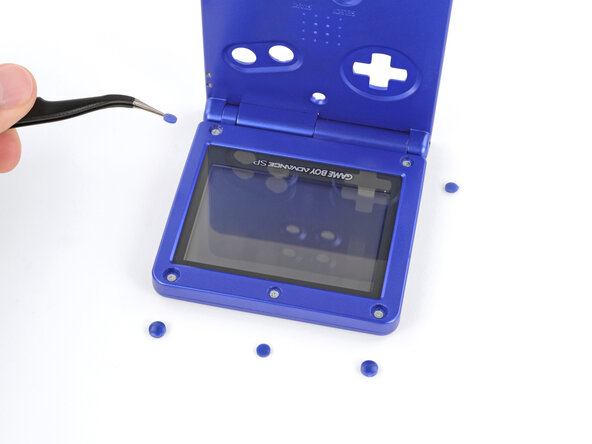
    • Use tweezers or your fingers to remove the four silicone pads covering the buttons (A and B, D‑pad, brightness, and Start/Select).

    • If any of the pads are missing, they may be stuck to their corresponding spot on the motherboard.

  11. Nintendo Game Boy Advance SP Screen Lens Replacement, Remove the buttons: 手順 11、 3の画像 1 Nintendo Game Boy Advance SP Screen Lens Replacement, Remove the buttons: 手順 11、 3の画像 2 Nintendo Game Boy Advance SP Screen Lens Replacement, Remove the buttons: 手順 11、 3の画像 3
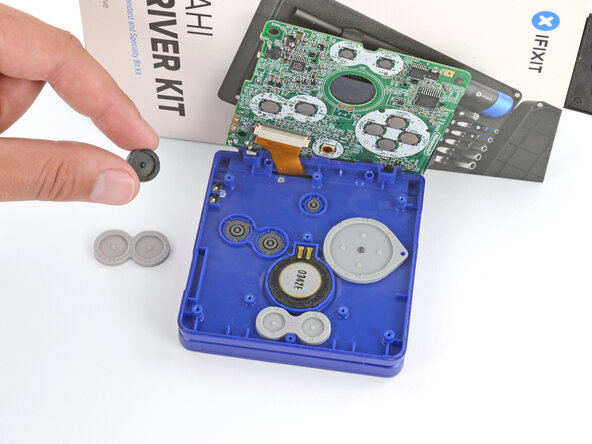
    • Use tweezers or your fingers to remove the buttons (A and B, D‑pad, brightness, and Start/Select).

    • When re‑inserting the action buttons, note that each one is keyed specifically for its recess and proper orientation.

  12. Nintendo Game Boy Advance SP Screen Lens Replacement, Remove the speaker: 手順 12、 3の画像 1 Nintendo Game Boy Advance SP Screen Lens Replacement, Remove the speaker: 手順 12、 3の画像 2 Nintendo Game Boy Advance SP Screen Lens Replacement, Remove the speaker: 手順 12、 3の画像 3
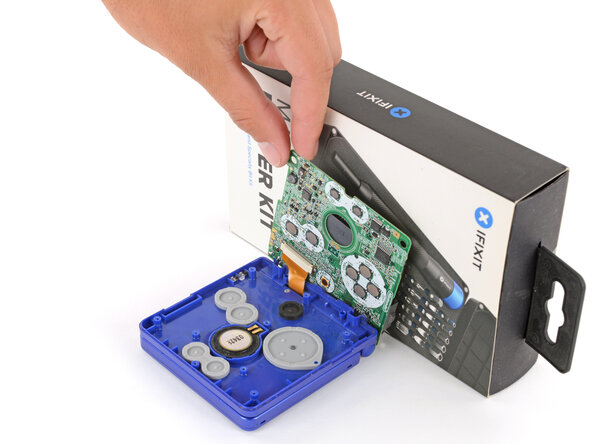
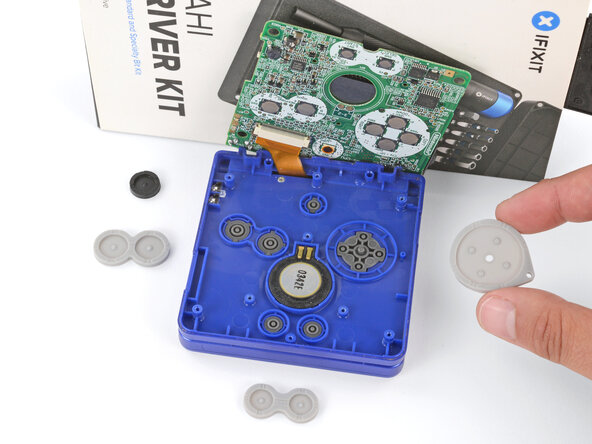
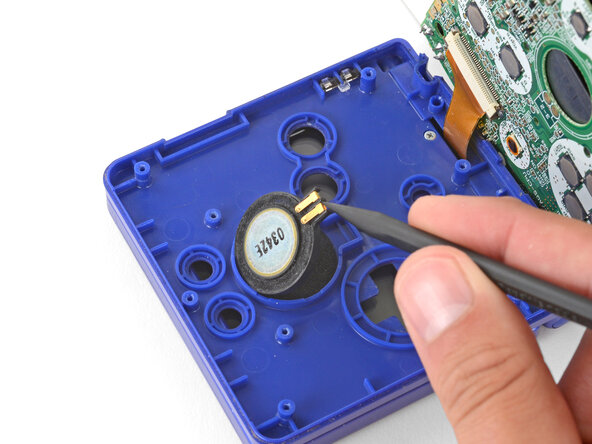
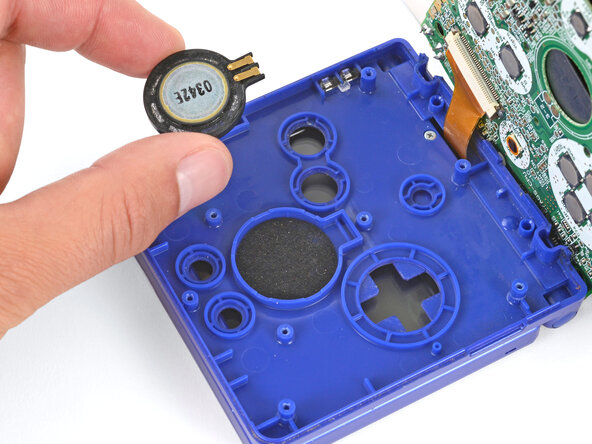
    • Use the point of a spudger or a clean fingernail to lift the speaker until you can grip it with your fingers.

    • Remove the speaker.

  13. Nintendo Game Boy Advance SP Screen Lens Replacement, Prop up the main body: 手順 13、 1の画像 1
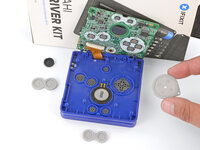
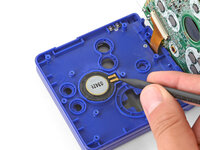
    • Remove the circular mesh from the speaker recess and set it aside—the piece can easily fall out and get lost when working.

  14. Nintendo Game Boy Advance SP Screen Lens Replacement, Prop up the main body: 手順 14、 3の画像 1 Nintendo Game Boy Advance SP Screen Lens Replacement, Prop up the main body: 手順 14、 3の画像 2 Nintendo Game Boy Advance SP Screen Lens Replacement, Prop up the main body: 手順 14、 3の画像 3
    • Be careful not to strain the screen cable during the next few steps—it has very little slack.

    • You need to prop up the main body of your Game Boy in order to disconnect the screen cable without straining it. Here are two ways to do so:

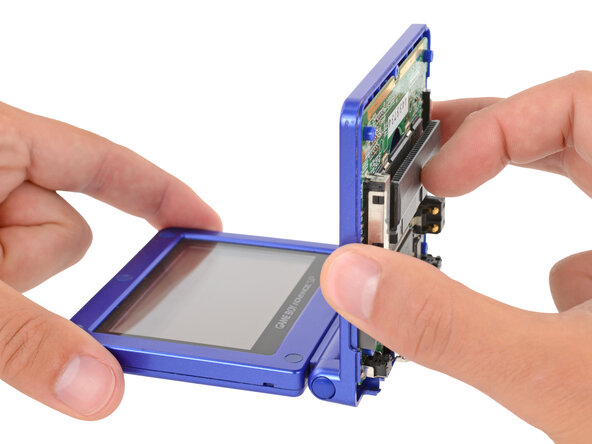
    • Option 1: Open the main body of your Game Boy to a 90‑degree angle and gently lay the motherboard down. Make sure the main body is resting on top of the motherboard to give the cable slack.

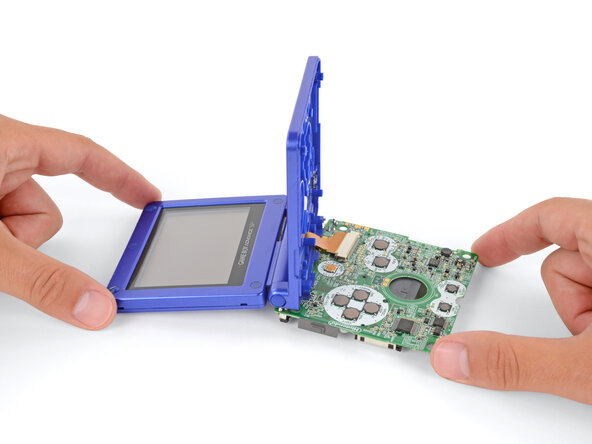
    • Option 2: Keep the main body closed and prop it up on the edge of the logic board, using a sturdy object to hold it up.

  15. Nintendo Game Boy Advance SP Screen Lens Replacement, Disconnect the screen cable: 手順 15、 3の画像 1 Nintendo Game Boy Advance SP Screen Lens Replacement, Disconnect the screen cable: 手順 15、 3の画像 2 Nintendo Game Boy Advance SP Screen Lens Replacement, Disconnect the screen cable: 手順 15、 3の画像 3
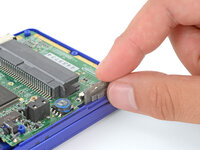
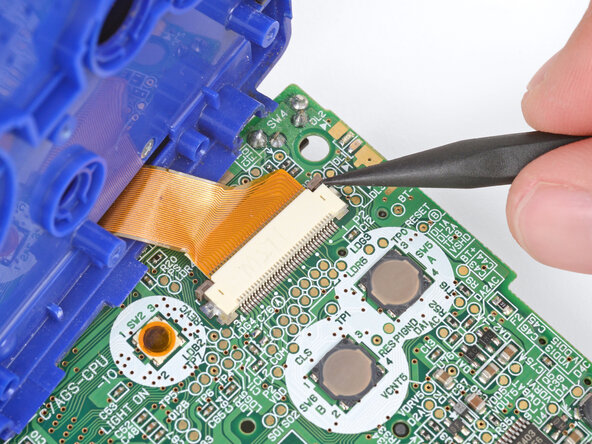
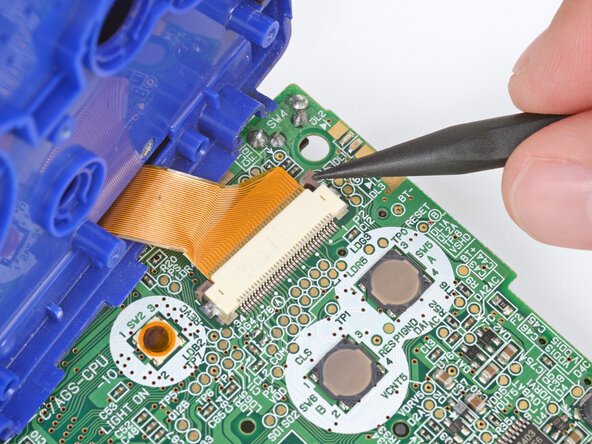
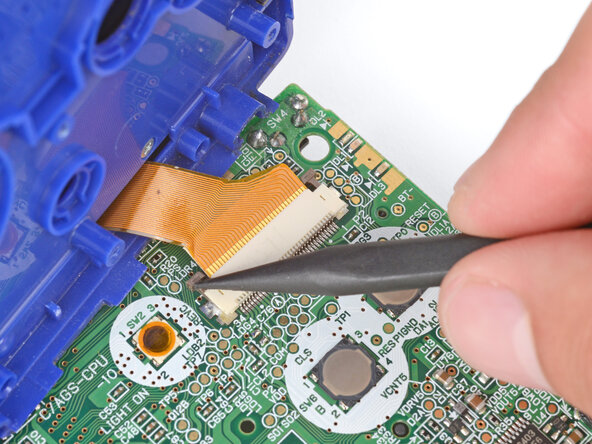
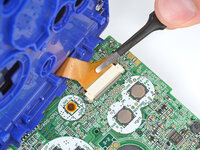
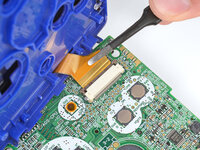
    • Use the point of a spudger to push the two tabs on either side of the screen cable connector into the unlocked position.

    • Only push the tabs until they stop. If you push them too far, you may slide the locking tab off the connector.

  16. Nintendo Game Boy Advance SP Screen Lens Replacement: 手順 16、 2の画像 1 Nintendo Game Boy Advance SP Screen Lens Replacement: 手順 16、 2の画像 2
    • Use a pair of tweezers to gently slide the screen cable out of its socket.

  17. Nintendo Game Boy Advance SP Screen Lens Replacement, Remove the main body: 手順 17、 1の画像 1
    • Remove the main body from the motherboard.

    • During reassembly, prop up the main body for enough slack reconnect the screen cable.

  18. Nintendo Game Boy Advance SP Screen Lens Replacement, Open your Game Boy: 手順 18、 1の画像 1
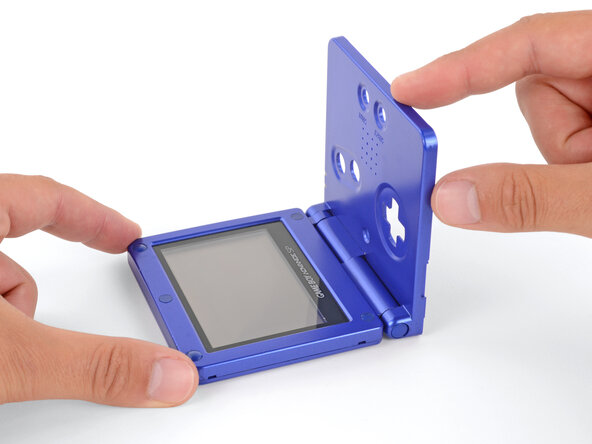
    • Open your Game Boy to a 90‑degree angle and set it down so the screen is facing up.

  19. Nintendo Game Boy Advance SP Screen Lens Replacement, Remove the rubber screw covers: 手順 19、 3の画像 1 Nintendo Game Boy Advance SP Screen Lens Replacement, Remove the rubber screw covers: 手順 19、 3の画像 2 Nintendo Game Boy Advance SP Screen Lens Replacement, Remove the rubber screw covers: 手順 19、 3の画像 3
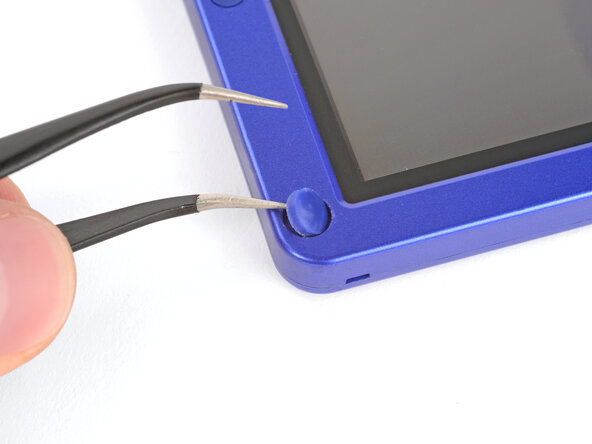
    • Use a pair of angled tweezers to pry up and remove all five rubber screw covers.

    • Removing old, brittle covers without damaging them can be tricky. Make sure to pry gently between the cover’s edge and the frame—don’t dig into the cover itself.

  20. Nintendo Game Boy Advance SP Screen Lens Replacement, Remove the screen screws: 手順 20、 2の画像 1 Nintendo Game Boy Advance SP Screen Lens Replacement, Remove the screen screws: 手順 20、 2の画像 2
    • Use a tri‑point Y0 screwdriver to remove the five 4.7 mm‑long screws securing screen shells together.

  21. Nintendo Game Boy Advance SP Screen Lens Replacement, Close the main body: 手順 21、 2の画像 1 Nintendo Game Boy Advance SP Screen Lens Replacement, Close the main body: 手順 21、 2の画像 2
    • Fully close your Game Boy (the button cutouts should be on top).

  22. Nintendo Game Boy Advance SP Screen Lens Replacement, Remove the hinge cover screw: 手順 22、 3の画像 1 Nintendo Game Boy Advance SP Screen Lens Replacement, Remove the hinge cover screw: 手順 22、 3の画像 2 Nintendo Game Boy Advance SP Screen Lens Replacement, Remove the hinge cover screw: 手順 22、 3の画像 3
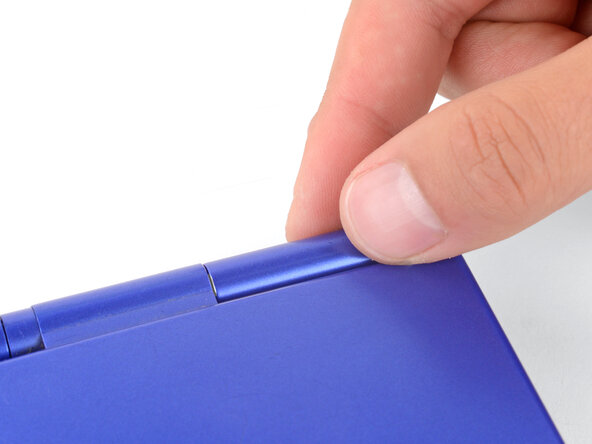
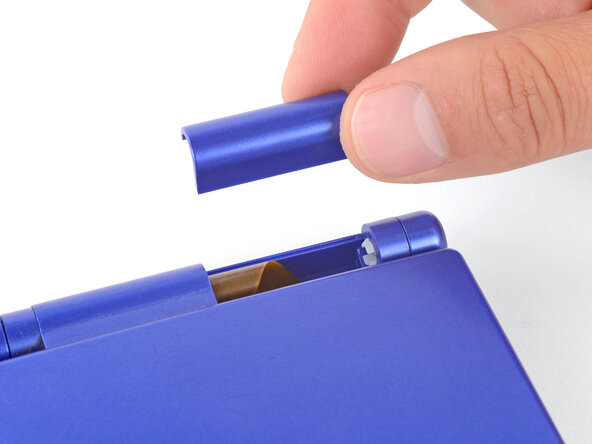
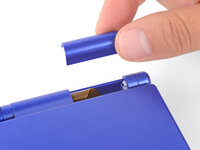
    • Use a JIS 00 screwdriver to remove the 6.3 mm‑long screw securing the hinge cover.

    • You may need to use your free hand to hold the screen cable out of the way.

  23. Nintendo Game Boy Advance SP Screen Lens Replacement, Flip your Game Boy over: 手順 23、 2の画像 1 Nintendo Game Boy Advance SP Screen Lens Replacement, Flip your Game Boy over: 手順 23、 2の画像 2
    • Flip your Game Boy over.

  24. Nintendo Game Boy Advance SP Screen Lens Replacement, Remove the hinge cover: 手順 24、 2の画像 1 Nintendo Game Boy Advance SP Screen Lens Replacement, Remove the hinge cover: 手順 24、 2の画像 2
    • Use your fingers to lift and remove the hinge cover.

  25. Nintendo Game Boy Advance SP Screen Lens Replacement, Remove the top shell: 手順 25、 3の画像 1 Nintendo Game Boy Advance SP Screen Lens Replacement, Remove the top shell: 手順 25、 3の画像 2 Nintendo Game Boy Advance SP Screen Lens Replacement, Remove the top shell: 手順 25、 3の画像 3
    • Depending on the age of your device, the screen may stay attached to its outer shell. If it does, make sure to thread the cable through its cutout while removing the shell.

    • Use your fingers to lift and remove the outer screen shell.

  26. Nintendo Game Boy Advance SP Screen Lens Replacement, Remove the screen: 手順 26、 3の画像 1 Nintendo Game Boy Advance SP Screen Lens Replacement, Remove the screen: 手順 26、 3の画像 2 Nintendo Game Boy Advance SP Screen Lens Replacement, Remove the screen: 手順 26、 3の画像 3
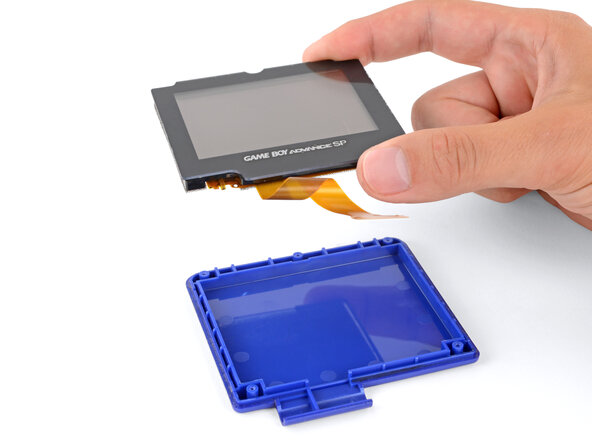
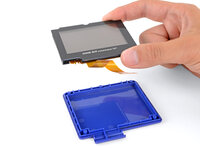
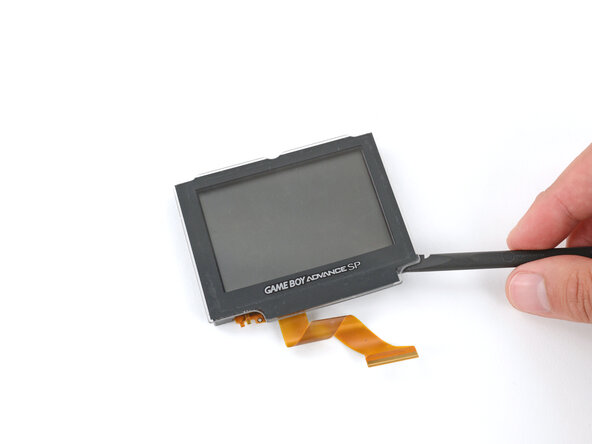
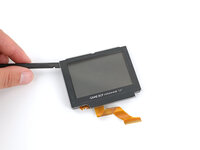
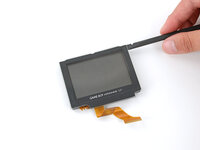
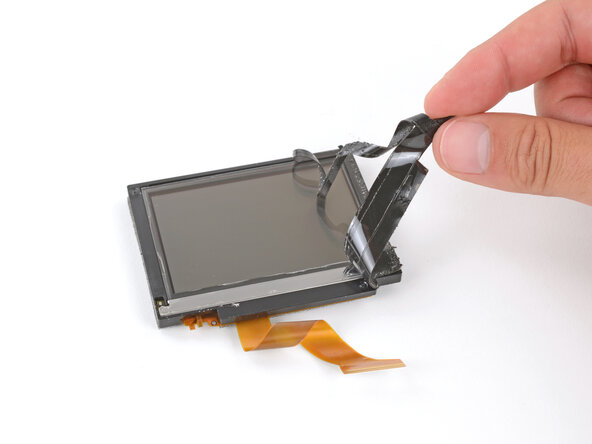
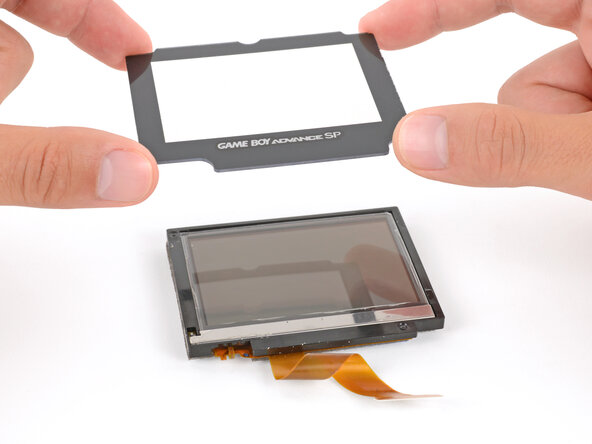
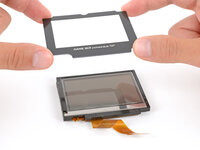
    • Use your fingers to lift and remove the screen, threading the cable through its cutout.

    • If your screen stayed attached to the shell, you may need to gently pry it up with a spudger before removing it.

    • During reassembly:

    • Place the screen foam-side up into its recess, so the cable is near the hinges.

    • Make one loop in the screen cable and then slide it through the cutout.

  27. Nintendo Game Boy Advance SP Screen Lens Replacement, Heat the screen lens: 手順 27、 2の画像 1 Nintendo Game Boy Advance SP Screen Lens Replacement, Heat the screen lens: 手順 27、 2の画像 2
    • Mild adhesive secures the screen lens to the screen. Heating the lens will soften the adhesive, making it easier to separate.

    • Heat an iOpener and lay it on the screen lens for two minutes.

    • Alternatively, you can use a hair dryer on the Low heat setting—be careful not to apply too much heat, or you may damage the screen.

  28. Nintendo Game Boy Advance SP Screen Lens Replacement, Separate the adhesive: 手順 28、 2の画像 1 Nintendo Game Boy Advance SP Screen Lens Replacement, Separate the adhesive: 手順 28、 2の画像 2
    • Slide the flat end of a spudger under the screen lens.

  29. Nintendo Game Boy Advance SP Screen Lens Replacement: 手順 29、 3の画像 1 Nintendo Game Boy Advance SP Screen Lens Replacement: 手順 29、 3の画像 2 Nintendo Game Boy Advance SP Screen Lens Replacement: 手順 29、 3の画像 3
    • Slide the spudger under the perimeter of the lens to separate all its adhesive.

    • If you're having trouble with a section, apply more heat and try again.

  30. Nintendo Game Boy Advance SP Screen Lens Replacement, Remove the screen lens: 手順 30、 3の画像 1 Nintendo Game Boy Advance SP Screen Lens Replacement, Remove the screen lens: 手順 30、 3の画像 2 Nintendo Game Boy Advance SP Screen Lens Replacement, Remove the screen lens: 手順 30、 3の画像 3
    • Use your fingers to peel up and remove the screen lens.

  31. Nintendo Game Boy Advance SP Screen Lens Replacement, Remove the old adhesive: 手順 31、 2の画像 1 Nintendo Game Boy Advance SP Screen Lens Replacement, Remove the old adhesive: 手順 31、 2の画像 2
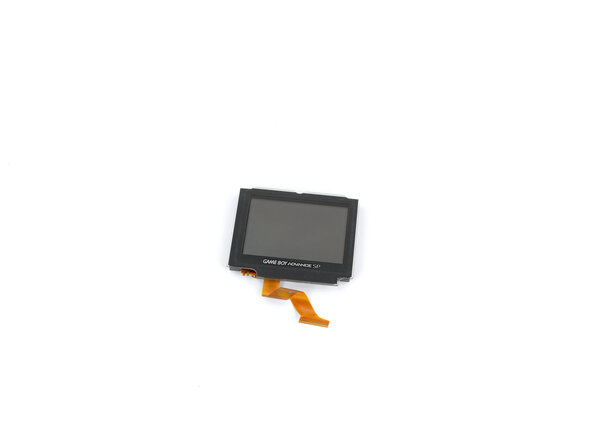
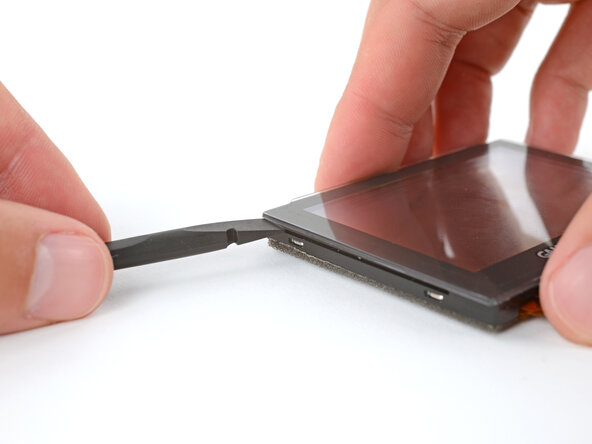
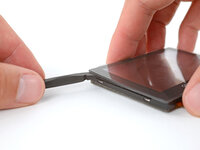
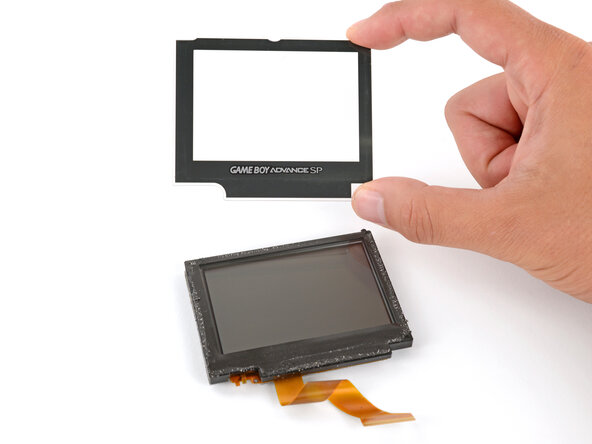
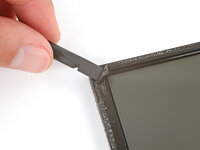
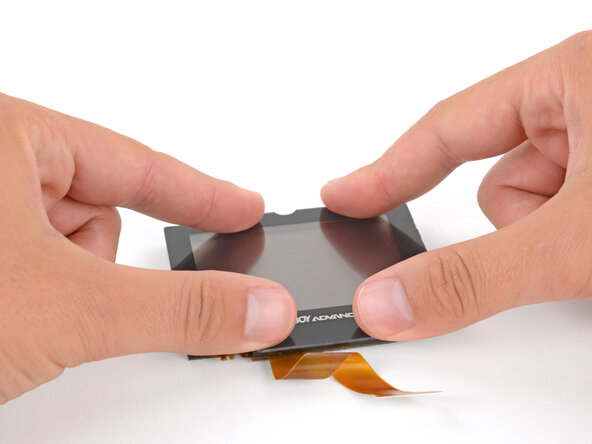
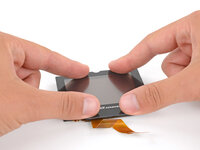
    • Use a spudger and your fingers to peel up and remove all the old lens adhesive.

  32. Nintendo Game Boy Advance SP Screen Lens Replacement, Install the new lens: 手順 32、 3の画像 1 Nintendo Game Boy Advance SP Screen Lens Replacement, Install the new lens: 手順 32、 3の画像 2 Nintendo Game Boy Advance SP Screen Lens Replacement, Install the new lens: 手順 32、 3の画像 3
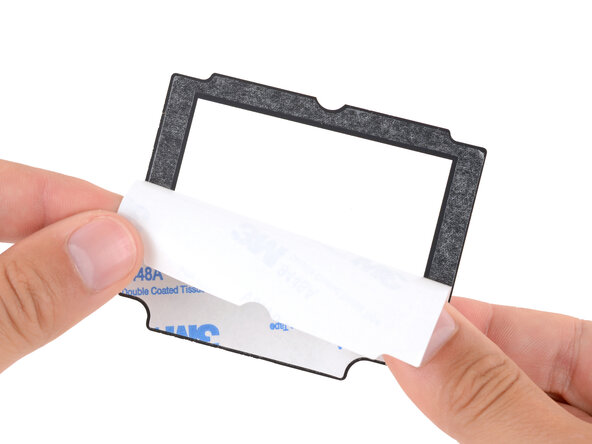
    • Remove the liner from the back of the screen lens to expose its adhesive.

    • Align the lens over the screen and lay it in place.

    • Aligning the lens is tricky! Take your time—once the lens sticks to the screen, you won't be able to reposition it. Align the inner edge of the bezel with the outer edge of the screen panel.

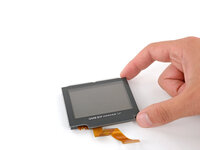
    • Use your fingers to press firmly around the perimeter to secure it.

終わりに

To reassemble your device, follow these instructions in reverse order, starting with the screen step.

Take your e-waste to an R2 or e-Stewards certified recycler.

Repair didn’t go as planned? Try some basic troubleshooting, or ask our Answers Community for troubleshooting help.

作成者

1人の作成者と共同作成されました。

Spencer Day

メンバー登録日: 09/14/22

149,628 ポイント

995のガイドは作成済み

0件のガイドコメント

コメントを追加

統計データ:

過去 24時間: 9

過去 7 日: 28

過去 30 日: 136

今までの合計 481