メインコンテンツにスキップ
リペアコミュニティに参加 - アカウントの作成

Nikon D3100 Motherboard Replacement

必要な工具と部品

    1. Nikon D3100 Motherboard Replacement, LCD Screen: 手順 1、 1の画像 1
      • Use a Phillips #00 screwdriver for all of the screws.

      • Remove two of the 4mm screws indicated by the circles on the bottom side of the camera.

      FixBotに聞いてみる

      コメントを追加

    2. Nikon D3100 Motherboard Replacement: 手順 2、 2の画像 1 Nikon D3100 Motherboard Replacement: 手順 2、 2の画像 2
      • Remove four of the 3mm screws around the eye piece located on the top of the back panel, including the screw hidden behind the auto focus label.

      • Remove the 3mm screw behind the rubber grip on the top right of the back panel.

      FixBotに聞いてみる

      コメントを追加

    3. Nikon D3100 Motherboard Replacement: 手順 3、 1の画像 1
      • Peel back the rubber grip on the right side of the camera using a spudger.

      • You may need a heating pad to melt the glue holding the rubber grip to the camera. If using the heating pad, use caution and handle carefully.

      • Remove two of the 5mm screws under the rubber grip.

      FixBotに聞いてみる

      コメントを追加

    4. Nikon D3100 Motherboard Replacement: 手順 4、 1の画像 1
      • Remove two of the 4mm screws on the left side of the camera.

      FixBotに聞いてみる

      コメントを追加

    5. Nikon D3100 Motherboard Replacement: 手順 5、 2の画像 1 Nikon D3100 Motherboard Replacement: 手順 5、 2の画像 2
      この手順で使用する道具:
      Tweezers
      $4.99
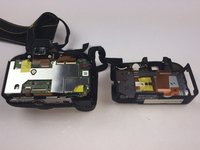
      • Starting from the top, gently lift the back panel of the camera off. Slowly separate the back panel from the main body of the camera.

      • Be careful not to pull the panel out too fast or the ribbon may be damaged.

      • Carefully remove the ribbon using a spudger to lift up the connector and then use tweezers to pull out the ribbon.

      • Separate the back panel from the main body of the camera.

      FixBotに聞いてみる

      コメントを追加

    6. Nikon D3100 Motherboard Replacement: 手順 6、 1の画像 1
      • Be careful when separating the metal plate from the back panel because the speaker wire is connected to the metal plate. It can easily be torn if caution is not taken.

      • Remove nine of the 3mm screws connecting the metal plate to the plastic panel.

      FixBotに聞いてみる

      コメントを追加

    7. Nikon D3100 Motherboard Replacement: 手順 7、 1の画像 1
      • Remove the tape covering the ribbons. Be careful not to break the tape.

      FixBotに聞いてみる

      コメントを追加

    8. Nikon D3100 Motherboard Replacement: 手順 8、 1の画像 1
      • Remove the two ribbons connecting the LCD screen to the metal plate using the same method from Step 5.

      FixBotに聞いてみる

      コメントを追加

    9. Nikon D3100 Motherboard Replacement: 手順 9、 1の画像 1
      • Remove the old LCD screen from metal plate.

      FixBotに聞いてみる

      コメントを追加

    1. Nikon D3100 Motherboard Replacement, Motherboard: 手順 10、 2の画像 1 Nikon D3100 Motherboard Replacement, Motherboard: 手順 10、 2の画像 2
      この手順で使用する道具:
      Tweezers
      $4.99
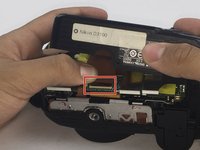
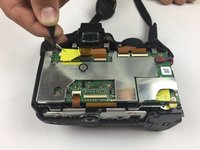
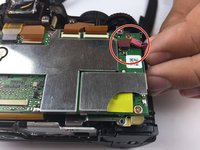
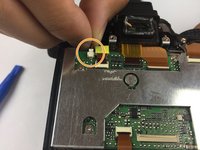
      • Use tweezers to gently lift the yellow tape from the back of the camera.

      FixBotに聞いてみる

      コメントを追加

    2. Nikon D3100 Motherboard Replacement: 手順 11、 1の画像 1
      • Use a plastic spudger to remove the 6 ribbons.

      • Be careful not to tear the ribbons.

      FixBotに聞いてみる

      コメントを追加

    3. Nikon D3100 Motherboard Replacement: 手順 12、 2の画像 1 Nikon D3100 Motherboard Replacement: 手順 12、 2の画像 2
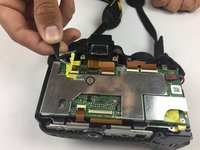
      • Remove the plug located on the top-right side of the camera.

      • Remove the plug located on the top-left side of the camera.

      FixBotに聞いてみる

      コメントを追加

    4. Nikon D3100 Motherboard Replacement: 手順 13、 1の画像 1
      • Use a Philips #00 Screwdriver to remove the five 3 mm screws marked in the image.

      FixBotに聞いてみる

      コメントを追加

    5. Nikon D3100 Motherboard Replacement: 手順 14、 2の画像 1 Nikon D3100 Motherboard Replacement: 手順 14、 2の画像 2
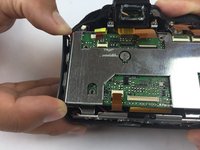
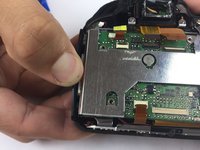
      • Gently pull out the side wall of the camera so that the motherboard comes out easier.

      • Do not pull too hard or you will risk breaking the plastic.

      FixBotに聞いてみる

      コメントを追加

    6. Nikon D3100 Motherboard Replacement: 手順 15、 1の画像 1
      • Be careful while lifting the motherboard because there is one more ribbon attached.

      • Gently lift the motherboard to separate it from the back of the camera.

      • Use a plastic spudger to detach the ribbon.

      FixBotに聞いてみる

      コメントを追加

    7. Nikon D3100 Motherboard Replacement: 手順 16、 1の画像 1
      • Replace the motherboard.

      FixBotに聞いてみる

      コメントを追加

終わりに

To reassemble your device, follow these instructions in reverse order.

キャンセル: このガイドを終了できませんでした。

6 の人々がこのガイドを完成させました。

作成者

8人の作成者と共同で作成されました。

Jet Mejia

メンバー登録日: 09/26/16

686 ポイント

3のガイドは作成済み

チーム

USF Tampa, Team 14-1, Eyestone Fall 2016 USF Tampa, Team 14-1, Eyestone Fall 2016人のメンバー

USFT-EYESTONE-F16S14G1

3 メンバー

4のガイドは作成済み

0件のガイドコメント

コメントを追加

統計データ:

過去 24時間: 4

過去 7 日: 17

過去 30 日: 92

今までの合計 6,704