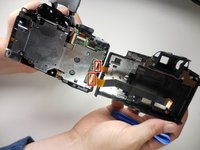
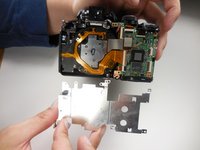
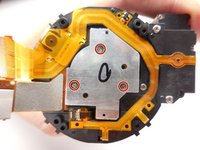
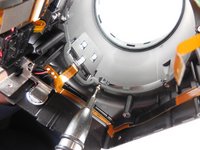
メインコンテンツにスキップ
リペアコミュニティに参加 - アカウントの作成

Nikon Coolpix P510 Lens Casing Replacement

必要な工具と部品

  1. Nikon Coolpix P510 Lens Casing Replacement, Lens Assembly: 手順 1、 2の画像 1 Nikon Coolpix P510 Lens Casing Replacement, Lens Assembly: 手順 1、 2の画像 2
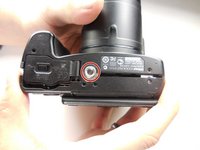
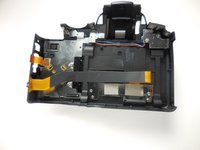
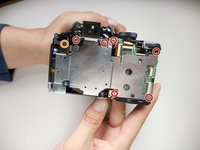
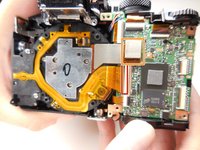
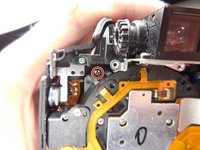
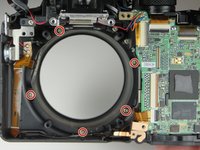
    • Flip the camera upside down and remove six 3mm PH00 Philips screws with a Philips screwdriver.

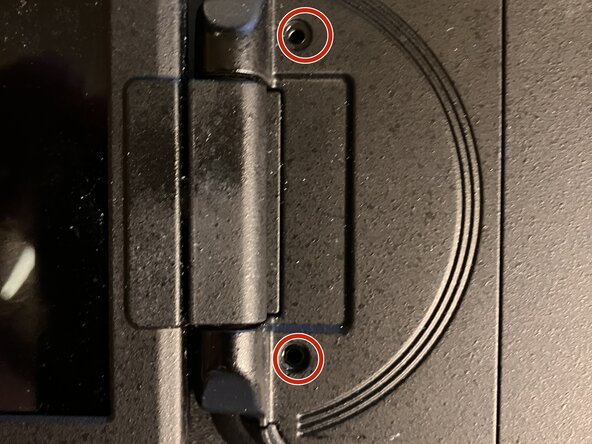
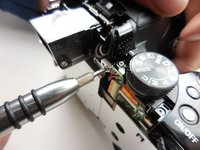
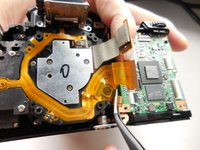
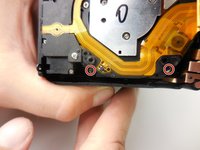
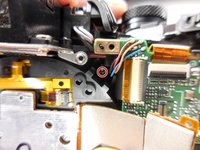
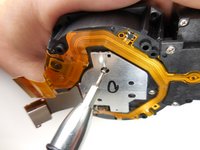
    • On the thumb grip, remove the one 4mm PH00 Philips screw.

  2. Nikon Coolpix P510 Lens Casing Replacement: 手順 2、 1の画像 1
    • With the camera upside down, remove the three 3mm PH00 Philips screws on the left side.

    • One of the screws are under the HDMI and A/V Out cover.

  3. Nikon Coolpix P510 Lens Casing Replacement: 手順 3、 1の画像 1
    • On the opposite side of the camera, remove the two 3mm PH00 Philips screws.

  4. Nikon Coolpix P510 Lens Casing Replacement: 手順 4、 1の画像 1
    • open the display and remove the two Ph 00 screws near the hinge

  5. Nikon Coolpix P510 Lens Casing Replacement: 手順 5、 3の画像 1 Nikon Coolpix P510 Lens Casing Replacement: 手順 5、 3の画像 2 Nikon Coolpix P510 Lens Casing Replacement: 手順 5、 3の画像 3
    • Open the flash and use a plastic opening tool to pop the tab under it as shown.

    • Now pull the casing apart.

    • The tripod attachment may fall out on its own, or you will need to pull it out.

  6. Nikon Coolpix P510 Lens Casing Replacement: 手順 6、 2の画像 1 Nikon Coolpix P510 Lens Casing Replacement: 手順 6、 2の画像 2
    • Unplug the two ribbon cables to completely detach the back, by securely opening the latch

  7. Nikon Coolpix P510 Lens Casing Replacement: 手順 7、 3の画像 1 Nikon Coolpix P510 Lens Casing Replacement: 手順 7、 3の画像 2 Nikon Coolpix P510 Lens Casing Replacement: 手順 7、 3の画像 3
    • With the back separated, you need to remove six 3mm PH000 Philips screws with a Philips screwdriver.

    • Remove one 5mm PH00 Philips screw

    • To remove the top right corner screw, you may need to lift the corner of the case to gain access to it.

    • With all the screws out, the metal plate should simply lift off.

  8. Nikon Coolpix P510 Lens Casing Replacement: 手順 8、 2の画像 1 Nikon Coolpix P510 Lens Casing Replacement: 手順 8、 2の画像 2
    • With the metal plate off, unplug this ribbon cable from the motherboard.

    • To remove the flat-topped connector, you simply lift it up to unplug it.

  9. Nikon Coolpix P510 Lens Casing Replacement: 手順 9、 3の画像 1 Nikon Coolpix P510 Lens Casing Replacement: 手順 9、 3の画像 2 Nikon Coolpix P510 Lens Casing Replacement: 手順 9、 3の画像 3
    • To get the lens assembly out, you need to remove four 6mm PH00 Philips screws

  10. Nikon Coolpix P510 Lens Casing Replacement: 手順 10、 2の画像 1 Nikon Coolpix P510 Lens Casing Replacement: 手順 10、 2の画像 2
    • With the support screws out, you can simply slide the assembly out of the casing.

  11. Nikon Coolpix P510 Lens Casing Replacement: 手順 11、 3の画像 1 Nikon Coolpix P510 Lens Casing Replacement: 手順 11、 3の画像 2 Nikon Coolpix P510 Lens Casing Replacement: 手順 11、 3の画像 3
    • If you are moving on to take the lens casing off, you do not need to do this step.

    • With the assembly out we need to take of this last piece by removing the three 3mm PH000 Philips screws.

  12. Nikon Coolpix P510 Lens Casing Replacement, Lens Casing: 手順 12、 2の画像 1 Nikon Coolpix P510 Lens Casing Replacement, Lens Casing: 手順 12、 2の画像 2
    • Remove the five PH00 screws surrounding the lens.

  13. Nikon Coolpix P510 Lens Casing Replacement: 手順 13、 1の画像 1
    • Separate the lens casing from the front.

    • The switch on the side simply slides off of the front casing.

終わりに

To reassemble your device or to attach a new lense, follow these instructions in reverse order. Take your e-waste to an R2 or e-Stewards certified recycler.

3 の人々がこのガイドを完成させました。

作成者

4人の作成者と共同で作成されました。

Brian Hulsey

メンバー登録日: 03/31/15

1,554 ポイント

6のガイドは作成済み

チーム

Colorado Springs, Team 2-2, Panko Spring 2015 Colorado Springs, Team 2-2, Panko Spring 2015人のメンバー

UCCS-PANKO-S15S2G2

3 メンバー

15のガイドは作成済み

0件のガイドコメント

コメントを追加

統計データ:

過去 24時間: 0

過去 7 日: 9

過去 30 日: 52

今までの合計 3,719