はじめに
作業を始める前に、必ずMotorola Moto X4の電源を切ってください。
必要な工具と部品
-
この手順で使用する道具:Tesa 61395 Tape$5.99
-
iOpenerもしくはヒートガンを使って、ディスプレイ4辺全ての端が熱くて触れない程度まで温めます。これは固定用に使われている接着剤を柔らかくするためです。
-
開口ピックなど先が先端になった開口ツールをディスプレイ端の下に差し込み、接着剤を慎重に切り込みながら、デバイス周辺全体をスライドします。
-
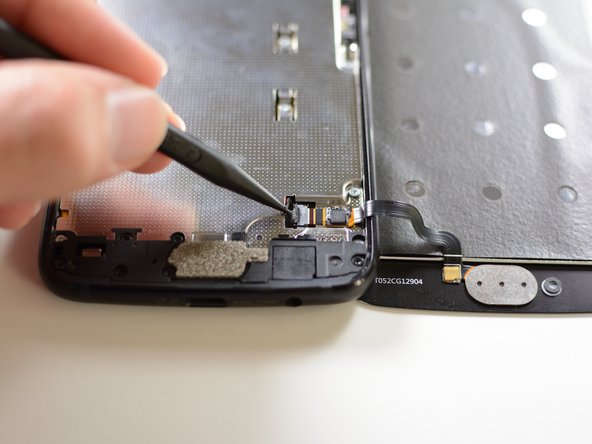
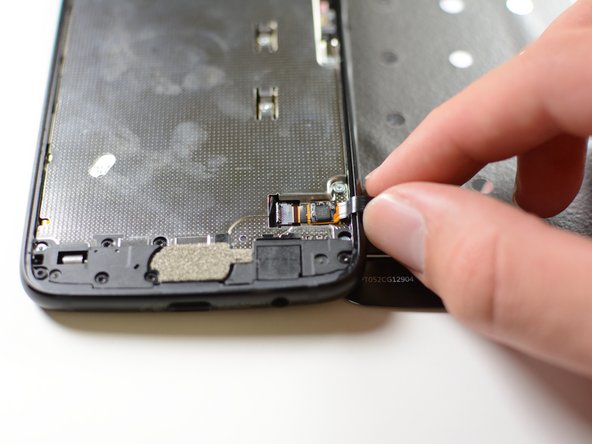
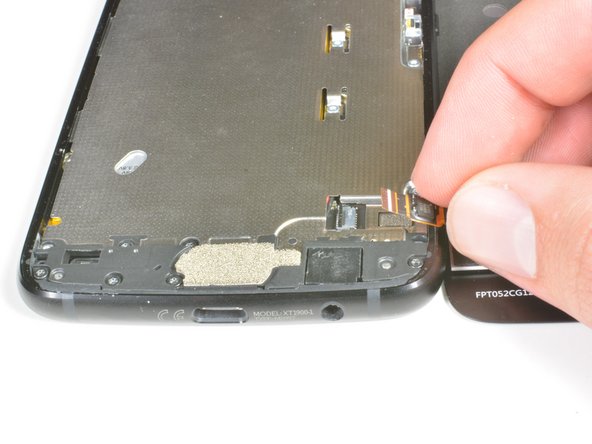
左端からディスプレイを開き、右側にめくります。まだ完全に2つを離さないでください。
-
-
デバイスを再組み立てする際は、これらのインストラクションを逆の順番に従って作業を進めてください。
デバイスを再組み立てする際は、これらのインストラクションを逆の順番に従って作業を進めてください。
23 の人々がこのガイドを完成させました。
以下の翻訳者の皆さんにお礼を申し上げます:
0%
Midori Doiさんは世界中で修理する私たちを助けてくれています! あなたも貢献してみませんか?
翻訳を始める ›
8 件のコメント
This guide really only covers screen removal, and should detail replacing the screen as advertised. Here are a few more steps that should be added:
1. Transferring old hardware to the new screen (seals, filters, fingerprint sensor, & the grey carbon mat.
2. Cleaning up old adhesive.
3. Applying new adhesive, whether it’s the one-piece that ifixit carries (recommended), or Tesa tape.
4. Installing the new display assembly
Is it possible to remove and replace only the glass? Can I do that without removing the whole LCD screen and avoid disconnecting/reconnecting wires?
Hi Drew,
I haven’t tried, but I think it is possible to do a glass-only repair for this LCD screen, as long as you have the necessary tools and bonding adhesives. You would still have to deal with the fingerprint sensor, which is sealed onto the glass.
I noticed the fingerprint sensor not being quite as low on the right edge after this. Also, I think it has a bit of “give” now when I press on it with a thumbnail. If the tips of my thumbs weren't so dry right now I might not have noticed, though.
Hey Chris,
Did you add adhesive to the fingerprint sensor, if you didn't add some adhesive it may have some play, as most things need to be glued in place, and you could have forgotten to add some new adhesive.
I just finished following your guide and mostly satisfied. Somehow my fingerprint sensor doesn’t work but <shrugs> If I loose that convenience for a time, then I still payed less and got experience. Now, for the constructive criticism. YOU NEED a re-assembly guide. We’re not all at the level you guys are and it took a lot more work for me to put things back together as I had to flip things around and watch a few other videos to see steps I missed. You need a guide because you some of the items you’re supposed to use are not mentioned here because they’re not used until you re-assemble it. Please add it to this guide (for future people) unless you’re going to stop selling this kit, then just add it to the other kits. It would be a great help.
Agree completely with this statement and others above. Please do re-assembly. It’s a few more photos and it makes sure you did not miss anything as this user said. At this point, in my replacement, I do not know where to start with the adhesive, etc.
Andrea -
What is the 'carbon mat'?? Is it the black backing with 15 holes that was on the inside of original screen? I'll transfer this and hope that's right. And YES . . . We definitely need ReInstall directions. I would really like to know exactly how to use the pre cut adhesive, or the Tesa tape, if needed... which I think I will. I lost the speaker screen and had to pull one from another phone. But as for other holes... I would feel much better k king I'm doing it right. It really dies no good to perfectly remove the old screen. . . If you screw up installing the new one. All in all - I'm so very Thankful this site dies exist and you guts are excellent. There's still room to grow to reach perfection ( wink**) but helping to keep the power in our hands, is priceless. I love learning and always like to know what I'm using, how it works, and how to fix it. The automotive world is pushing us further away each year. Thank you and good luck everyone.
Kristabell - 返信


