メインコンテンツにスキップ

この翻訳は、ソースガイドの最新の更新を反映していない可能性があります。 翻訳の更新に協力してください。 または ソースガイドを参照してください

Motorola Moto X ディスプレイアセンブリの交換

必要な工具と部品

ビデオの概要

  1. Motorola Moto X ディスプレイアセンブリの交換, SIMカード: 手順 1、 3の画像 1 Motorola Moto X ディスプレイアセンブリの交換, SIMカード: 手順 1、 3の画像 2 Motorola Moto X ディスプレイアセンブリの交換, SIMカード: 手順 1、 3の画像 3
    • SIMカードのエジェクトツールをSIMカードトレイの横にあるホールに差し込み、トレイを押し出します。

    • SIMカードトレイを取り出します。

    • SIMカードトレイが自動的に外れない場合は、指を使って取り出してください。

  2. Motorola Moto X ディスプレイアセンブリの交換, バックカバーアセンブリ: 手順 2、 3の画像 1 Motorola Moto X ディスプレイアセンブリの交換, バックカバーアセンブリ: 手順 2、 3の画像 2 Motorola Moto X ディスプレイアセンブリの交換, バックカバーアセンブリ: 手順 2、 3の画像 3
    • 次の手順では、デバイスのケースを固定しているクリップを解放します。 ただし、リアケースはクリップに加えて接着パッドでも固定されています。 クリップを分離した後、iOpenerで接着剤を温めてケースを完全に開いてください。 接着剤を温めずにデバイスを開口しないでください

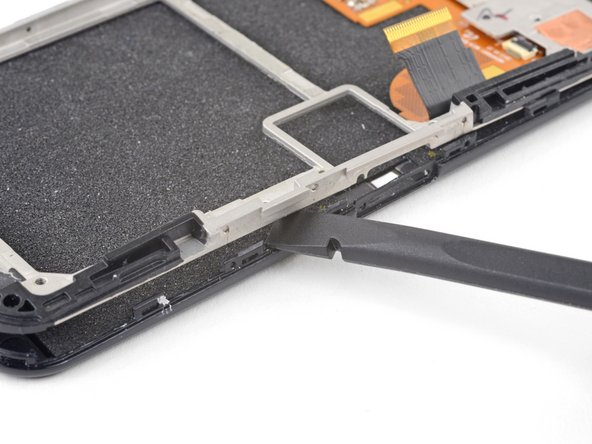
    • SIMカードスロット近くのフロントカバーとリアカバー間のシームに、プラスチック製の開口ツールを挿入します。

    • プラスチックの開口ツールをシームに沿って上部コーナーに向けてスライドさせます。

  3. Motorola Moto X ディスプレイアセンブリの交換: 手順 3、 2の画像 1 Motorola Moto X ディスプレイアセンブリの交換: 手順 3、 2の画像 2
    • プラスチック製開口ツールを慎重に、コーナー周辺をスライドして、クリップを外します。

  4. Motorola Moto X ディスプレイアセンブリの交換: 手順 4、 2の画像 1 Motorola Moto X ディスプレイアセンブリの交換: 手順 4、 2の画像 2
    • 両カバーの上部右側コーナーの間をこじ開けます。

  5. Motorola Moto X ディスプレイアセンブリの交換: 手順 5、 3の画像 1 Motorola Moto X ディスプレイアセンブリの交換: 手順 5、 3の画像 2 Motorola Moto X ディスプレイアセンブリの交換: 手順 5、 3の画像 3
    • カバーを固定している残りのクリップを全て外し、四方のシームに沿って開口ツールをスライドします。

    • フロントカバーのプラスチックはボタンの近くで薄くなっているため、ボタンが動くことがあります。 ボタンとフロントカバーの損傷を防ぐため、ゆっくりとスライドしてください。

    • 開口ツールをデバイス内部深くまで押し込まないでください。内部コンポーネントが損傷する可能性があります。

  6. Motorola Moto X ディスプレイアセンブリの交換: 手順 6、 1の画像 1
    • iOpenerを温めて、デバイス上に約90秒間載せてください。バックカバーに付けられた接着剤を緩めます。

  7. Motorola Moto X ディスプレイアセンブリの交換: 手順 7、 3の画像 1 Motorola Moto X ディスプレイアセンブリの交換: 手順 7、 3の画像 2 Motorola Moto X ディスプレイアセンブリの交換: 手順 7、 3の画像 3
    • SIMスロット側から、デバイスのリアカバーを慎重に剥がします。

    • リアカバーは非常に柔軟性がありますが、作業を急ぎぎて内部コンポーネントに損傷を与えないようご注意ください。

    • NFCコイルがリアカバーに付着して剥がれない可能性があります。 その場合は、カバーを剥がす作業を中断して、温めたiOpenerをリアカバー上に載せてください。

    • リアカバーを完全に外さないでください。 カメラのフラッシュケーブルがデバイスに接続されたままです。

    • フラッシュケーブルは、デバイスの電源/音量ボタン側に接続されています。

  8. Motorola Moto X ディスプレイアセンブリの交換: 手順 8、 1の画像 1
    • カメラのフラッシュケーブルコネクタが露出するように、リアカバーをゆっくりと開きますが、コネクタに圧力がかからないようにご注意ください。

  9. Motorola Moto X ディスプレイアセンブリの交換: 手順 9、 3の画像 1 Motorola Moto X ディスプレイアセンブリの交換: 手順 9、 3の画像 2 Motorola Moto X ディスプレイアセンブリの交換: 手順 9、 3の画像 3
    • スパッジャーの先端を使って、フラッシュケーブルのZIFコネクタ上の固定フラップを持ち上げます。

    • フラップのみをこじ開けてください。コネクタ自体には接触しないでください。

    • ソケットからフラッシュケーブルをまっすぐ引き抜きます。

  10. Motorola Moto X ディスプレイアセンブリの交換: 手順 10、 1の画像 1
    • デバイスからバックカバーを外します。

  11. Motorola Moto X ディスプレイアセンブリの交換, 下側アンテナアセンブリ: 手順 11、 1の画像 1
    • デバイスに下側アンテナアセンブリを固定している、3 mm T3トルクスネジを4本外します。

  12. Motorola Moto X ディスプレイアセンブリの交換: 手順 12、 3の画像 1 Motorola Moto X ディスプレイアセンブリの交換: 手順 12、 3の画像 2 Motorola Moto X ディスプレイアセンブリの交換: 手順 12、 3の画像 3
    • スパッジャーの平面側先端を使って、デバイスから下側アンテナアセンブリをこじ開けて、解放します。

    • アンテナアセンブリを取り出します。

  13. Motorola Moto X ディスプレイアセンブリの交換, バッテリー: 手順 13、 3の画像 1 Motorola Moto X ディスプレイアセンブリの交換, バッテリー: 手順 13、 3の画像 2 Motorola Moto X ディスプレイアセンブリの交換, バッテリー: 手順 13、 3の画像 3
    • スパッジャーの先端を、コネクタ付近のバッテリーケーブルの下に差し込み、ソケットからまっすぐ持ち上げます。

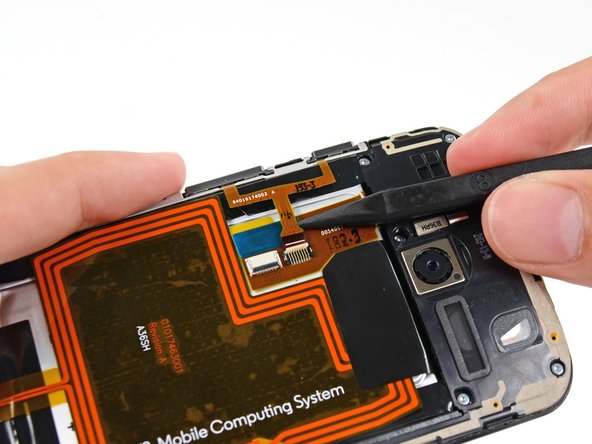
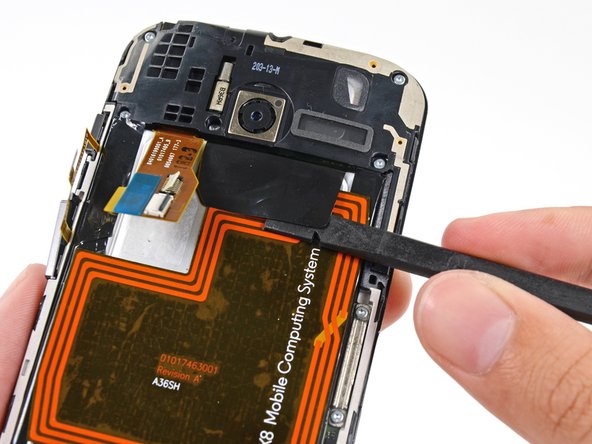
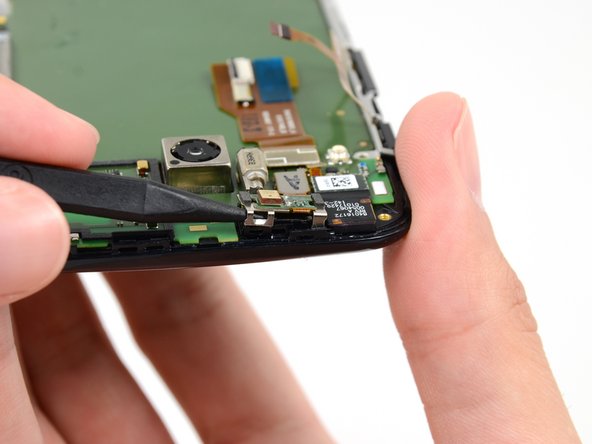
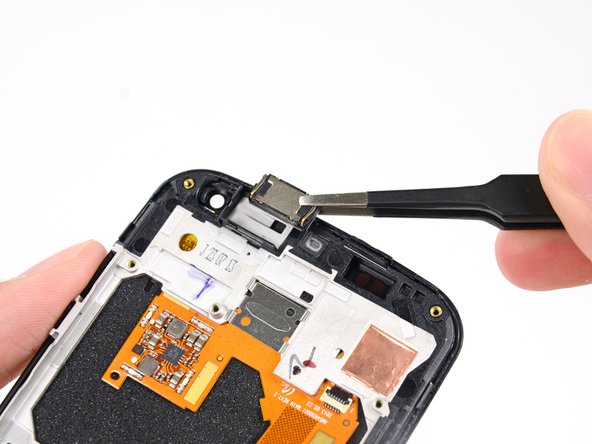
    • スパッジャーの平面側先端を使って、NFCアンテナケーブルコネクタの接続を外します。
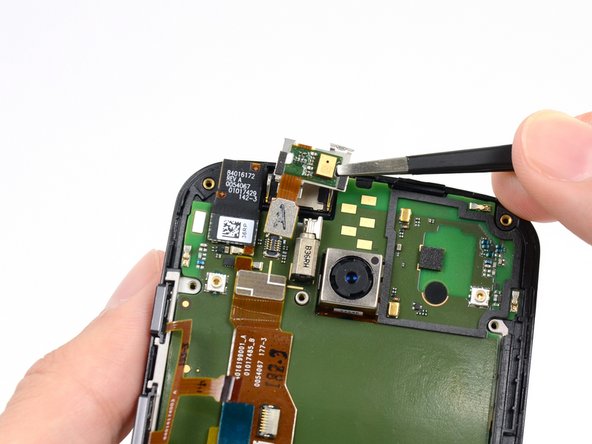
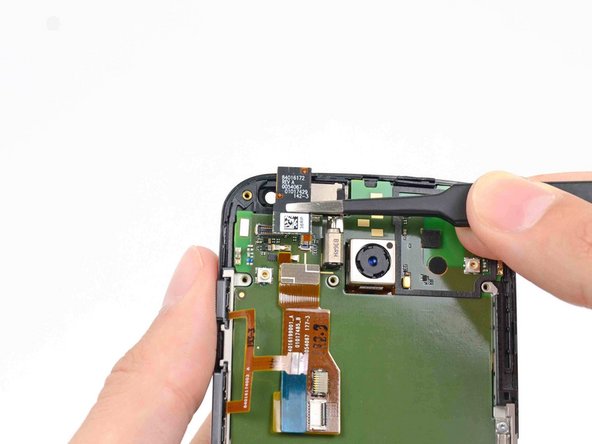
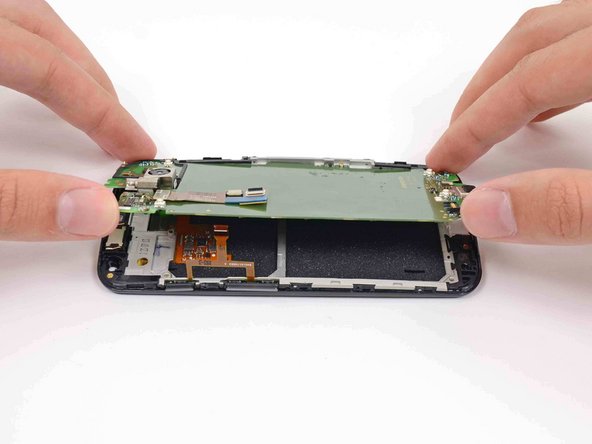
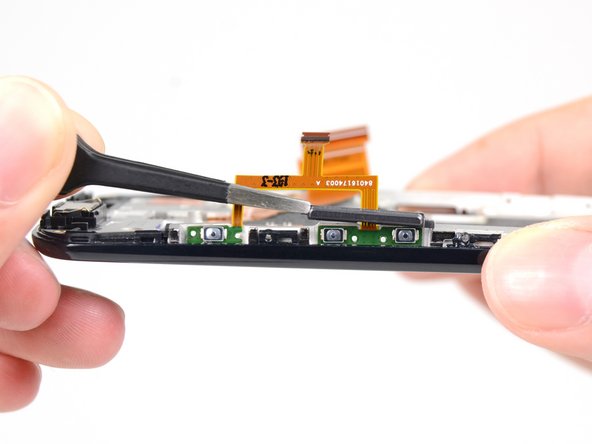
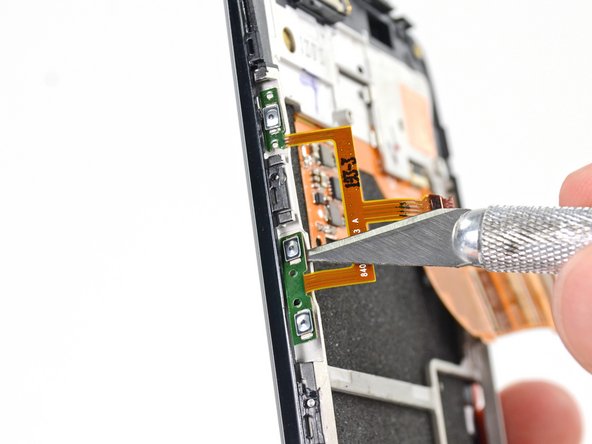
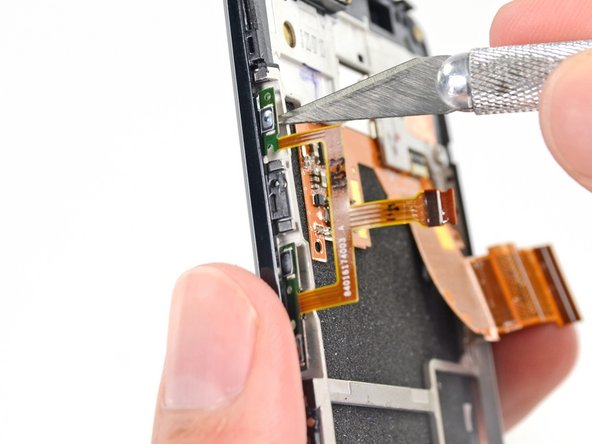
  14. Motorola Moto X ディスプレイアセンブリの交換: 手順 14、 3の画像 1 Motorola Moto X ディスプレイアセンブリの交換: 手順 14、 3の画像 2 Motorola Moto X ディスプレイアセンブリの交換: 手順 14、 3の画像 3
    • スパッジャーの先端を使って、ボタンアセンブリケーブルのコネクタからZIF固定フラップを持ち上げます。

    • スパッジャーの先端を、コネクタ付近のボタンアセンブリケーブルの下にスライドして、ソケットからケーブルを引き上げます。

  15. Motorola Moto X ディスプレイアセンブリの交換: 手順 15、 2の画像 1 Motorola Moto X ディスプレイアセンブリの交換: 手順 15、 2の画像 2
    • スパッジャーの平面側先端を相互接続ケーブルの下に差し込んで、バッテリーに固定している接着剤から解放します。

  16. Motorola Moto X ディスプレイアセンブリの交換: 手順 16、 2の画像 1 Motorola Moto X ディスプレイアセンブリの交換: 手順 16、 2の画像 2
    • スパッジャーの平面側先端を使って、バッテリー上部から接着剤用プルタブを剥がします。

  17. Motorola Moto X ディスプレイアセンブリの交換: 手順 17、 3の画像 1 Motorola Moto X ディスプレイアセンブリの交換: 手順 17、 3の画像 2 Motorola Moto X ディスプレイアセンブリの交換: 手順 17、 3の画像 3
    この手順で使用する道具:
    Tesa 61395 Tape
    $5.99
    購入する
    • 接着剤プルタブを使って、バッテリーを角から持ち上げます。

    • バッテリーは軽く接着剤でマザーボードに固定されています。ゆっくりと剥がしながら、バッテリーに穴を開けたり曲げないようにご注意ください。

    • デバイスからバッテリーを取り出します。

    • 再組み立ての際は、バッテリーを両面テーププレカットされた接着ストリップを使って固定してください。

  18. この手順は未翻訳です。 翻訳を手伝う。

    Motorola Moto X ディスプレイアセンブリの交換: 手順 18、 1の画像 1
    • Remove the five 3 mm T3 Torx screws from the headphone jack/speaker assembly.

  19. この手順は未翻訳です。 翻訳を手伝う。

    Motorola Moto X ディスプレイアセンブリの交換: 手順 19、 3の画像 1 Motorola Moto X ディスプレイアセンブリの交換: 手順 19、 3の画像 2 Motorola Moto X ディスプレイアセンブリの交換: 手順 19、 3の画像 3
    • Insert a spudger under the panhandle of the headphone jack/speaker assembly and pry it up from its recess.

    • Remove the headphone jack/speaker assembly.

  20. この手順は未翻訳です。 翻訳を手伝う。

    Motorola Moto X ディスプレイアセンブリの交換: 手順 20、 2の画像 1 Motorola Moto X ディスプレイアセンブリの交換: 手順 20、 2の画像 2
    • Push the tip of a spudger under the microphone assembly clip to free it from the earpiece speaker.

    • If the assembly clip seems to be missing, check the speaker assembly that was removed from the previous step.

  21. この手順は未翻訳です。 翻訳を手伝う。

    Motorola Moto X ディスプレイアセンブリの交換: 手順 21、 2の画像 1 Motorola Moto X ディスプレイアセンブリの交換: 手順 21、 2の画像 2
    • Use the flat end of a spudger to free the microphone assembly cable connector.

    • Use tweezers to remove the microphone assembly.

  22. この手順は未翻訳です。 翻訳を手伝う。

    Motorola Moto X ディスプレイアセンブリの交換: 手順 22、 2の画像 1 Motorola Moto X ディスプレイアセンブリの交換: 手順 22、 2の画像 2
    • Disconnect the front-facing camera cable connector.

    • Remove the front-facing camera from its recess with a pair of tweezers.

  23. この手順は未翻訳です。 翻訳を手伝う。

    Motorola Moto X ディスプレイアセンブリの交換: 手順 23、 1の画像 1
    • Remove the final two 3 mm T3 Torx screws from the SIM slot bracket.

  24. この手順は未翻訳です。 翻訳を手伝う。

    Motorola Moto X ディスプレイアセンブリの交換: 手順 24、 1の画像 1
    • Remove the SIM slot bracket from the motherboard.

  25. この手順は未翻訳です。 翻訳を手伝う。

    Motorola Moto X ディスプレイアセンブリの交換: 手順 25、 2の画像 1 Motorola Moto X ディスプレイアセンブリの交換: 手順 25、 2の画像 2
    • Insert the flat end of a spudger under the motherboard above the button assembly cable, and pry it out of the phone.

    • Be careful not to snag any cables.

    • The buttons may pop out of their recesses; take care not to lose them.

  26. この手順は未翻訳です。 翻訳を手伝う。

    Motorola Moto X ディスプレイアセンブリの交換: 手順 26、 2の画像 1 Motorola Moto X ディスプレイアセンブリの交換: 手順 26、 2の画像 2
    • Gently lift the motherboard out of the phone, rotating it from the SIM slot edge of the phone.

    • Do not attempt to separate the motherboard entirely; it is still connected to the display by the display cable.

  27. この手順は未翻訳です。 翻訳を手伝う。

    Motorola Moto X ディスプレイアセンブリの交換: 手順 27、 3の画像 1 Motorola Moto X ディスプレイアセンブリの交換: 手順 27、 3の画像 2 Motorola Moto X ディスプレイアセンブリの交換: 手順 27、 3の画像 3
    • Lay the motherboard down to allow access to the display cable connector.

    • Use the flat end of a spudger to flip the retaining tab on the display cable ZIF connector.

    • Carefully pull the display cable out of its connector as you remove the motherboard from the display assembly.

  28. この手順は未翻訳です。 翻訳を手伝う。

    Motorola Moto X ディスプレイアセンブリの交換, ディスプレイアセンブリ: 手順 28、 3の画像 1 Motorola Moto X ディスプレイアセンブリの交換, ディスプレイアセンブリ: 手順 28、 3の画像 2 Motorola Moto X ディスプレイアセンブリの交換, ディスプレイアセンブリ: 手順 28、 3の画像 3
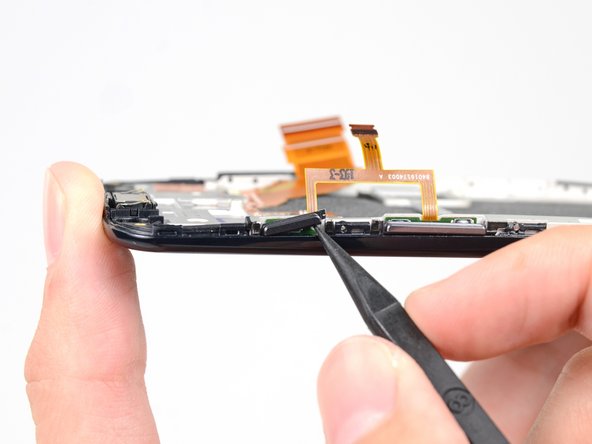
    • Use the tip of a spudger to nudge the sleep/power button out of its slot in the display assembly.

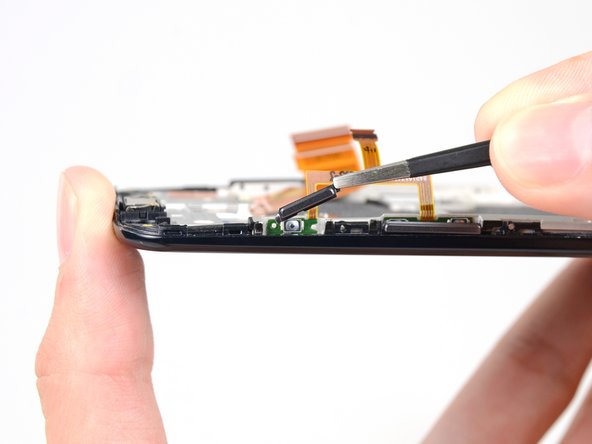
    • Remove the sleep/power button cover with a pair of tweezers.
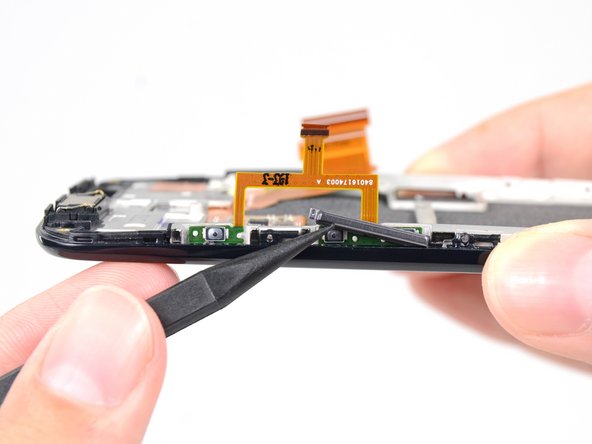
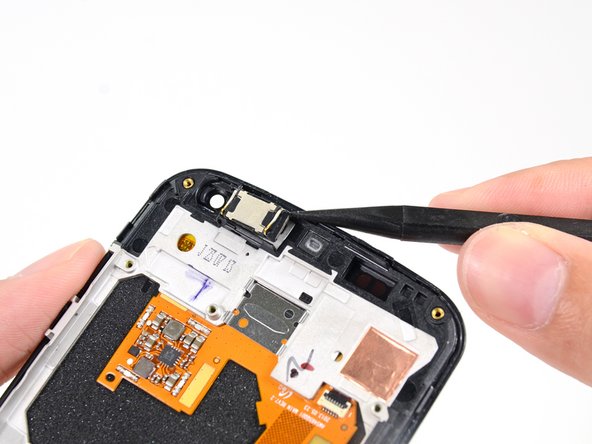
  29. この手順は未翻訳です。 翻訳を手伝う。

    Motorola Moto X ディスプレイアセンブリの交換: 手順 29、 3の画像 1 Motorola Moto X ディスプレイアセンブリの交換: 手順 29、 3の画像 2 Motorola Moto X ディスプレイアセンブリの交換: 手順 29、 3の画像 3
    • Use the tip of a spudger to push the volume rocker button cover out of the display assembly, and remove.

  30. この手順は未翻訳です。 翻訳を手伝う。

    Motorola Moto X ディスプレイアセンブリの交換: 手順 30、 3の画像 1 Motorola Moto X ディスプレイアセンブリの交換: 手順 30、 3の画像 2 Motorola Moto X ディスプレイアセンブリの交換: 手順 30、 3の画像 3
    • Use the tip of a hobby knife or plastic opening tool to pry the button assembly off of the adhesive securing it to the display assembly.

    • Keep the sharp edge of the knife pointed away from the cable to avoid accidentally cutting it.

  31. この手順は未翻訳です。 翻訳を手伝う。

    Motorola Moto X ディスプレイアセンブリの交換: 手順 31、 1の画像 1
    • Remove the button assembly cable from the display assembly.

  32. この手順は未翻訳です。 翻訳を手伝う。

    Motorola Moto X ディスプレイアセンブリの交換: 手順 32、 3の画像 1 Motorola Moto X ディスプレイアセンブリの交換: 手順 32、 3の画像 2 Motorola Moto X ディスプレイアセンブリの交換: 手順 32、 3の画像 3
    • If your replacement part comes with an earpiece speaker, skip this step.

    • Pry the earpiece speaker out of the display assembly with the point of a spudger.

    • Remove the earpiece speaker with a pair of tweezers.

  33. この手順は未翻訳です。 翻訳を手伝う。

    Motorola Moto X ディスプレイアセンブリの交換: 手順 33、 2の画像 1 Motorola Moto X ディスプレイアセンブリの交換: 手順 33、 2の画像 2
    • If your replacement part comes with a white mid-frame, skip the remaining steps.

    • The white mid-frame is held to the display assembly by tiny pins.

    • Look over the long edges of the display assembly and note where all the pins are.

  34. この手順は未翻訳です。 翻訳を手伝う。

    Motorola Moto X ディスプレイアセンブリの交換: 手順 34、 2の画像 1 Motorola Moto X ディスプレイアセンブリの交換: 手順 34、 2の画像 2
    • Use a SIM eject tool, SIM eject bit, or a bent paper clip to gently push the pin outwards from within the case.

    • Be sure to do this in a clean and brightly lit work area. The pins are very small and are easily lost.

    • Repeat the process for the remaining pins.

    • To reinstall the pins, align them with the holes on the outside of the display assembly and them push inwards.

    • The pins have a tapered end and will install in only one direction.

  35. この手順は未翻訳です。 翻訳を手伝う。

    Motorola Moto X ディスプレイアセンブリの交換: 手順 35、 3の画像 1 Motorola Moto X ディスプレイアセンブリの交換: 手順 35、 3の画像 2 Motorola Moto X ディスプレイアセンブリの交換: 手順 35、 3の画像 3
    • Use the flat end of a spudger to pry up the white mid-frame from the display assembly.

    • If any part of the mid-frame seems resistant to movement, check for any overlooked pins still holding the frame in place.

  36. この手順は未翻訳です。 翻訳を手伝う。

    Motorola Moto X ディスプレイアセンブリの交換: 手順 36、 3の画像 1 Motorola Moto X ディスプレイアセンブリの交換: 手順 36、 3の画像 2 Motorola Moto X ディスプレイアセンブリの交換: 手順 36、 3の画像 3
    この手順で使用する道具:
    Tesa 61395 Tape
    $5.99
    購入する
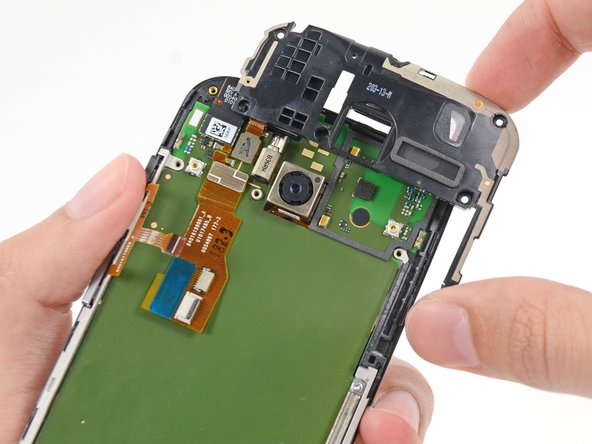
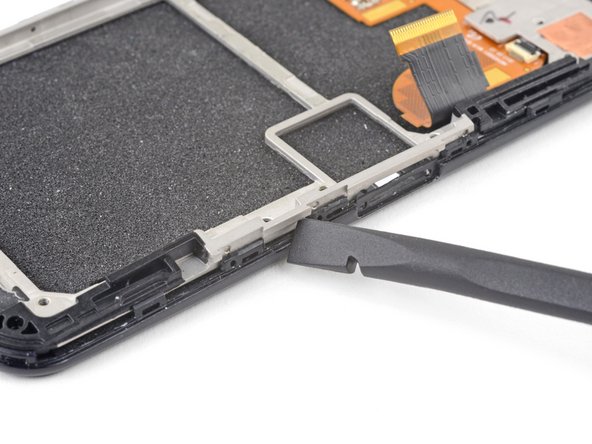
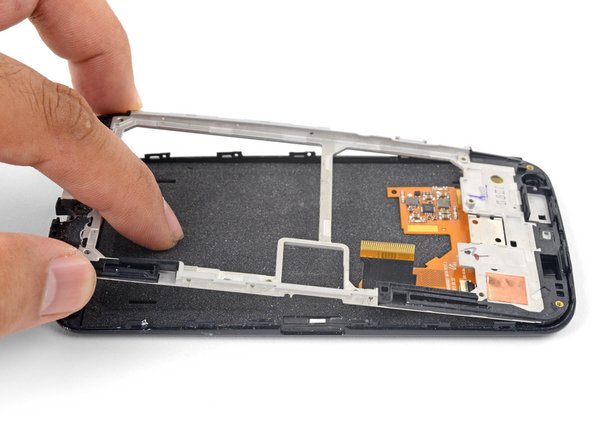
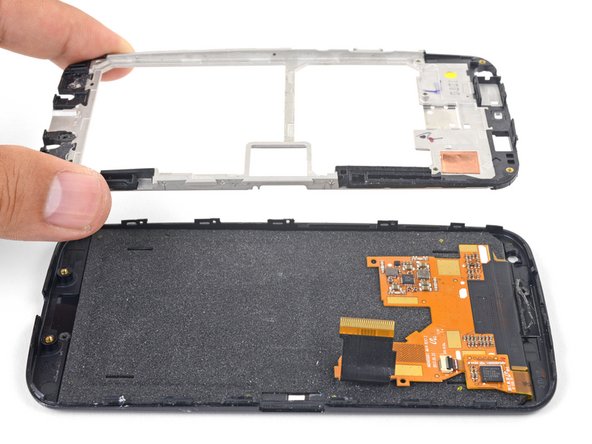
    • Hold the edges of the white mid-frame and push against the display assembly to swing the mid-frame free.

    • Remove the white mid-frame.

    • When reassembling your phone replace old adhesive with double-sided tape or pre-cut adhesive strips.

終わりに

交換用のパーツとオリジナルのパーツを見比べてください。残りのコンポーネントを移植する必要があるか、パーツを装着する前に接着剤の裏張りを取る必要があります。

デバイスを再組み立てする際は、これらの手順を逆の順番に従って作業を進めてください。

e-wasteを処理する場合は、認可済みリサイクルセンターR2を通じて廃棄してください。

修理が上手く進みませんか?トラブルシュートのヘルプには、Motorola Moto Xのアンサーコミュニティを参照してください。

61 の人々がこのガイドを完成させました。

以下の翻訳者の皆さんにお礼を申し上げます:

en jp

30%

Midori Doiさんは世界中で修理する私たちを助けてくれています! あなたも貢献してみませんか?
翻訳を始める ›

作成者

8人の作成者と共同で作成されました。

Sam Goldheart

メンバー登録日: 10/18/12

465,777 ポイント

538のガイドは作成済み

チーム

iFixit iFixit人のメンバー

Staff

135 メンバー

16,817のガイドは作成済み

20 件のコメント

I was able to follow this guide, but the T3 Torx was too small. The T4 Torx was also too small. Fortunately I had a T5 Torx which worked perfectly. During removal of the back I damaged my NFC antenna and can't use my Moto Skip anymore. Be careful with that component.

shawnhartsock - 返信

BUY THIS TORX SCREWDRIVER https://www.amazon.com/Husky-74502-Torx-...

NO seriously I have done a ton of electronics projects and getting a torx screwdriver that actually works with most electronics has been a struggle this is the new version of the husky 8-1 I have the old version I believe they are the same. This thing has caught thread on screws where I had given up hope

CalbertEnstein -

This is insane. I'm a computer tech, I build computers for a living. I repair components. Fixing this little crappy phone is crazy complex. Look at all the comments saying "be careful of x because I destroyed it accidentally". Not a one says "wow, that was incredibly simple".

I personally wouldn't try it -- I'd just get another phone and have it swapped onto my account. And then I'd stop doing whatever I'd done to break the first one.

wobblerlorri - 返信

You should leave ifixit to the qualified. Just stick to Best Buy, kid.

Brn Mace -

Ohhh Ziiingg so hot it burns!

CalbertEnstein -

コメントを追加

統計データ:

過去 24時間: 0

過去 7 日: 2

過去 30 日: 8

今までの合計 102,708