この翻訳は機械によって生成されたものであり、まだ人間による校正は行われていません。 この言語を話せますか? レビューはこちら.
はじめに
この修理ガイドでは、Motorola Moto G (第3世代) から液晶タッチスクリーンを取り外す方法を説明します。デバイス内部へのアクセスやタッチスクリーンの交換を行うには、このガイドの手順に従ってください。この修理ガイドの作業には、ヒートガンまたはiOpenerが必要です。
作業を始める前に、Software Fixアプリをダウンロードしてデバイスのバックアップを取り、問題がソフトウェアに起因するものか、ハードウェアに起因するものかを確認してください。
必要な工具と部品
ビデオの概要
-
-
-
-
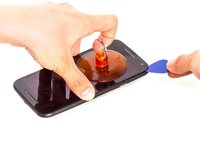
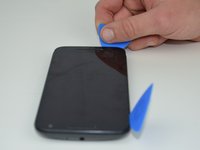
粘着剤が緩んできたら、オープニングツールまたはオープニングピックを使用して、画面の端を上にこじ開けます。この際、吸盤カップも併用すると便利です。
-
オープニングピックを隙間に差し込んでその端を固定し、必要に応じて熱を加えながら、画面全体の縁に沿ってこの工程を続けます。
-
-
この手順で使用する道具:Tesa 61395 Tape$8.95
-
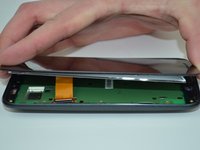
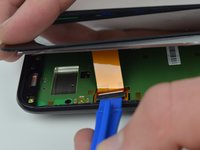
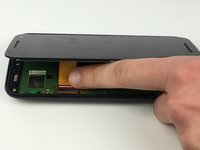
プラスチック製オープニングツールを使用して、ディスプレイケーブルのZIFコネクタのロックを跳ね上げます。
-
マザーボードのソケットからディスプレイケーブルを引き抜きます。
-


 FixBotに聞いてみる




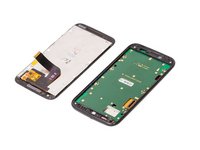
デバイスを再組み立てするには、これらのインストラクションを逆の順番に従って作業を進めてください。
52 の人々がこのガイドを完成させました。
以下の翻訳者の皆さんにお礼を申し上げます:
100%

Translation Botさんは世界中で修理する私たちを助けてくれています! あなたも貢献してみませんか?
翻訳を始める ›

チーム

USF Tampa, Team 1-3, Nance Spring 2016 USF Tampa, Team 1-3, Nance Spring 2016人のメンバー
USFT-NANCE-S16S1G3
4 メンバー
45のガイドは作成済み
20件のガイドコメント
If your original screen has any adhesive tape on it's back (near to where the flat cable connects to the board), remove it from the original and put on the replacement piece, i've spent a lot of hours trying to undestand why my replacement screen worked fine out of the phone, but had some problems after puting it on the phone. After a lot of time i noticed this tape and did what i said, and the problem stoped, aparently is some kind short circuit betwen board and the screen aluminum back. Sorry bad english.
Thank you soooooo much! I just had the same problem! many thanks for posting und best wishes. You are a great human being!
I had the same problem, now i ordered better adhesive. where is this tape? Do you have a picture?
In my case it was a yellow stripe unter the ZIF connector that prevents the socket from connecting with the back of the screen.
