この翻訳は機械によって生成されたものであり、まだ人間による校正は行われていません。 日本語を話せますか? レビューはこちらから。
はじめに
Motorola Moto 360は全体的に非常に壊れやすい構造をしています。ツールを使用する際は細心の注意を払ってください。iOpenerを使用する必要があるため、使い慣れていない場合はこちらの修理ガイドを確認してください。
必要な工具と部品
-
-
-
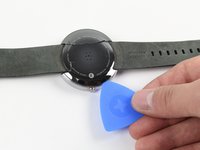
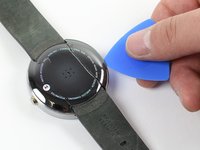
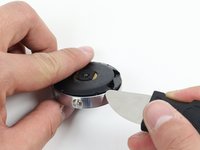
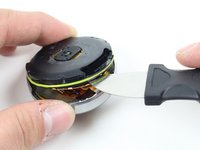
適切な箇所に針を使用して、無理に力を加えずにリアカバーを取り外すには、こちらの修理ガイドの手順に従ってください:
-
その後、手順5から続けてください。または、針を使用せずにそのまま次の手順に進むことも可能です。
-
-
-
-
-
-
黒いプラスチック製のプルタブを持ち上げ、バッテリーをケースから引き抜きます。バッテリーは非常に強力に固定されているため、かなりの力が必要になる場合があります。
-

 FixBotに聞いてみる






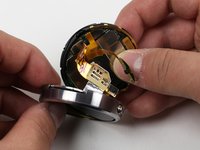
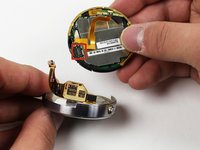


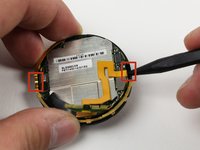
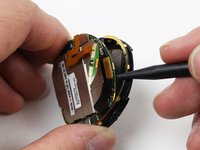


デバイスを再組み立てするには、これらのインストラクションを逆の順番に従って作業を進めてください。
74 の人々がこのガイドを完成させました。

チーム

Cal Poly, Team 17-32, Amido Winter 2015 Cal Poly, Team 17-32, Amido Winter 2015人のメンバー
CPSU-AMIDO-W15S17G32
4 メンバー
49のガイドは作成済み
41件のガイドコメント
Thanks for the guide. However I found several steps at least misleading, or not directly applicable to my Moto 360. I'm not sure if this is because the Moto 360 internal construction has varied over different production iterations.
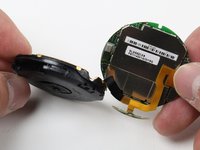
The key difference is this guide implies that the inner body can simply be slid up and out of the metal shell with slow and careful prying. Actually, there are 4 curved plastic parts (call them locking pins) that fit corresponding slots in the metal shell and the plastic inner body at each side of the top and bottom clasp attachment points. Once inserted during manufacture, there is no way the body will ever slide up and out of the shell. I had to apply significant pressure to bend the shell out and pry the body out past the locking slots. However, it's possible that the locking pins could have been removed with tweezers permitting a less energetic disassembly of the watch.
Actually, there is a way to remove them. They are flat and tiny, near the watchbands' holes. To remove them, insert something (like a needle, or a toothpick) into the 4 carved out parts and their heads will pop out. Use a screwdriver or nail to gently peel it out. After that, hold the top and bottom (where the watchbands are), and pull the inner body up.
I made a video that includes removal of the retaining clips, a critical step missing from all the iFixIt Guides: https://youtu.be/r1as_h5jnBM
davedogcaddy - 返信 共有
To answer Mike's question, the outside dimensions of the rectangular battery are 30mm x 28mm x ~2.6mm. However, that's not the full story, as the part of the battery module containing the electronics and where the wires attach is thinner than the rest, providing a space about 3mm wide along the narrow edge of the battery that sits above other components on the board.
My asseessment is that there may be space for a slightly larger battery if it was not rectangular, but this would require careful design and provide only marginal benefit.
could an ipod nano battery fit inside?
freestyle695 - 返信 共有
